
Dovecot is an open-source service for IMAP and POP3 on Unix-like operating systems. It focused on lightweight and secure mail server available for most of the Linux operating system. This tutorial will help you to install and configure POS3/IMAP using Dovecot on CentOS 7 Linux system.
Step 1 – Installing Dovecot
Dovecot package is available under the default yum repositories. Simply run the below command from terminal to install Dovecot packages on your CentOS 7 system.
sudo yum install dovecot -y
Step 2 – Configure Dovecot
Once the installation finished, configure Dovecot server as per your requirements. Here is the quick and useful configuration of Dovecot to work on your system.
- Edit Dovecot main configuration file and uncomment below lines to enable POP3 and IMAP protocols. Also configure Dovecot on all interfaces.
sudo vi /etc/dovecot/dovecot.conf
protocols = imap pop3 lmtp
listen = *, ::
-
After that, edit mail configuration file to configure location of the Mailbox. Make sure to set this to correct location where your email server is configure to save users emails.
sudo vi /etc/dovecot/conf.d/10-mail.conf
mail_location = maildir:~/Maildir
-
Next, edit below configuration file and set the username and group name of the mail server is running with.
sudo vi /etc/dovecot/conf.d/10-master.conf
unix_listener /var/spool/postfix/private/auth { mode = 0666 user = postfix group = postfix } -
Finally edit Dovecot SSL configuration file. Set SSL to yes or required. By default it uses self singed certificate, if you have your own certificates update them as followings.
sudo vi /etc/dovecot/conf.d/10-ssl.conf
ssl = yes

ssl_cert =
Step 3 - Manage Dovecot Service
We can manage dovecot using systemctl command line tool. Use the following command to enable and start Dovecot service.
sudo systemctl enable dovecot
sudo systemctl start dovecot
Use the below command to view the current status of the service
sudo systemctl status dovecot
Step 4 - Test Configuration
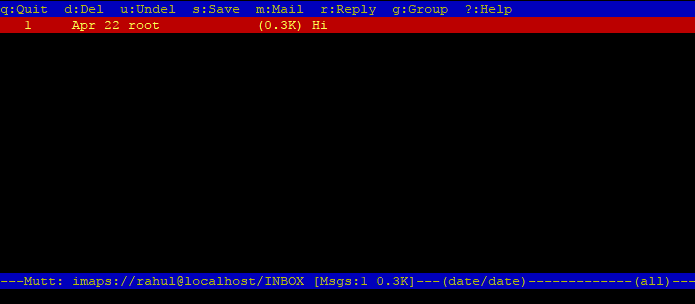
I have created an user named "rahul" on my CentOS 7 system. Now, we will access the Mailbox of this user using the mutt command line utility via the IMAPs protocol.
sudo yum install mutt
Then connect to mailbox using below command:
mutt -f imaps://rahul@localhost
This will prompt to accept certificate (Press a for accept alwys). After that it will prompt for the password. Enter user password and press enter. You will see the emails of your account.
Step 5 - Allow POP3(s)/IMAP(s) Ports in Firewalld
At the end, adjust the firewall rules (if active) to allow POP3(s) and IMAP(s) service to access from the network.
sudo firewall-cmd --add-service={pop3,imap} --permanent
sudo firewall-cmd --add-service={pop3s,imaps} --permanent
Then reload the changes.
sudo firewall-cmd --reload
Conclusion
You can configured your server to access user mailbox via POP3 or IMAP protocols. You can also configure Roundcube webmail interface to access Mailboxs.