
GIMP (GNU Image Manipulation Program) is a freely distributed software for manipulating images. We can easily optimize the image, and convert their type using GIMP. It provides the power and flexibility to designers to transform images into truly unique creations. GIMP is the cross platforms application and is available for Linux, Windows, MAC OS, FreeBSD, etc.
This tutorial will help you to install the latest Gimp on macOS using Homebrew.
Step 1 – Prerequisites
Before starting the installation of GIMP using this tutorial you must have the following prerequisites
- Terminal: You must have Mac Terminal access and little knowledge about working with the terminal application.
- Homebrew: Homebrew is a popular package management tools used for installing most open-source software like Node. Here is the Homebrew installation tutorial
Step 2 – Install GIMP on macOS
GIMP can be simply installed with the homebrew package installer. However, it is not available in the current repository of homebrew, hence we have to tap into another repository by using the following command.
brew updatebrew tap caskroom/cask
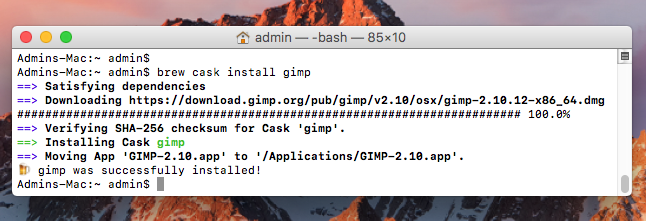
Then use the following command to install GIMP on the macOS system.
brew cask install gimp
Wait for the installation complete.
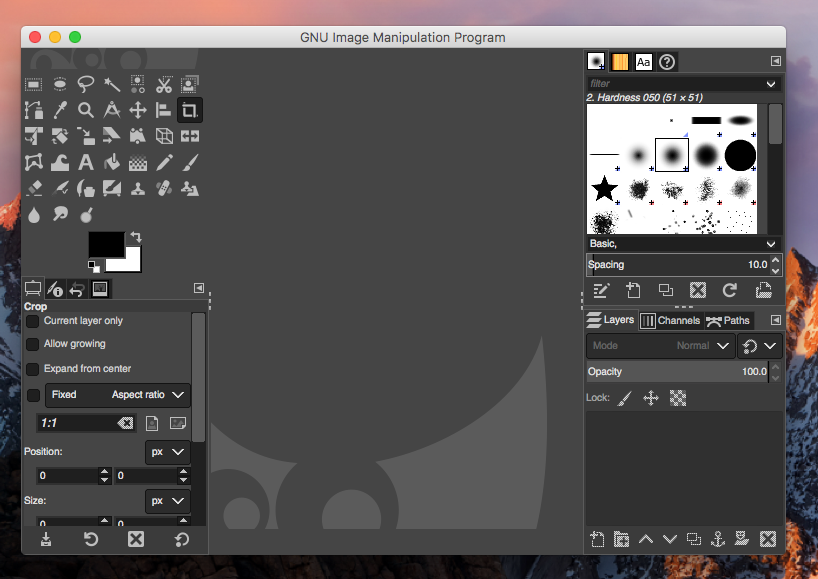
Step 3 – Launch GIMP Application
You have successfully installed GIMP on macOS. Launch this application on your system.
Conclusion
Gimp is an excellent tool for image manipulations. This tutorial helps you to install GIMP on macOS system.


4 Comments
Why do we need cask here, it is possible to install gimp just by executing > brew install gimp
Your instructions didn’t work for me. Instead do:
> brew update
> brew tap homebrew/cask
> brew cask install gimp
Rahul,
Thank you very much. I’ll donate in couple days since I’m retiree.
Nice