LAMP is the acronyms of Linux, Apache, MySQL and PHP. Apache is the web server to serve files over HTTP protocol. MySQL is the popular database server. PHP is the programming language used for developing web applications. Using these applications, we can create a full fledged web server. The most common way to run PHP applications with Apache is the use of mod_php module. Also the good alternative is to use PHP-FPM, which has several advantages over this. The default installation on CentOS 8 uses PHP-FPM to process php files.
This tutorial will help you to install and configure LAMP (Linux, Apache, MySQL and PHP) on CentOS 8 and RHEL 8 Linux systems.
Useful link:
Prerequisites
- Newly installed CentOS 8 machine.
- Complete initial server setup
- Shell access with sudo privileges
Step 1: Update Your System
First, it’s always a good practice to update your system to the latest packages and security patches. This can be done using the dnf package manager.
sudo dnf update -y
Step 2: Install Apache HTTP Server
The Apache web server packages are available under the default AppStream repository on CentOS 8. You just need to update the DNF cache and install packages using the following commands.
sudo dnf updatesudo dnf install httpd httpd-tools
The mod_ssl package provides the functionality to use an SSL certificate for secure HTTP. After installation, enable the httpd service and start.
sudo systemctl enable httpd.servicesudo systemctl start httpd.service
Now check the Apache service status:
sudo systemctl status httpd.service
Step 3: Install MySQL Server
The latest MySQL 8 packages are available under the AppStrem repository under CentOS 8. Use the following command to install MySQL server including required packages on your system.
sudo dnf -y install @mysql
After completing the installation, enable the MySQL service to auto-start on the system start. Also start service manually for the first time.
sudo systemctl enable mysqld.servicesudo systemctl start mysqld.service
Then check the service current status using the following command:
sudo systemctl status mysqld.service
The MySQL installation has been completed. Now you can connect the MySQL server without any password but we recommend securing the MySQL installation. The MySQL packages provide mysql_secure_installation command to apply the security. Just run the below command on terminal:
sudo mysql_secure_installation
and follow the on-screen instructions. Below are the details which require user input.
- Press y|Y for Yes, any other key for No: y
- Please enter 0 = LOW, 1 = MEDIUM and 2 = STRONG: 2
- New password: [ENTER STRONG PASSWORD HERE]
- Re-enter new password: RE ENTER PASSWORD HERE
- Do you wish to continue with the password provided?(Press y|Y for Yes, any other key for No) : y
- Remove anonymous users? (Press y|Y for Yes, any other key for No) : y
- Disallow root login remotely? (Press y|Y for Yes, any other key for No) : y
- Remove test database and access to it? (Press y|Y for Yes, any other key for No) : y
- Reload privilege tables now? (Press y|Y for Yes, any other key for No) : y
Step 4: Install PHP
The Remi repository contains the latest PHP packages for the CentOS 8 Linux system. So first of all, you need to add the REMI repository to your system. Just execute the following command to add the repository.
sudo dnf install dnf-utils http://rpms.remirepo.net/enterprise/remi-release-8.rpm
Then enable the required DNF module for PHP installation. Here we are enabling the module for installing PHP 7.4. You can change this to PHP 7.3 or PHP 7.2 as per your requirements.
sudo dnf module reset phpsudo dnf module enable php:remi-7.4
Once the repository is enabled on your system. Install PHP packages along with required PHP modules.
sudo dnf install php php-mysqlnd
You many also need to install other required php modules as per your application requirements. The below command will install few frequently used php modules:
sudo dnf install php-gd php-zip php-mcrypt php-json php-xml php-gettext php-curl php-intl
Step 5: Create Apache Virtual Host
All the packages required for LAMP environment is installed. Now, create the Apache virtual host. By default the Apache uses php-fpm for processing PHP files on CentOS 8 system.
Create and edit virtual host configuration file in the favorite text editor:
sudo vim /etc/httpd/conf.d/example.com.conf
Add the following content in the configuration file. Make sure to change required parameters.
<VirtualHost *:80>
    ServerAdmin admin@example.com
    DocumentRoot /var/www/html

    ServerName tecadmin.example.net
    ServerAlias www.tecadmin.example.net

    ErrorLog logs/tecadmin.net-error.log
    CustomLog logs/tecadmin.net-access.log combined
</VirtualHost>
Save the virtual host configuration file and reload Apache to apply changes.
sudo systemctl restart httpd.service
Useful link:
Step 6: Allow Ports in Firewalld
The CentOS 8 Linux server is ready to serve the application over LAMP environment. If your system has firewalld installed ans active, you need to allow Apache ports. This will allow network users to access web application from remote systems.
The following commands will open the required ports for you.
sudo firewall-cmd --zone=public --permanent --add-service=httpsudo firewall-cmd --zone=public --permanent --add-service=httpssudo firewall-cmd --reload
Useful link:
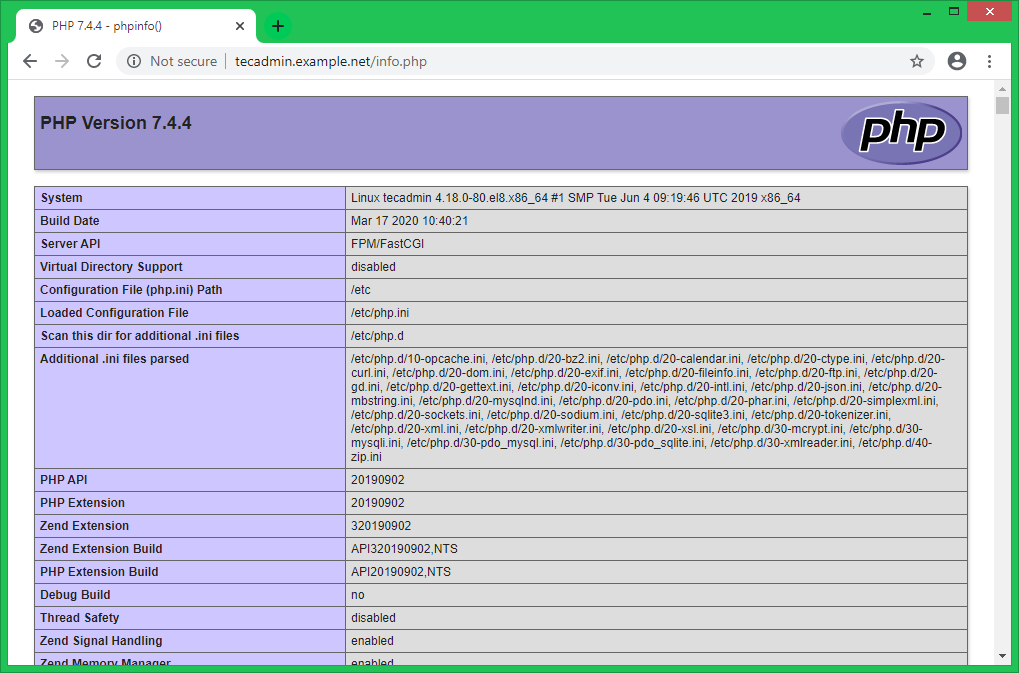
Step 7: Test Setup
All done. To test the environment, create a PHP script with phpinfo() function. Place this file to your server document root. Use the below command to do this.
echo "<?php phpinfo(); ?>" > /var/www/html/info.php
Then access info.php using server IP address (for default VirtualHost) for your configured domain in Apache VirtualHost.
http://tecadmin.example.net/info.php
Conclusion
You have successfully installed the LAMP stack on RHEL or CentOS 8. This setup provides a solid foundation for hosting web applications. From here, you can deploy your web applications, explore further configurations, and customize your environment to suit your needs. Remember, ongoing management and security practices are crucial for maintaining a secure and efficient web server.
Next you can install phpMyAdmin on your system.


1 Comment
php:remi-7.4 not found
php-mcrypt – not found