Laravel is a powerful and popular open-source PHP framework for creating web applications. It is the preferred choice for many developers due to its intuitive syntax, scalability, and reliability. Setting up Laravel on Ubuntu & Debian is relatively easy, and this article will walk you through the steps.
Prerequisites
Before we dive into setting up Laravel, let’s take a look at the prerequisites for doing so. Firstly, you will need a server running Ubuntu or Debian. You will also need to have the latest version of PHP installed on the server. Finally, you will need to install the Composer package manager, as it is required for Laravel.
Once you have all the prerequisites in place, you can move on to the next step.
Step 1 – Install LAMP
The latest version of Laravel required PHP 8.0 or a newer version. To start with Laravel, we first need to set up a running LAMP server. If you have already run the LAMP stack skip this step else use the following commands to set up the lamp on the Ubuntu system.
Install PHP
sudo apt install python-software-properties
sudo add-apt-repository ppa:ondrej/php
sudo apt update
sudo apt install -y php8.0 php8.0-mcrypt php8.0-gd php8.0-mbstring php8.0-xml
Install Apache2
sudo apt-get install apache2 libapache2-mod-php8.0
Install MySQL
sudo apt-get install mysql-server php8.0-mysql
Step 2 – Install PHP Composer
The composer is required for installing Laravel dependencies. So use the below commands to download and use as a command in our system.
curl -sS https://getcomposer.org/installer | php
sudo mv composer.phar /usr/local/bin/composer
sudo chmod +x /usr/local/bin/composer
Step 3 – Create Laravel Application
Now that you have PHP and Composer installed on the server, you can move on to installing Laravel. To do this, you will need to open the terminal and run the following command:
cd /var/www
composer create-project --prefer-dist laravel/laravel my-laravel-app
This will create a new Laravel project in the directory specified by `my-laravel-app`. After that, you will need to open the project directory and run the following command to install all the dependencies:
cd /var/www/my-laravel-app
sudo composer install
Once the dependencies are installed, you can move on to the next step.
The dependencies installation may take some time as per your network speed. After successfully installing all dependencies, set the proper permissions on all files.
chown -R www-data.www-data /var/www/my-laravel-app
chmod -R 755 /var/www/my-laravel-app
chmod -R 777 /var/www/my-laravel-app/storage
Now generate base64 random number encryption key, which is used by the Illuminate encrypter service.
php artisan key:generate

Application key set successfully.
Edit the .env configuration file and update the required settings. Also, make sure APP_KEY is properly set as generated in the above command.
Step 4 – Create Database for Laravel
You may also require creating a database for your Laravel application. Login to your MySQL server and create MySQL database and user.
1 2 3 4 | mysql> CREATE DATABASE laravel; mysql> GRANT ALL ON laravel.* to 'laravel'@'localhost' IDENTIFIED BY 'secret'; mysql> FLUSH PRIVILEGES; mysql> quit |
Now edit the .env file and update database settings.
DB_CONNECTION=mysql
DB_HOST=127.0.0.1
DB_PORT=3306
DB_DATABASE=laravel
DB_USERNAME=laravel
DB_PASSWORD=secret
Step 5 – Apache Configuration
Edit Apache default virtual host configuration file 000-default.conf and update DocumentRoot to Laravel public directory as below:
vim /etc/apache2/sites-enabled/000-default.conf
also add some more configuration.
<VirtualHost *:80>

        ServerAdmin webmaster@localhost
        DocumentRoot /var/www/my-laravel-app/public

        <Directory />
                Options FollowSymLinks
                AllowOverride None
        </Directory>
        <Directory /var/www/my-laravel-app>
                AllowOverride All
        </Directory>

        ErrorLog ${APACHE_LOG_DIR}/error.log
        CustomLog ${APACHE_LOG_DIR}/access.log combined

</VirtualHost>
Reload Apache configuration changes by restarting the service using the below command
sudo service apache2 restart
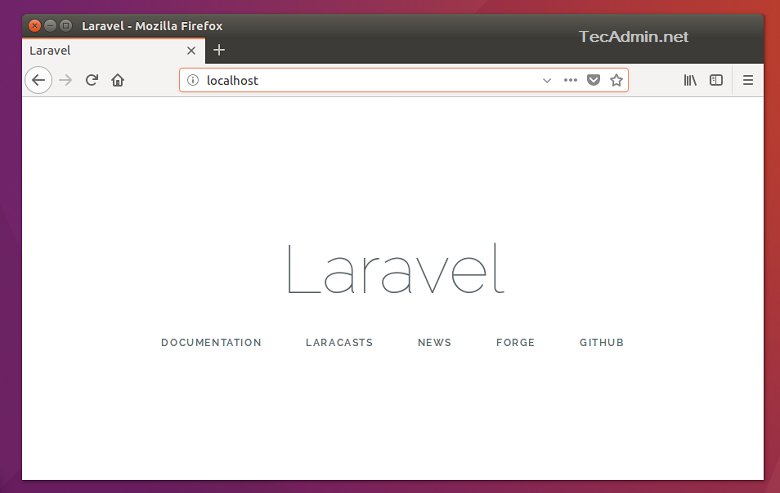
Step 6 – Access Laravel Application
You have successfully configured the Laravel 7 PHP framework on your system. Access the Laravel application in your favorite web browser
Let’s start building an awesome application using Laravel PHP Framework. Thanks.
Conclusion
Now that you have set up Laravel on Ubuntu & Debian, you can start developing your web application. Setting up Laravel is fairly straightforward, and this article should have given you a good idea of how to do it. It is important to note that you should always keep your server and software up to date in order to ensure optimal performance and security. If you have any questions or need help setting up Laravel, we are here to help.

88 Comments
where to put the part? you did not mention that!
the virtualhost part
https://tecadmin.net/install-multiple-php-version-apache-ubuntu/
Not working for me… when i went to localhost in browser, its only show Apache2 Ubuntu Default Page
This great doc about laravel installation, thank you so much 🙂 Here is go bookmark 🙂
hello, i work to step 4. I don’t generate key?
my error :
1. ails
Composer could not find a composer.json file in /root
To initialize a project, please create a composer.json file as described in the https://getcomposer.org/ “Getting Started” section
Does the steps 3 completed successfully?
Awesome man. Very helpful.
Simple and Clear – Just add that this doesn’t work with Ubuntu distro
Also, why not use .local or something for local domains rather than .com, which can sometimes confuse users because .com will route them to actual site on the internet, say if there is another server being used on the local network.
Thank You.
Working like a charm, thank you
Hello,
I used your tutorial on LinuxMint 18.2 Sonya.
In laravel directory, vendor subdirectory is missing. So, at Step 4, the second command line does not run.
How can I solve this problem ?
Thank you
Loic
I have the same problem!
Does step 3 command completed successfully?
sudo composer install
I have tried again today and worked! Sorry I did not answer earlier!
Many thanks for this great tutorial. After doing all the steps and trying to access the installation from the browser I get an empty folder with “Index of /” as a title. Any idea what could’ve gone wrong? Thanks in advance.
Many thanks for this great tutorial. I have set up everything as specified, but I see an empty folder when I browse to the domain name. Any idea how to solve this? Thanks in advance!
Very Good .
Very Good .
Very Good .
Very Good .
Very Good .
All settings correct for using Composer Unable to write keys.dev.pub to: /home/ubuntu/.composer
Step 1: just go to your Project Directory and run a Command sudo su
Step 2: then Try to install the Composer using The Following Command
/etc/apache2/sites-available/laravel.example.com.conf “directory does not exist”
my laravel project is returning apache2 default page instead login/index.php page .
php 5.9, mysql 5.6 and LAMP server using with Ubuntu 14.04.
It is ok on ubuntu 15.04.
How do I trace? Would you help me please?
You must have some issue in step 5. first, check if the virtual host is properly created and enabled. Are you accessing the site with ip or domain name?
I had the same issue and found out it’s pointing to the var/www/html folder instead of var/www/laravel as specified in the configuration file. Any idea how to solve this? I also tried to put the domain name instead of the * but this results in a 500 error.
Fatal error: Class ‘Illuminate\Foundation\Application’ not found in /opt/lampp/htdocs/laravel/bootstrap/app.php on line 14
I am getting such type of error
I am getting blank page while using http://laravel.example.com
execute this
chown -R www-data.www-data .env
Greate tutorial ..in order to avoid HTTP 500 when going to /public after installation make sure PHP 5.6 is running on server
sudo a2dismod php5
sudo a2enmod php5.6
sudo service apache2 restart
I would suggest you to check out Cloudways platform (https://www.cloudways.com/en/laravel-hosting.php ). Using their platform, you can install laravel in just one click. There is no need to manually install and configure Linux or stack.
Thanks for the tutorial.
I can’t seem to get pass the last section of part 3. I can’t set the permission on the files.
Any suggestions?
Thanks.
ubuntu 14.04
You probably need to use sudo in front of the commands.
I had to put the example here at this URL because I couldn’t add it here for some reason.
http://laravel.io/bin/32lVD
the sudo add-apt-repository ppa:ondrej/php5 is deprecated. Step “install php5” shoul d be updated with the commands :
sudo LC_ALL=C.UTF-8 add-apt-repository ppa:ondrej/php
sudo apt-get update
sudo apt-get install php5.6
as suggested in the installer it self .
Hey, I’ve been following the tutorial on a debian machine.
But when trying to reload apache2 I get ‘Job for apache2.service failed. See ‘systemctl status apache2.service’ and ‘journalctl -xn’ for details.’
The are no other logs.
Any suggestions?
I am follow step by step i am getting this error .
`/opt/lampp/htdocs/laravel/app/storage’ : No such file or directory
try after remove app
/laravel/storage
LAMP = Linux Apache Mysql PHPMyAdmin , where is phpmyadmin ???
Hi John , you are almost correct . Actually P in the LAMP stands for PHP,Python,Perl ,etc. PHPMyAdmin is basically a web browser based GUI built on PHP for ease of access to database . It is not a part of LAMP stack , you’ll have to install it seperately .
work well for me too thanks
Great tutorial. First time using Laravel and all steps worked smooth. Thanks!
Hi,
I am facing a problem in step – 4. Whenever i am trying to run the command php artisan key:generate, i am getting an error ,
[ErrorException]
file_get_contents(/opt/lampp/htdocs/mylaravel/laravel/.env): failed to open
stream: No such file or directory
Please help me.
Thank You
Hi Habeeb,
You can recheck hidden file view is enabled or not else try CTRL + H to view hidden file .env.example then rename the file to .env , now try to run the command “php artisan key:generate” to view application key.
I did what you tell, but I don’t have permission to rename it nor I can find it using terminal. Can you please be more specific?
Thank you!
Hi Rahul, I have deployed my laravel apps on digitalocean from cloudways platform because I only had to do few clicks they took care of the rest. You did a good tutorial here and its good for beginners. I am sharing it in my network.
If you face issues, with routes giving a 404 when you access them, please make sure you enable mod_rewrite by doing: a2enmod rewrite
Thank you
A really great narrative and contains useful information.
I have set up everything as above stated, but when i type “laravel.example.com”, it navigates me to the localhost page. I have already spent so many days to fix the problem. Please, help me as soon as possible.
1. I think my virtual host is not working.
2 . I am using Ubuntu 15.10 .
Let me know, if you need anything more to resolve my problem.
Amazing Thanks in Advance!!! PLEASE, HELP ME!!
by step 5 when I input: $ vim /etc/apache2/sites-available/laravel.example.com.conf, I recieve ´the program ´vim’ can be found in the following packages… vim, vim-gnome, vim-tiny, vim-athena, vim-gtk and vim-nox.
So entered apt-get install´ in front. However when I do this it outputs ¨Unable to locate package /etc/apache2/sites-available”. what should I do, should I install one of the the packages?
You simply do not have the vim text editor installed. You have two options:
1. Install vim, # apt-get install vim, then run the command in the tutorial
2. Use another editor, # nano /etc/apache2/sites-available/laravel.example.com.conf
it helped thanks
The very last step is not clear. How do I know my server ID and domain name?
10/10 for the tutorial
0/10 for including the $ prompt in each block of commands to use, making it really annoying to copy / paste to actualy use the instructions
It’s always better to write the commands manually. You’ll learn faster from it. Besides the structure of these command are fairly easy. 😉
I agree to the 10/10 tutorial rating tho.
Thanks
>>sudo composer install
getting this error
Loading composer repositories with package information
The “https://packagist.org/packages.json” file could not be downloaded: Failed to enable crypto
failed to open stream: operation failed
https://packagist.org could not be fully loaded, package information was loaded from the local cache and may be out of date
Installing dependencies (including require-dev)
[ComposerDownloaderTransportException]
The “http://packagist.org/p/symfony/console%248630ea4e7d5fdd743a5cd91696380
ff9f48ff6c659262d76efd6495d96b80539.json” file could not be downloaded (HTT
P/1.1 302 Found)
install [–prefer-source] [–prefer-dist] [–dry-run] [–dev] [–no-dev] [–no-plugins] [–no-custom-installers] [–no-autoloader] [–no-scripts] [–no-progress] [-v|vv|vvv|–verbose] [-o|–optimize-autoloader] [-a|–classmap-authoritative] [–ignore-platform-reqs] [–] []…
thanks 🙂
I am getting issue setting up permissions:
It has app directory inside web/laravel but not stoarge.
Hi Daisy,
It looks code is not properly downloaded. storage directory is available at https://github.com/laravel/laravel
Hi,
I encountered the same mistake as Daisy and I corrected by downloading from the source you gave. There is still no storage directory.
Looks like storage folder is not under app but under root folder. Is it supposed to be also under app?
Hello I have managed to install it as you put it. Now, I would like to know how could I use this in multiple projects, I mean, how to install laravel in other directories? I tried to adapt the steps but I get a 403 Forbidden. Can anybody help? Thanks
It is a perfect article but it lacks the final step : adding an entry to the hosts file:
127.0.0.1 laravel.example.com
Please add it to the article for completeness.
Agreed, add that missing step and it is the most useful laravel lamp setup article I have come across.
Thanks Mohamed and Shannanigans,
We have updated this tutorial accordingly.
Great Tutorial. Thanks.
It saves my day.
Hi
i see this when i try to lauch app ..
Whoops, looks like something went wrong.
1/1
FatalErrorException in Route.php line 238:
Class ‘SymfonyComponentRoutingRoute’ not found
Hi,
Thanks for the step by step instructions on how to setup Laravel. I was able to do this with in no time.
But when we create a new route and view, the system gives 404 error. for example shambhavicreations.in/test/
We have been trying this for long but we are getting stuck.
Best,
Ajay
i got the same problem have you found any solution
Sorry if you already got this.
In your app/Http/routes.php file add something like
Route::get(‘test’, function(){
print “this is working”;
});
hey you forgot to mention..
– Add an APP_KEY by running php artisan key:generate from the command line in your project root. This will generate a random, 32 character string which is used for encryption.
– You should already have ‘cipher’ => ‘AES-256-CBC’, within your config/app.php file if it is a new project. That is where I think you are confused.
You’re good to go 😀
I have problem during follow the description
when I type
username@ubuntu:.var/www$ git clone https://github.com/laravel/laravel.git
fatal: could not create work tree dir ‘larval’.:permission denied
how to should do?
I solved it 😐
Everthing i installed step by step process,finally i got server not found in browser please any one knw let me
same here… have you solved it
It should say this is for local machine, not a web server.
I done the whole tutorial. But when I’m trying to access the http://laravel.example.com, the browser says, “Server Not Found” what do you think the reason? I’m using the Ubuntu 15.04 the latest version. Please help!
I have same problem… can you help me it solved with you?
Hi,
in your file /etc/hosts insert this line:
127.0.0.1 lavarel.example.com
Save and restart Apache.
Can you give us a working example file plz.
Please check the spelling for laravel in 127.0.0.1 lavarel.example.com
127.0.0.1 laravel.example.com
you replaced v and r, it confused me for couple of minutes so I thought it s a good thing to point out for others…
Besides that: yeah, this should’ve been part of tutorial
Thanks, with this the problem was solved.
Happy new year.
Hi, SÉRGIO
How did solve the problem? Can you please the solution with me… Even I am facing the same problem of “Web-page not available” after following the all the above mentioned steps…
And I can’t install phpmyadmin
Hello.
Version 5.6 in Ubuntu 15.04 does not work well.
Php5-mcrypt package is not available (dependencies)
And the setting is not good with mysqli.
Could you help me to fix it?
Hi,
I got below error after i run a2ensite laravel.example.com
ERROR: Site laravel.example.com does not exist!
Please help
Hi Jain,
Please add .conf in Apache virtual host configuration file name. Rename file laravel.example.com to laravel.example.com.conf will work fine. I have updated article accordingly.
I am still facing the same problem.
When i run this command a2ensite laravel.example.com, i get this error
ERROR: Site laravel.example.com does not exist!
Hi Ninika,
What is your VirtualHost filename created in step #4.
Inside “/etc/apache2/sites-enabled/” you should have a file named the same as the domain name with “.conf” extension. (based on the article, here it should be laravel.example.com.conf).
If you don’t see one, make a copy of the etc/apache2/apache2.conf file and rename it. or just create a new one and copy the contents from this article.
Hey before step 4 tell users to add thee lines of code if their installation gets stuck due to mcrypt not available issue. worked for me.
sudo apt-get install mcrypt php5-mcrypt
sudo php5enmod mcrypt
sudo service apache2 restart
Thanks Rohan,
We will update the article soon…