
Laravel is a powerful, open-source PHP web framework, designed for the faster development of web applications. It is based on the Symfony framework, follows the MVC architectural pattern. During the recent update of this tutorial, Laravel 9 is the latest version available.
The Laravel framework also provides a command-line interface (CLI) known as Artisan. It provides helpful commands to perform operations for your applications.
This article will help you to install the Laravel PHP Framework on CentOS 8 systems.
Prerequisites
- The newly installed system’s follow initial server setup.
- Shell access with sudo privileges account.
Step 1 – Installing LAMP Stack
First of all, Laravel required LAMP stack to be running LAMP stack on your CentOS 8 system. The systems that have already run the LAMP stack can skip this step else use the following commands to install it.
Install Apache2
The Apache packages can be directly installed on default repositories.
sudo dnf install httpd
Once you installed the web server, type curl http://localhost, which will display HTML content on your screen.
Install MySQL
Use the following command to install MySQL on your system. For the detailed instructions visit here.
sudo dnf install @mysql
sudo mysql_secure_installation
Follow the MySQL initial configuration wizard to set a new password.
Install PHP
Laravel required PHP 7.2 or higher version. The official repositories already contains the required version’s of PHP packages. So, we can simply install the PHP by executing the following command:
sudo dnf install php php-curl php-bcmath php-dom php-xml php-mbstring php-json
Step 2 – Installing PHP Composer
Composer is used to creating new Laravel applications or installing dependencies for an existing applications. Run the below commands to download and install PHP composer on your system.
curl -sS https://getcomposer.org/installer | php
mv composer.phar /usr/local/bin/composer
chmod +x /usr/local/bin/composer
Step 3 – Create Laravel Application
Next, create a Laravel application using the composer package manager. Switch to your projects directory and create a Laravel application using “composer create-project laravel/laravel” followed by application name.
cd /var/www
composer create-project laravel/laravel myLaravelApp
The above commands will download the Laravel project files and install all the required dependencies on your CentOS system.
Next, set the 32 bit long random number encryption key, which is used by the Illuminate encrypter service.
cd /var/www/myLaravelApp
php artisan key:generate

Application key set successfully.
Step 4 – Access Laravel Application
Run your Laravel application in a development environment using php artisan. After that, I’ll tell you how you should deploy it on Apache.
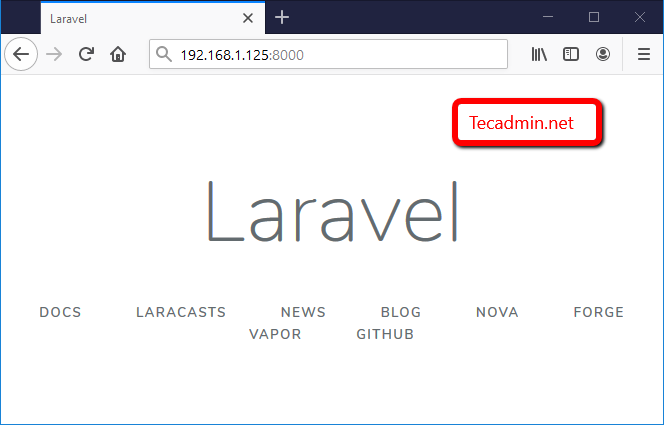
Run the below command from your Laravel application. You can change the host to your LAN IP or localhost to restrict access.
php artisan serve --host 0.0.0.0 --port=8000
Access Laravel application using localhost (for local systems) or server IP address and specified port.
Step 5 – Setup Laravel with Apache
Now add a Virtual Host in your Apache configuration file to access Laravel framework from web browser. To do it create Apache configuration file /etc/httpd/conf.d/laravel.conf and add below code:
sudo vim /etc/httpd/conf.d/laravel.conf
<VirtualHost *:80>
       ServerName laravel.example.net
       DocumentRoot /var/www/myLaravelApp/public

       <Directory /var/www/myLaravelApp>
              AllowOverride All
       </Directory>
</VirtualHost>
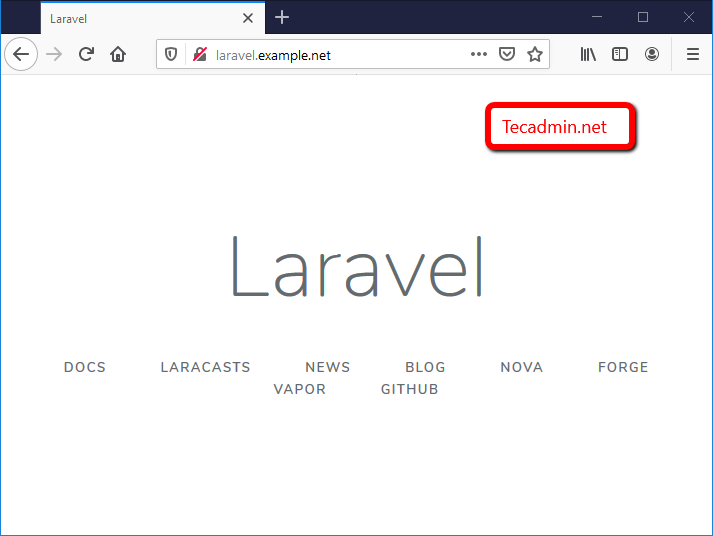
Restart Apache service and access the Laravel framework using your favorite web browser.
sudo systemctl restart httpd.service
Now, set the proper permission for the application files and directories.
chown -R apache.apache /var/www/myLaravelApp
chmod -R 755 /var/www/myLaravelApp
chmod -R 755 /var/www/myLaravelApp/storage
SELinux enabled systems also run the below command to allow write on storage directory.
chcon -R -t httpd_sys_rw_content_t /var/www/myLaravelApp/storage
Finally, access your Laravel application in a web browser.
Conclusion
In this tutorial, you have learned to create a new Laravel application with a composer and run it on a development system. Also deployed laravel on Apache server.
3 Comments
Thanks!, a perfect tutorial!
it’s worked for me but when I try to put application in virtual directory it give me forbidden :
sudo chown -R apache.apache /home/opc/projects/myLaravelApp
sudo chmod -R 755 /home/opc/projects/myLaravelApp
sudo chmod -R 755 /home/opc/projects/myLaravelApp/storage
sudo chcon -R -t httpd_sys_rw_content_t /home/opc/projects/myLaravelApp/storage
cd /etc/httpd/conf
sudo nano httpd.conf
# ADD THIS LINES FOR YOUR VIRTUAL DIRECTORIES
Alias /myLaravelApp /home/opc/projects/myLaravelApp/public
# SETTING DIRECTORY FOR /home/opc/projects/myLaravelApp/public
AllowOverride All
allow from all
Options +Indexes
Require all granted
sudo systemctl restart httpd
I found this post as very useful , you have tried to explain things very beautifully . Keep up the good job.
Thanks