Install Mattermost with MySQL on Ubuntu 14.04 & Debian 8. Mattermost is a best alternative of Slack messaging application. It provides you option for all communications at one place with easy to use interface. You can easily share messages, files over desktops and mobile devices.
Step 1 – Setup MySQL Database Server
First you need to install MySQL database server on your system. Use following command to install default available version of mysql or read this tutorial.
$ sudo apt-get install mysql-server
Now create a database for mattermost installation and a mysql user for authentication.
$ mysql -u root -p

mysql> CREATE DATABASE mattermost;
mysql> GRANT ALL on mattermost.* to mmuser@localhost IDENTIFIED BY 'password';
mysql> FLUSH PRIVILEGES;
Step 2 – Download Mattermost Archive
Now you can use root account or a separate account for your mattermost installation. Use below commands to create separate account.
$ sudo adduser mmuser
$ sudo passwd mmuser
Now switch to newly created account and download the mattermost compiled edition using below command. To find latest version visit here. Also extract the downloaded archive file.
$ sudo su - mmuser
$ wget https://releases.mattermost.com/2.2.0/mattermost-team-2.2.0-linux-amd64.tar.gz
$ tar xzf mattermost-team-2.2.0-linux-amd64.tar.gz
Step 3 – Configure Mattermost
Now edit mattermost configuration file config/config.json and update below details under SqlSettings section. Update DataSource values as per created records in step 1.
  "DriverName": "mysql",
  "DataSource": "mmuser:password@tcp(localhost:3306)/mattermost?charset=utf8mb4,utf8",
Now create data directory for mattermost installation. This is the location where mattermost keeps data of teams like uploaded files etc.
$ mkdir ~/mattermost/data
Step 4 – Start Mattermost Server
You mattermost setup has been completed. Now use following commands to start mattermost service.
$ cd ~/mattermost/bin
$ ./platform
Default mattermost runs on port 8065, which can be changed in config/config.json file. Access your server on port 8065 (or customized port) through web browser.
http://svr1.tecadmin.net:8065/
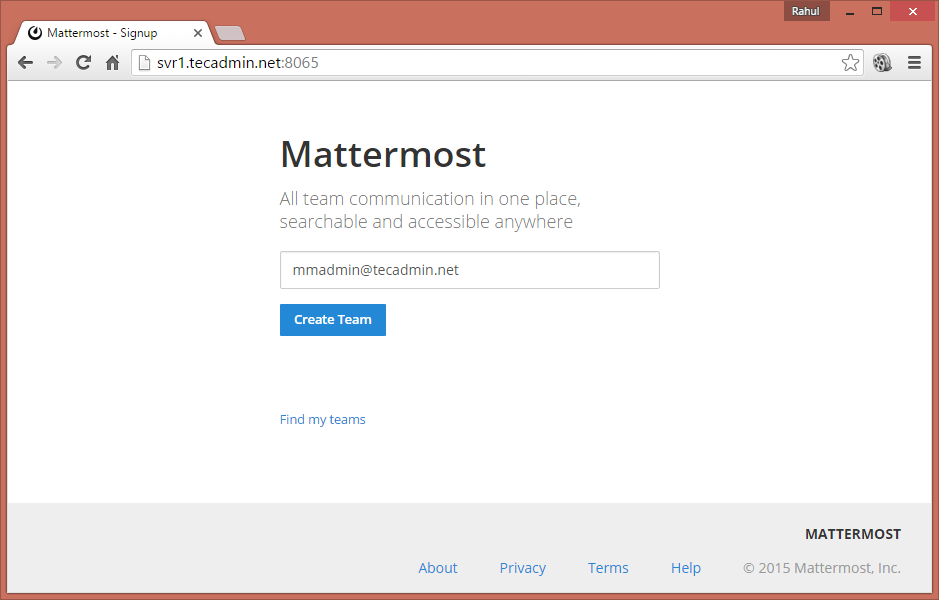
Now you may need to create your first team in mattermost. To create team enter email address for team administrator account and click Create Team.
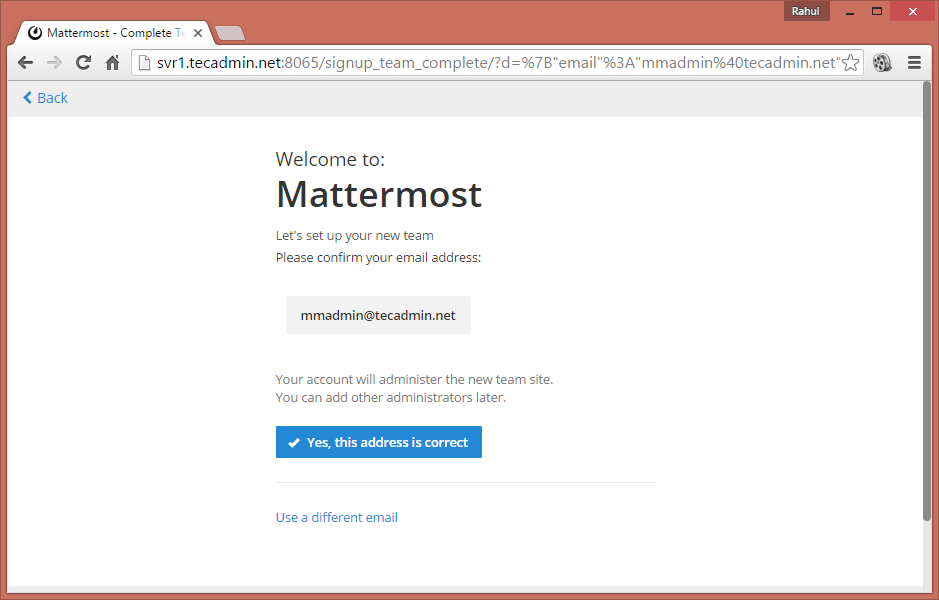
Make sure administrator email is correct and click “Yes, this address is correct”.
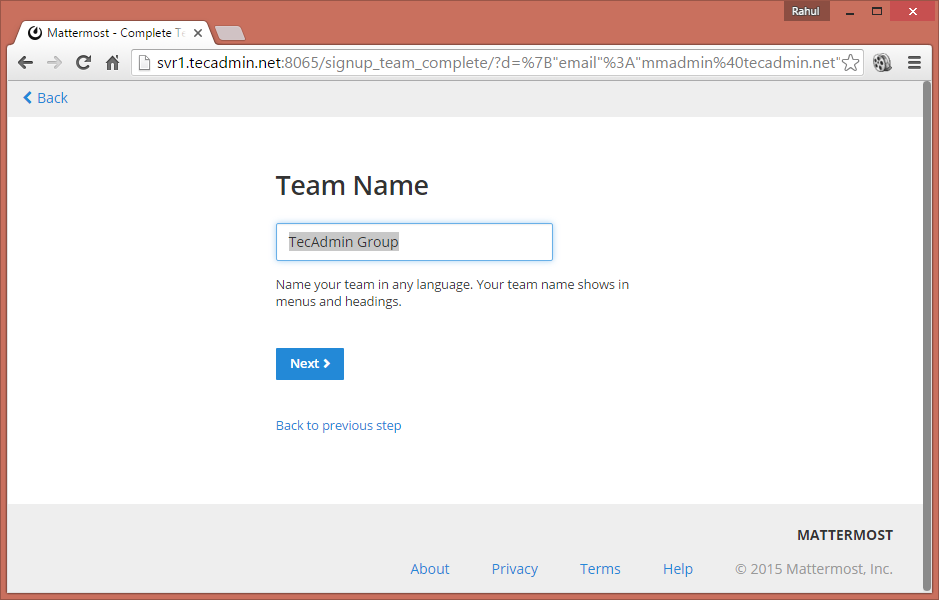
Now enter name of you team in box and click Next.
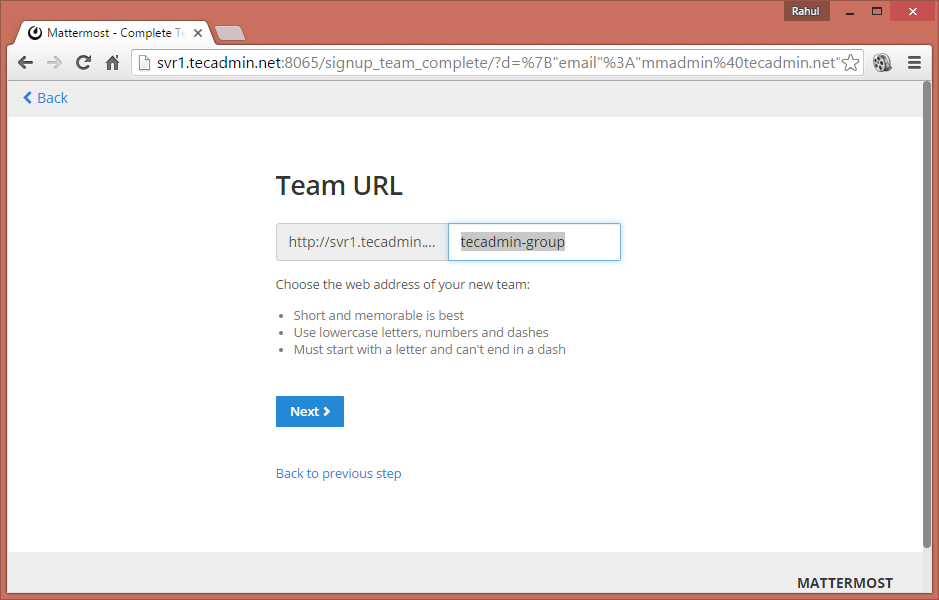
You can customized your team url here. Input required team url and click Next.
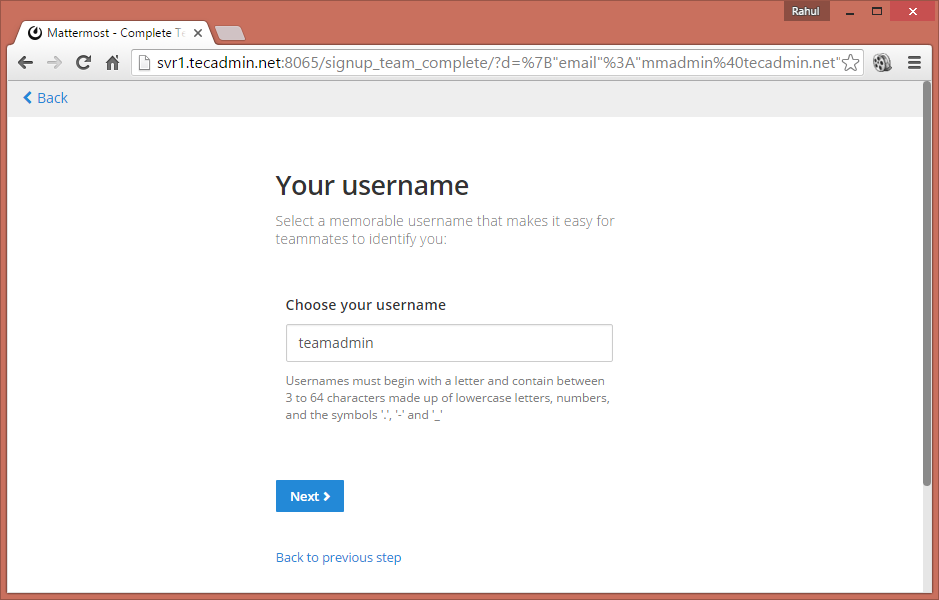
Now choose a username for your administrator account and click Next.
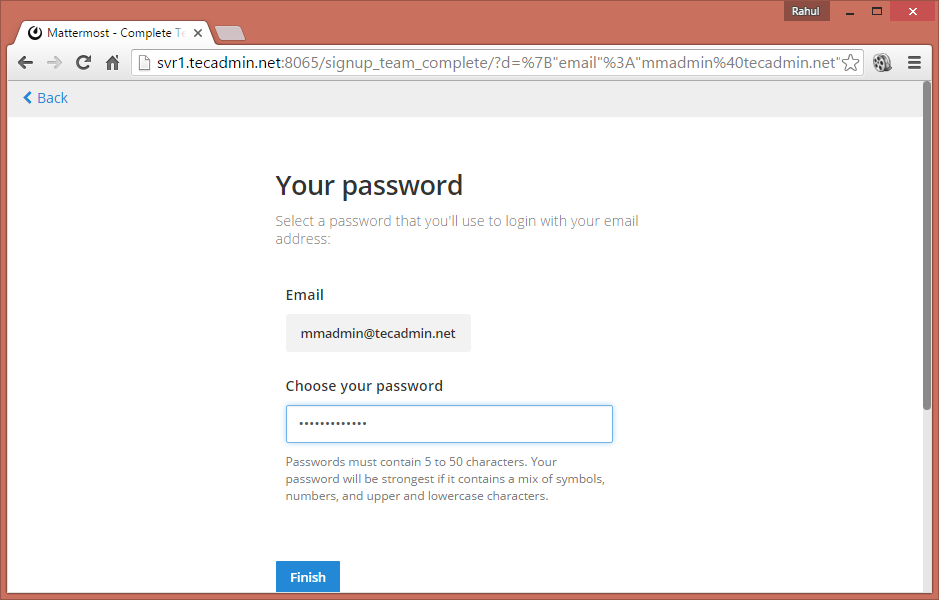
Enter a secured password for you administrator account and click Finish.
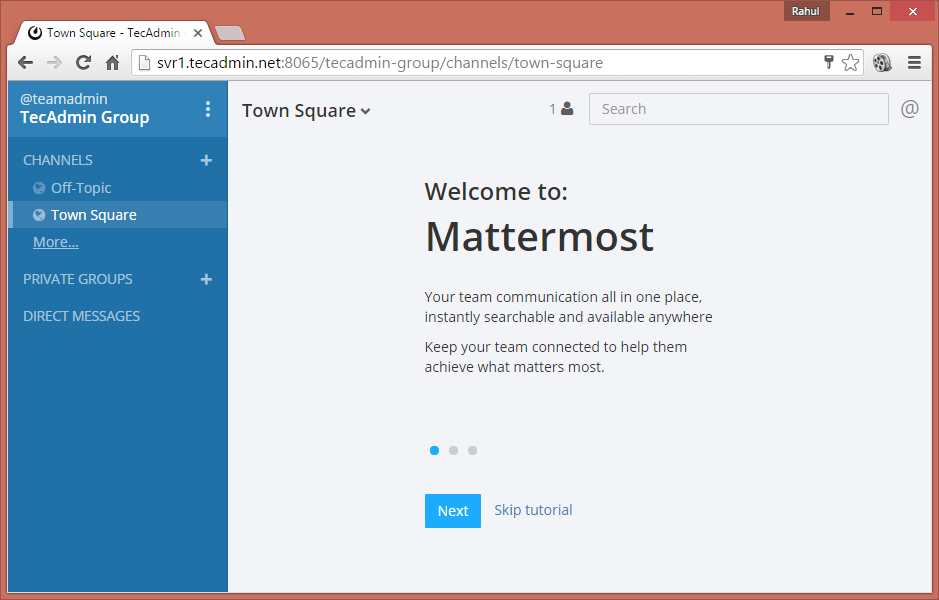
You team has been successfully created and you will be redirected to you account.
Step 5 – Setup Mattermost with Upstart
Now create a mattermost startup script for Upstart daemon. Edit /etc/init/mattermost.conf file in text editor and add following content.
start on runlevel [2345]
stop on runlevel [016]
respawn
chdir /home/mmuser/mattermost
setuid mmuser
exec bin/platform
Now you can use following commands to start and stop mattermost .
$ sudo start mattermost
$ sudo stop mattermost


2 Comments
Update to the newest mysql version
$sudo apt-get install mysql-server-5.6
This is what I get when I try to start it up after creating the database.
[2016/07/14 10:12:40 BST] [INFO] Loaded system translations for ‘en’ from ‘/home/mmuser/mattermost/i18n/en.json’
[2016/07/14 10:12:40 BST] [INFO] Current version is 3.1.0 (3.1.0/Mon Jun 13 19:08:00 UTC 2016/974238231b9cdbd39a825ec8e9299fbb0b51f6b8/none)
[2016/07/14 10:12:40 BST] [INFO] Enterprise Enabled: false
[2016/07/14 10:12:40 BST] [INFO] Current working directory is /home/mmuser/mattermost/bin
[2016/07/14 10:12:40 BST] [INFO] Loaded config file from /home/mmuser/mattermost/config/config.json
[2016/07/14 10:12:40 BST] [INFO] Server is initializing…
[2016/07/14 10:12:40 BST] [INFO] Pinging sql master database
[2016/07/14 10:12:40 BST] [INFO] Pinging sql replica-0 database
[2016/07/14 10:12:40 BST] [CRIT] Failed to create index Error 1214: The used table type doesn’t support FULLTEXT indexes
panic: Failed to create index Error 1214: The used table type doesn’t support FULLTEXT indexes
Any ideas/help would be much appreciated.