Generally, web hosting manager used a separate server for each PHP version application deployment. Which increases the hosting cost. Alternatively, you can run multiple Docker containers for multiple PHP versions.
This tutorial helps you with the installation and configuration of two VirtualHost on the Nginx web server with different PHP versions. First VirtualHost will work with PHP 5.6 and another VirtualHost will run with PHP 7.2. So just go through this tutorial. You can also use more than two PHP versions with Nginx as required but this tutorial covers two only.
PHP Installation
For the installation of PHP versions, we use the PPA maintained here. Use the below couple of commands to add the PPA to your system.
sudo apt install python-software-properties
sudo add-apt-repository ppa:ondrej/php
For this tutorial, I used PHP 5.6 and PHP 7.2 to configure it with the Nginx web server. To use the multiple PHP versions, we will use PHP FPM and FastCGI. Let’s install the following packages on your system.
apt update
sudo apt install php5.6 php5.6-fpm
sudo apt install php7.2 php7.2-fpm
You may also need to install additional PHP modules. For the tutorial, only the above packages are required.
After installation, php-fpm services will be started automatically. Use the following commands to make sure both services are running.
sudo systemctl status php5.6-fpm
sudo systemctl status php7.2-fpm
- Recommended: How to Enable/Disable PHP Modules on Ubuntu
Nginx Installation
The Nginx web server is packages are available in the official Ubuntu repository. Launch terminal on your system or login with ssh for remote systems. Execute the following commands to install the latest available version of the Nginx web server.
sudo apt update
sudo apt install nginx
Nginx Configuration
Get ready for the configuration of websites in the Nginx server. For the testing purpose, I am configuring two websites to work with two different-2 PHP versions. First, create two directories on your server.
sudo mkdir /var/www/php56
sudo mkdir /var/www/php72
Now, create and index.php containing the phpinfo() function.
echo " <?php phpinfo(); ?> " > /var/www/php56/index.phpecho " <?php phpinfo(); ?> " > /var/www/php72/index.php
After that create server blocks for both sites on Nginx. The latest version of Nginx keeps the server block configuration files under /etc/nginx/sites-available directory. Create a file for the first virtual host and edit in your favorite text editor.
sudo vim /etc/nginx/sites-available/php56.example.com
Add the following content. Make sure to use the correct ServerName and directory path according to your setup. This website is configured to work with PHP 5.6.
# Application with PHP 5.6
#
server {
	listen 80;

	root /var/www/php56;
	index index.php;
	server_name php56.example.com;

	location ~* \.php$ {
		# With php-fpm unix sockets
		fastcgi_pass unix:/var/run/php/php5.6-fpm.sock;
		include         fastcgi_params;
		fastcgi_param   SCRIPT_FILENAME    $document_root$fastcgi_script_name;
		fastcgi_param   SCRIPT_NAME        $fastcgi_script_name;
	}
}
Similarly, create a second VirtualHost configuration file to work with PHP 7.2. Edit configuration file in text editor:
sudo vim /etc/nginx/sites-available/php72.example.com
Add the following content to file with proper ServerName and DocumentRoot.
# Application with PHP 7.2
#
server {
	listen 80;

	root /var/www/php72;
	index index.php;
	server_name php72.example.com;

	location ~* \.php$ {
		# With php-fpm unix sockets
		fastcgi_pass unix:/var/run/php/php7.2-fpm.sock;
		include         fastcgi_params;
		fastcgi_param   SCRIPT_FILENAME    $document_root$fastcgi_script_name;
		fastcgi_param   SCRIPT_NAME        $fastcgi_script_name;
	}
}
All right, You have created both websites in your Nginx. But they are still not active. Nginx keeps active sites under /etc/nignx/sites-enabled directory. You can simply create a symbolic link for both config files to this directory or use the below command to do the same.
sudo ln -s /etc/nginx/sites-available/php56.example.com /etc/nginx/sites-enabled/
sudo ln -s /etc/nginx/sites-available/php72.example.com /etc/nginx/sites-enabled/
After making all the changes restart Nginx to reload new settings changes.
sudo systemctl restart nginx.service
Your setup has been completed now. Go to the next step to test your setup.
Test Setup
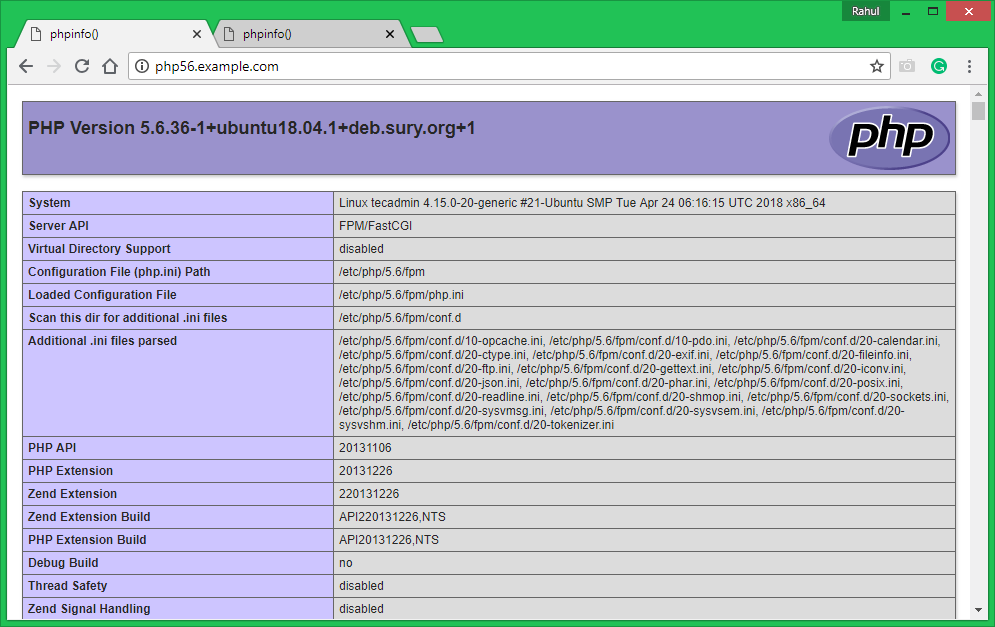
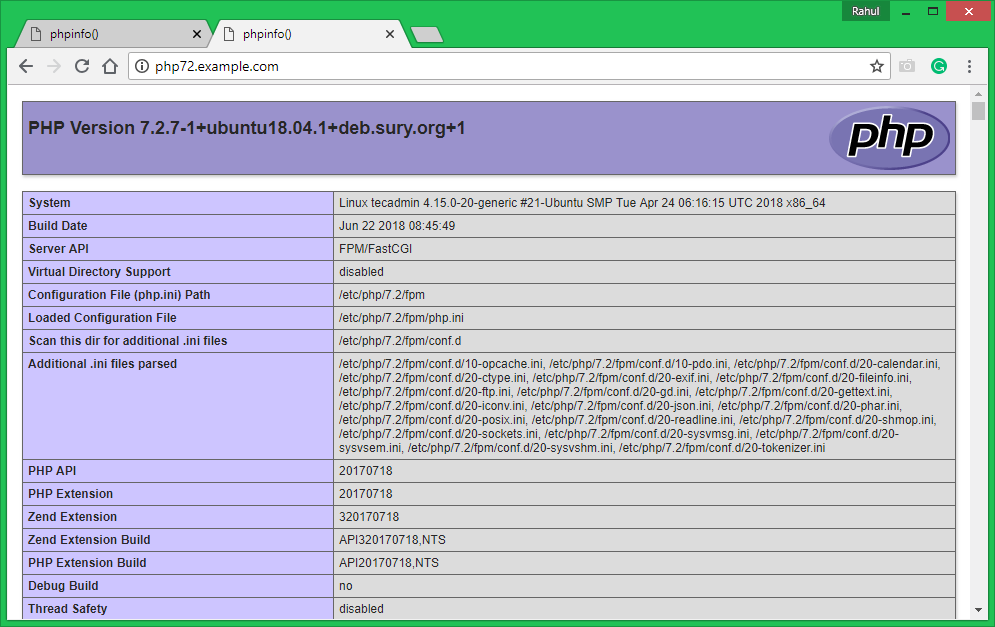
All done. You can access both sites in your favirote web browser . You will see that php56.example.com shows the version PHP 5.6 and php72.example.com is showing the PHP 7.2 as the configuration.
Congratulations, You system is ready to host websites with different PHP versions. Happy hosting.


6 Comments
Excellent Guide..
However i had to do two more step :
1) vim /etc/hosts
2) add below 2 lines , save and exit.
127.0.0.1 php56.example.com
127.0.0.1 php72.example.com
Thank you!! works for me.
how to open multiple php versions if i dont have dns… opening only one default page.
Nice tutorial. To extend it a little bit, how can we have two versions of php also in the cli? if you use composer, for example, the cli will say default version php7.2 but actually you need for that certain project to use php5. An answer is super appreciated.
You can define any php version with composer command as :
/usr/bin/php5.6 /usr/local/bin/composer help
/usr/bin/php7.2 /usr/local/bin/composer help
Thanks excellent guide..I was looking for a long time
In case of memcached or opcache do I have to make any changes?
Hello