MySQL is an open-source relational database management system. This tutorial will help you to install MySQL server on your Ubuntu and Debian systems. This version has various security improvements than the previous versions.
Step 1 – Configure Apt Repository
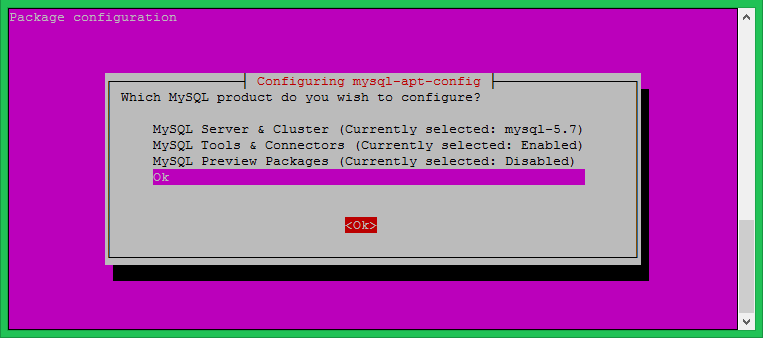
Download the MySQL apt configuration Debian package officially provided by the MySQL team and install it on your system. For Ubuntu 16.04 and later version’s MySQL 5.7 is available under default apt repositories, so you don’t need to enable additional repository that.
wget http://repo.mysql.com/mysql-apt-config_0.8.9-1_all.deb
sudo dpkg -i mysql-apt-config_0.8.9-1_all.deb
This will prompt you to select MySQL version to be install. So that the dpkg can configure the apt repository accordingly.
Step 2 – Install MySQL Server
Use the following commands to install MySQL server on your Ubuntu 16.04 and 14.04 systems. Currently, this is the most popular version used by the among users.
sudo apt-get update
sudo apt-get install mysql-server
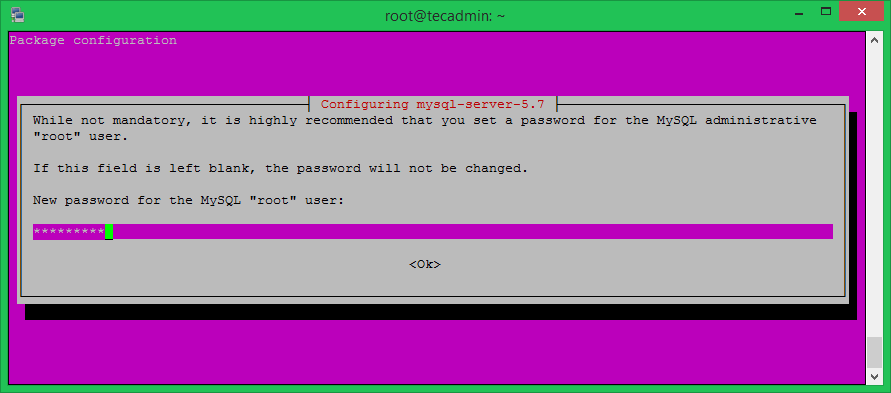
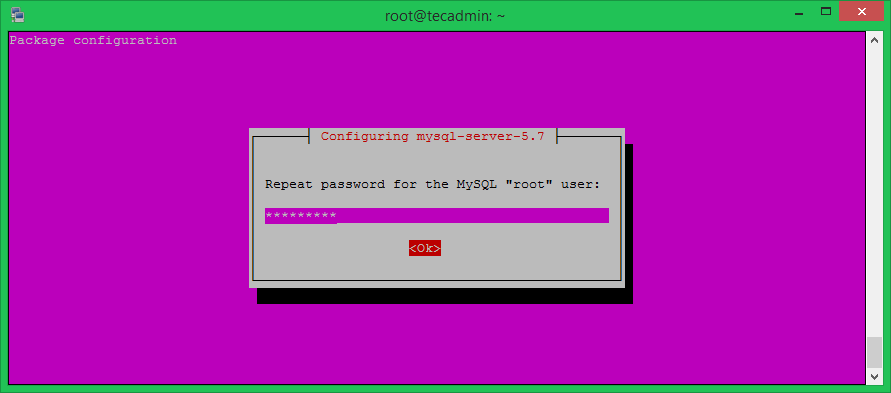
The installation process will prompt for the default password of root user and again to confirm the password.
Step 3 – Secure MySQL Installation
Now run the mysql_secure_installation command. This will prompt for the configuration of variable security changes. Like enable password strength using VALIDATE PASSWORD PLUGIN, disable remote root login, remote test database and connection to it.
mysql_secure_installation
Securing the MySQL server deployment.

Enter password for user root:

VALIDATE PASSWORD PLUGIN can be used to test passwords
and improve security. It checks the strength of password
and allows the users to set only those passwords which are
secure enough. Would you like to setup VALIDATE PASSWORD plugin?

Press y|Y for Yes, any other key for No:
Using existing password for root.
Change the password for root ? ((Press y|Y for Yes, any other key for No) :

 ... skipping.
By default, a MySQL installation has an anonymous user,
allowing anyone to log into MySQL without having to have
a user account created for them. This is intended only for
testing, and to make the installation go a bit smoother.
You should remove them before moving into a production
environment.

Remove anonymous users? (Press y|Y for Yes, any other key for No) : y
Success.


Normally, root should only be allowed to connect from
'localhost'. This ensures that someone cannot guess at
the root password from the network.

Disallow root login remotely? (Press y|Y for Yes, any other key for No) : y
Success.

By default, MySQL comes with a database named 'test' that
anyone can access. This is also intended only for testing,
and should be removed before moving into a production
environment.


Remove test database and access to it? (Press y|Y for Yes, any other key for No) : y
 - Dropping test database...
Success.

 - Removing privileges on test database...
Success.

Reloading the privilege tables will ensure that all changes
made so far will take effect immediately.

Reload privilege tables now? (Press y|Y for Yes, any other key for No) : y
Success.

All done!
Step 4 – Working with MySQL
Finally, login to MySQL server using the following command. Enter the password created during installation. Here you can create database and tables to store data. You can read our online MySQL tutorial to perform various tasks with MySQL command line. You may also need to disable strict SQL mode.
mysql -u root -p
Enter password:
Welcome to the MySQL monitor.  Commands end with ; or \g.
Your MySQL connection id is 4
Server version: 5.7.26 MySQL Community Server (GPL)

Copyright (c) 2000, 2019, Oracle and/or its affiliates. All rights reserved.

Oracle is a registered trademark of Oracle Corporation and/or its
affiliates. Other names may be trademarks of their respective
owners.

Type 'help;' or '\h' for help. Type '\c' to clear the current input statement.

mysql>
9 Comments
thanks to your tutorial, nice
Thanks bro it worked
Hello,
Thanks. It works but on Ubuntu 16.04 you will need to do: sudo apt install mysql-server-5.6 to force it to install Mysql 5.6 else you end up having 5.7 installed.
Same for me, tried to install mysql 5.6 on ubuntu 16, but at the end I have v5.7
after your commands (for 5.7) apt-get gets still 5.5 version from default package.
not working
Err http://ppa.launchpad.net jessie/main amd64 Packages
404 Not Found
Ign http://ppa.launchpad.net jessie/main Translation-en_US
Ign http://ppa.launchpad.net jessie/main Translation-en
Fetched 367 B in 2s (129 B/s)
W: Failed to fetch http://ppa.launchpad.net/ondrej/mysql-5.7/ubuntu/dists/jessie/main/binary-amd64/Packages 404 Not Found
first update your software list after that sure it will be working i m typing the command follow this
sudo update-manager -d
What to update? ondrej gives only for ubuntu, this guy has Debian.. it’s not avalaible so this article has bug.
Install MySQL 5.6 >>>
mysql –version
mysql Ver 14.14 Distrib 5.7.10, for Linux (x86_64) using EditLine wrapper
Seems it’s not working!