Step 1 – Install JAVA
Java is the primary requirement for the Netbeans installation on the system. Use below command to verify if Java is already installed or not.
java -version

java version "1.8.0_171"
Java(TM) SE Runtime Environment (build 1.8.0_171-b11)
Java HotSpot(TM) 64-Bit Server VM (build 25.171-b11, mixed mode)
If you don’t have Java installed, use tutorial => Install Java on Ubuntu
Step 2 – Download NetBeans (PHP) Installer
After installing/verifying java on your system, download NetBeans for PHP latest installer file, For following commands, we are running as root user.
sudo su -
wget http://download.netbeans.org/netbeans/8.2/final/bundles/netbeans-8.2-php-linux-x64.sh
You can download full version of NetBeans from official website or using this link. After complete download of installer file, make file executable and run it.
Step 3 – Install NetBeans IDE
Make the downloaded script executable and execute the script like below. As of today NetBeans 8.2 is the latest version is available to install, For more recent versions, visit https://netbeans.org/ official site.
chmod +x netbeans-8.2-php-linux-x64.sh
./netbeans-8.2-php-linux-x64.sh
The installer will launch an installation wizard. Follow the given instructions and complete the wizard.
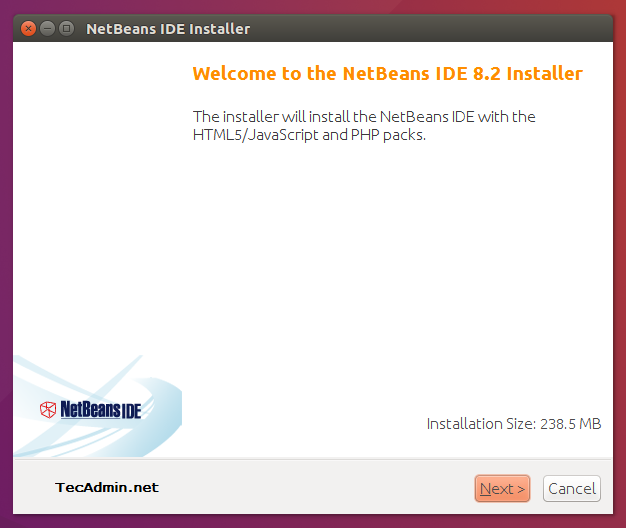
Complete above installer by clicking Next and Accept terms for uses.
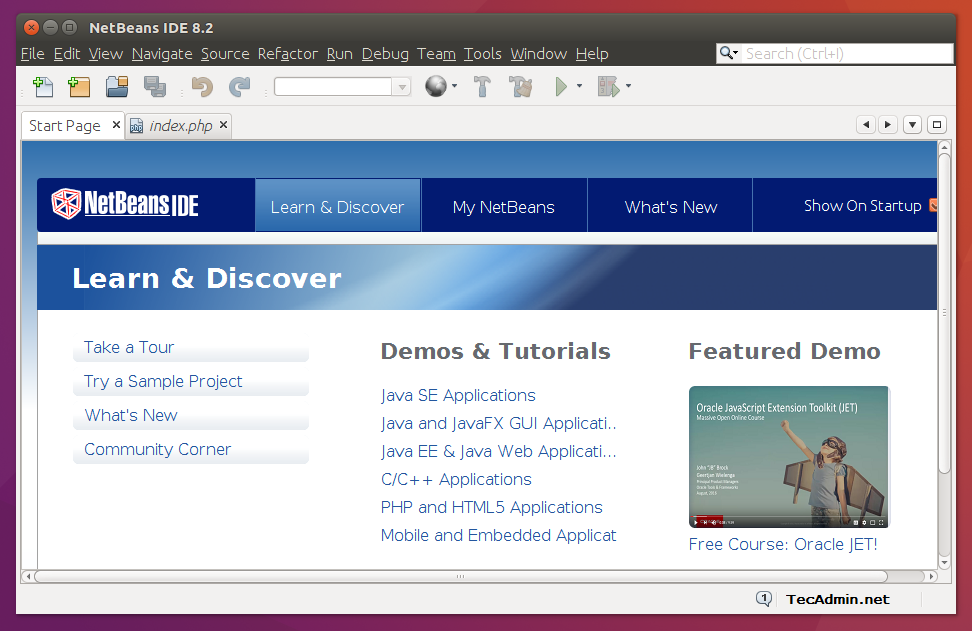
Step 4 – Open NetBeans IDE
After finishing the installation of NetBeans start using Dashboard search box, Type “NetBeans” and it will display launcher icon. Click on the icon to launch Netbeans IDE.


11 Comments
Getting this error while executing installer file.Please help.
Configuring the installer…
Searching for JVM on the system…
Preparing bundled JVM …
Extracting installation data…
Running the installer wizard…
Exception: java.lang.NoClassDefFoundError thrown from the UncaughtExceptionHandler in thread “main”
thanks
it was useful
Thanks for this tutorial. Worked like a charm.
Thanks for tutorial
thank it works for me
Thanks for help me
How to uninstall NetBeans IDE 8.0.2 for PHP on Ubuntu 14.04, 12.04 & LinuxMint
Thanks, you save me a lot of pain and big headache. Installing latest version of Netbeans was smooth following your tutorial. Your site go to my bookmarks, right now
Great Tutorial 🙂
Thanks for info about jre7 repository. Very nice. 😉
Thanks man for this tutorial. Has helped me lots.