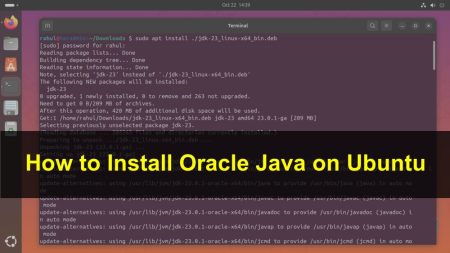
Java is a popular programming language for system software development and web application. You need to install the Java Development Kit (JDK) and Java Runtime Environment (JRE) for the setup of the Java development environment. JDK compiled the source java file and make a java class file. JRE is used to run that intermediate class file. This tutorial will guide you to install Oracle Java 11 LTS version on Ubuntu 16.04 LTS Xenial system.
Step 1 – Prerequsities
Before beginning the installation run login shell as the sudo user and update the current packages installed.
sudo apt update
sudo apt upgrade
Step 2 – Install Java 11 on Ubuntu 16.04
You need to add the following PPA to your Ubuntu system. This PPA contains a package oracle-java11-installer having the Java installation script.
sudo add-apt-repository ppa:linuxuprising/java
Then install Java 11 using the script provided in these packages. This script downloads the Java archive from the official site and configures on your system
sudo apt update
sudo apt-get install oracle-java11-installer
Also, install the following package to configure Java 11 as default Java version on your Ubuntu 18 system.
sudo apt-get install oracle-java11-set-default
Step 3 – Verify Java Version
Check the installed Java version on your system using the following command.
java -version

java version "11.0.2" 2019-01-15 LTS
Java(TM) SE Runtime Environment 18.9 (build 11.0.2+9-LTS)
Java HotSpot(TM) 64-Bit Server VM 18.9 (build 11.0.2+9-LTS, mixed mode)
You have successfully installed Java 11 on Ubuntu 16.04 LTS system.
Happy coding!


4 Comments
The clarification of the critical situation in the world may help Your business. We don’t give advice on how to run it. We highlight key points from the flood of information for You to draw conclusions. Fact: conflicting vested interests change the world. Agenda: control and reduction of the human population. Ways and Means: genetic engineering of viruses, mass-media scares, mandatory vaccination.
Thank You for the time of reading our unsolicited message! God bless You.
See: bit.ly/evilempire-blog
This solution doesn’t work anymore, you need to download JDK by yourself and place it in the folder. This blog post was useful to me so I am making comment to save someone’s time.
It’s important to understand that both OpenJDK 11 and Oracle Java SE 11 are NOT certified for ubuntu 16.04. They are only certified for both Ubuntu 18.04 and Ubuntu 18.10:
https://www.oracle.com/technetwork/java/javase/documentation/jdk11certconfig-5069638.html
Operating Systems:
Linux
Platform CPU Architecture Version Introduced In Notes
Ubuntu Linux x64 (64-bit) 18.10 11.0.1 Only X.org Mode supported. Wayland mode is unsupported.
Ubuntu Linux x64 (64-bit) 18.04 LTS 11 Only X.org Mode supported. Wayland mode is unsupported.
Hi Rahul,
Just curious, why not make a PPA which will settle the hassle once for all?
Like in your previous posts on java 8 installation, you suggested the WEBUPD8 PPA from Andrei.
There exists a linuxuprising PPA, would you recommend that?