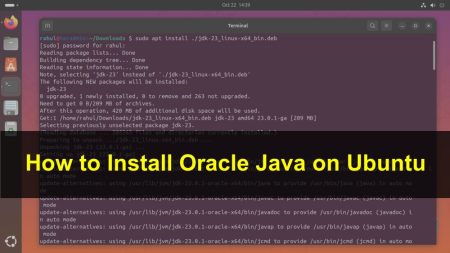
Java is a popular programming language for system software development and web application. You need to install the Java Development Kit (JDK) and Java Runtime Environment (JRE) for the setup of the Java development environment. This tutorial will guide you to install Oracle Java 13 version on Debian 10 Buster Linux system.
Step 1 – Prerequisites
First of all, log in to Debian 10 Buster system as the sudo user and install some required packages on your Debian system.
sudo -i
apt update
apt install wget libasound2 libasound2-data
Step 2 – Download Java Debian Package
Download the latest Java SE Development Kit 13 LTS debian file release from its official download page or use following commands to download from command line.
wget --no-cookies --no-check-certificate --header "Cookie: oraclelicense=accept-securebackup-cookie" https://download.oracle.com/otn-pub/java/jdk/13.0.1+9/cec27d702aa74d5a8630c65ae61e4305/jdk-13.0.1_linux-x64_bin.deb
Step 3 – Install Oracle Java on Debian 10
Now, use the Debian package installer utility (dpkg) to install a downloaded Java package on your system. Simply run the following command on the system terminal.
dpkg -i jdk-13.0.1_linux-x64_bin.deb
The Java 13 has been installed on your system. If you have multiple version’s of Java installed on the same system. Use the following commands to set Java 13 as default version on your system:
update-alternatives --install /usr/bin/java java  /usr/lib/jvm/jdk-13.0.1/bin/java 2
update-alternatives --config java
Use above command only If there is multiple Java version installed on your Debian 10 Linux system.
After using the above commands, you also need to other binaries to set as default for the JDK installation. Execute the commands to set javac and jar as default:
update-alternatives --install /usr/bin/jar jar /usr/lib/jvm/jdk-13.0.1/bin/jar 2
update-alternatives --install /usr/bin/javac javac /usr/lib/jvm/jdk-13.0.1/bin/javac 2
update-alternatives --set jar /usr/lib/jvm/jdk-13.0.1/bin/jar
update-alternatives --set javac /usr/lib/jvm/jdk-13.0.1/bin/javac
Step 4 – Verify Java Version
Therefore Java 13 has successfully installed on your Debian 10 Buster system. Now check the currently active Java version by running the following command.
java -version

java version "13.0.1" 2019-10-15
Java(TM) SE Runtime Environment (build 13.0.1+9)
Java HotSpot(TM) 64-Bit Server VM (build 13.0.1+9, mixed mode, sharing)
Step 5 – Configure Java Environment Variables
Most of the Java-based applications uses environment variables to work. Create a script as below. Now set all the required environment variables for Java. This file will automatically reload settings on system reboot.
sudo nano /etc/profile.d/jdk.sh
Now, Add/Update following values:
export J2SDKDIR=/usr/lib/jvm/jdk-13.0.1
export J2REDIR=/usr/lib/jvm/jdk-13.0.1
export PATH=$PATH:/usr/lib/jvm/jdk-13.0.1/bin:/usr/lib/jvm/jdk-13.0.1/db/bin
export JAVA_HOME=/usr/lib/jvm/jdk-13.0.1
export DERBY_HOME=/usr/lib/jvm/jdk-13.0.1/db
Then save your file and exit. Then load these setting to current active shell also
source /etc/profile.d/jdk.sh
You have successfully installed Java 13.0.1 on Debian 10 Buster Linux system.


8 Comments
This article is inaccurate. The typos are the least of it (they only bug me because if there are typos in the copy, there may be typos in the command input code) but off the bat, the information is prefaced by installing Java on “Debian 10 Stretch” and that is not the name for this distribution. The current Debian 10 OS is nicknamed “Buster.” This isn’t a huge deal either, except it makes me think this article was either updated from an older one and potentially having a mix of current and outdated information, or that the author doesn’t know much about Linux and is simply spitting out copy.
All of this is fine, it’s just hard to trust an article of very specific installation commands that was written in such a hurry.
Thanks Phil. I have updated the tutorial and tried to fix typos.
Thank you for this.
Is there a way to put Oracle in the repository, so I can get updates with apt?
Are there instruction, but for the old version and controversial information on the internet.
Hi, You can install Oracle Java 13. Other versions required Oracle subscription. I have updated article to Install Java 13 on Debian 10.
Thanks a lot!
change all the references that say “jdk-11.0.2” to “jdk-11.0.4” or what ever version you downloaded.
Where will the JRE be located?
update-alternatives: error: alternative path /usr/lib/jvm/jdk-11.0.2/bin/java doesn’t exist