In the era of cloud computing, having your own private cloud storage is not just a luxury but a necessity for many. ownCloud offers a flexible, open-source solution for file sharing and data synchronization. In this guide, we’ll walk you through the process of installing ownCloud on Fedora Linux, a popular and powerful Linux distribution.
Prerequisites
Before we start, ensure you have the following:
- A system running Fedora Linux.
- Basic knowledge of Linux command line.
- Sudo or root privileges on your system.
Step 1: System Update
First, update your Fedora system to ensure all packages are up to date. Open your terminal and execute:
sudo dnf update
Step 2: Install Apache Web Server
ownCloud runs on a web server, and Apache is a popular choice. Install Apache using the following command:
sudo dnf install httpd
Once installed, start and enable Apache to run on system boot:
sudo systemctl start httpdsudo systemctl enable httpd
Step 3: Install PHP
ownCloud is a PHP application, so you need to install PHP along with several required PHP modules. Use the following command:
sudo dnf install php php-gd php-json php-mbstring php-curl php-xml php-zip php-dom php-pdo
Step 4: Install MariaDB
ownCloud requires a database to store administrative data. MariaDB is a popular choice. Install it using:
sudo dnf install mariadb-server
After installation, start and enable MariaDB:
sudo systemctl start mariadbsudo systemctl enable mariadb
Secure your MariaDB installation:
sudo mysql_secure_installation
Step 5: Create a Database for ownCloud
Log in to MariaDB and create a database for ownCloud:
sudo mysql -u root -p
Once logged in, create a new database and user:
CREATE DATABASE owncloud;
GRANT ALL ON owncloud.* TO 'owncloud_user'@'localhost' IDENTIFIED BY 'password';
FLUSH PRIVILEGES;
EXIT;
Step 6: Download and Install ownCloud
Navigate to the official ownCloud website to get the latest version or use wget:
wget https://download.owncloud.com/server/stable/owncloud-complete-20231213.zip
Unzip the downloaded file and move it to your web server’s root directory:
unzip owncloud-complete-latest.zipsudo mv owncloud /var/www/html/
Set the proper permissions for the ownCloud directory:
sudo chown -R apache:apache /var/www/html/owncloud
Step 7: Configure Apache for ownCloud
Create an Apache configuration file for ownCloud:
sudo nano /etc/httpd/conf.d/owncloud.conf
Add the following configuration:
Alias /owncloud "/var/www/html/owncloud/"

<Directory "/var/www/html/owncloud/">
  Require all granted
  AllowOverride All
  Options FollowSymLinks MultiViews

  <IfModule mod_dav.c>
    Dav off
  </IfModule>

</Directory>
Restart Apache to apply the changes:
sudo systemctl restart httpd
Step 8: Finalizing the Installation
Open your web browser and navigate to http://your-server-ip/owncloud. You will be greeted with the ownCloud setup page. Enter your desired admin username and password, and fill in the database details you created earlier.
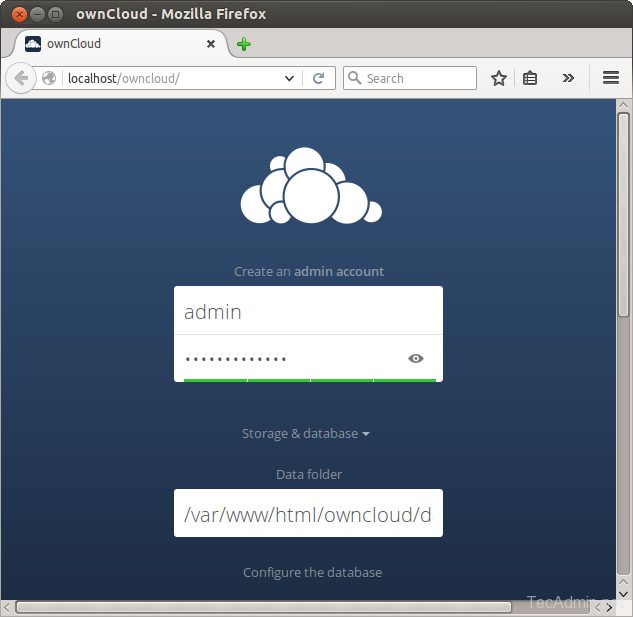
Now slide your page down and input the database credentials and click on Finish Setup.

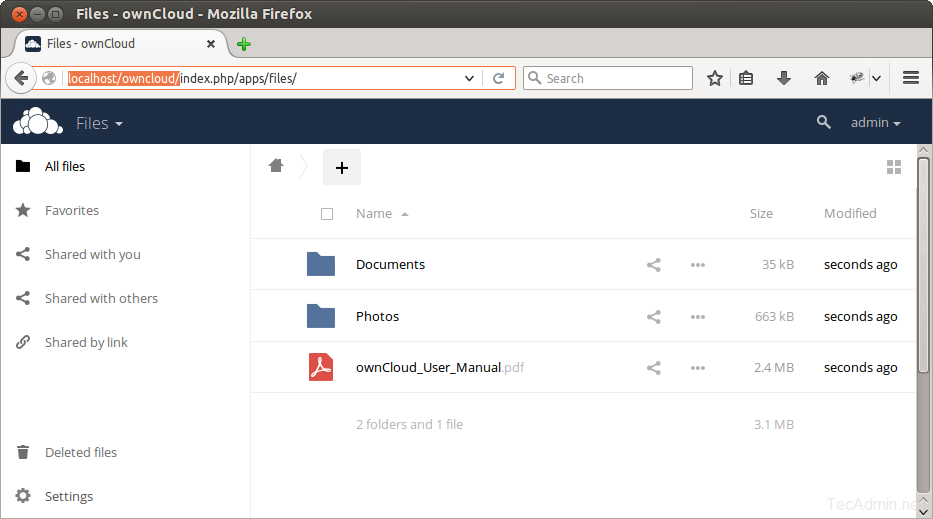
After completing the setup you will get the admin dashboard. Where you can create users, groups assigned them permissions, etc.
Conclusion
Congratulations! You have successfully installed ownCloud on your Fedora Linux system. You can now start uploading files, sharing documents, and enjoying your private cloud storage. Remember, always keep your system and applications updated for security and performance improvements.


2 Comments
You have only HALF of these commands preceded by “sudo”, but in fact *ALL* of them have to be done that way. Either that or just do a “sudo -i” and skip the sudo command going forward.
And as has been the case for EVERY tutorial for setting up Nextcloud/Owncloud, there is NO explanation of what values need to be used with mysql_secure_installation. So we have to make wild and probably wrong decisions. Nnd with the “GRANT ALL ON owncloud.* to ‘owncloud’@’localhost’ IDENTIFIED BY ‘_password_’;” command, do we chose our own password, or does Owncloud have to be hard-coded to that one specific password?
In the end, as has been the case with **EVERY** Nextcloud/Owncloud tutorial, all we get is a completely non-functioning server.
There must be something other than these two, because these obviously will never work.
Great tutorial. But I would recommend to use Nextcloud instead. It works very similar but has a lot more features, is faster and 100% open source. The original developers of Owncloud moved all to Nextcloud. But most of your tutorial should work 100% with Nextcloud. 🙂