
pgAdmin is a web-based interface for managing PostgreSQL database instances. With the help of pgAdmin4, We can create, access databases, run queries over databases easily. pgAdmin4 is available in both web and desktop versions. We can install it on a nix based systems, macOS, and Windows from official packages. The latest pgAdmin4 is helpful for managing PostgreSQL 9.2 and above versions.
This tutorial will guide you through installation of pgAdmin4 on Debian Linux system.
Prerequisites
You must have PostgreSQL server installed on your system via an official apt repository. If you don’t have installed PostgreSQL, use below link to install.
Install PostgreSQL on Debian 9
Install pgAdmin4 on Debian
pgAdmin4 packages are available under PostgreSQL official apt repository. We assume you already have configured apt repository during the installation of the database server.
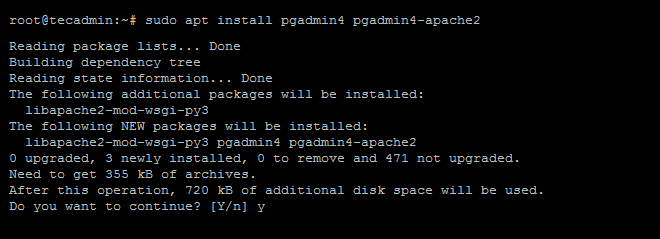
Execute below command on the terminal to begin pgAdmin4 installation on Debian.
sudo apt-get install pgadmin4 pgadmin4-apache2
The package pgadmin4-apache2 will integrate pgAdmin4 with Apache2 web server.
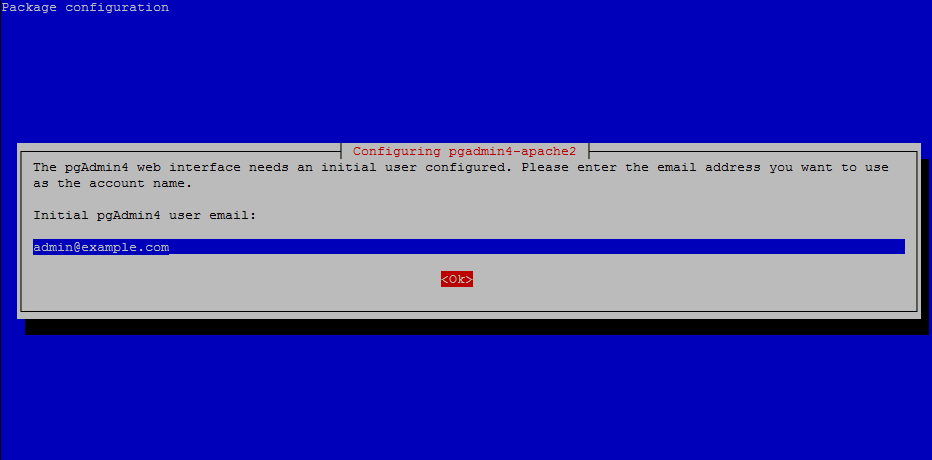
During the installation, you are required to setup pgAdmin4 admin login.
Enter an email address to use as admin login id for your pgAdmin4 web interface. You can use any address of your choice.
Then click OK.
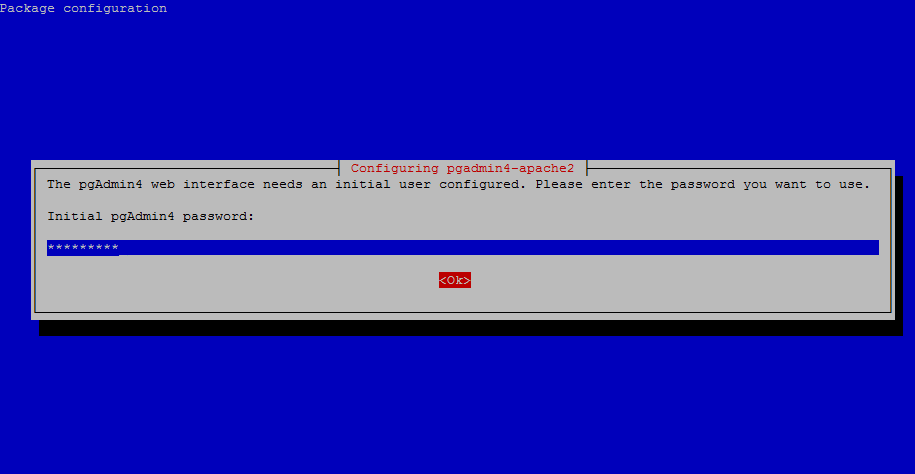
Now this will prompt to input password for the administrator account.
This will complete the installation of pgAdmin4 on your system. This will also make required changes on your local PostgreSQL system for connection.
Now, pgAdmin4 is ready to use. Let’s connect pgAdmin4 with PostgreSQL database.
Configure pgAdmin4 with PostgreSQL
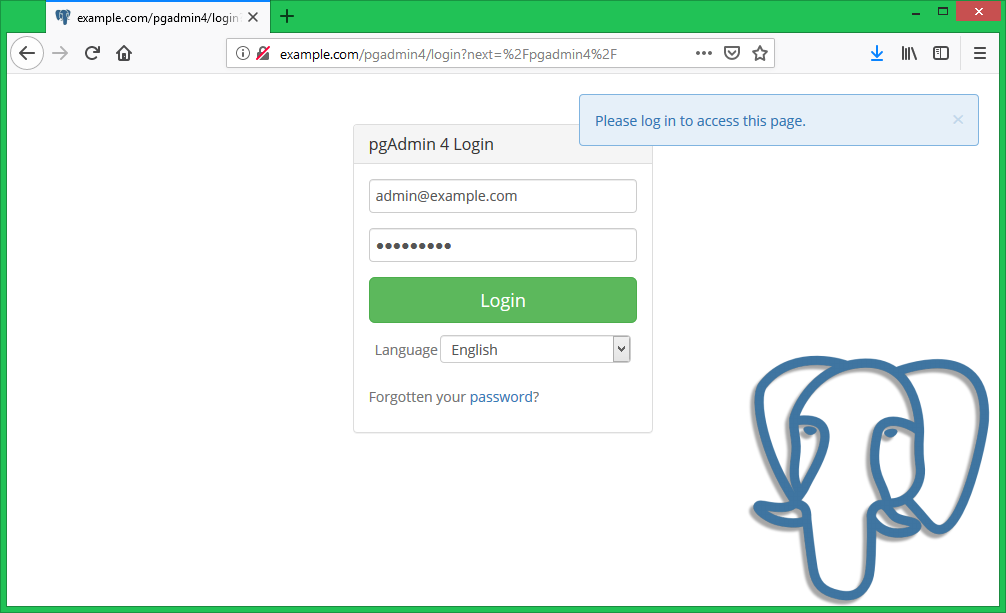
You have successfully installed pgAdmin4 on your Debian system. Now you can access pgAdmin4 in your favorite web browser.
Use servers IP address or domain name followed by /pgAdmin4 as subdirectory URL.
http://example.com/pgAdmin4
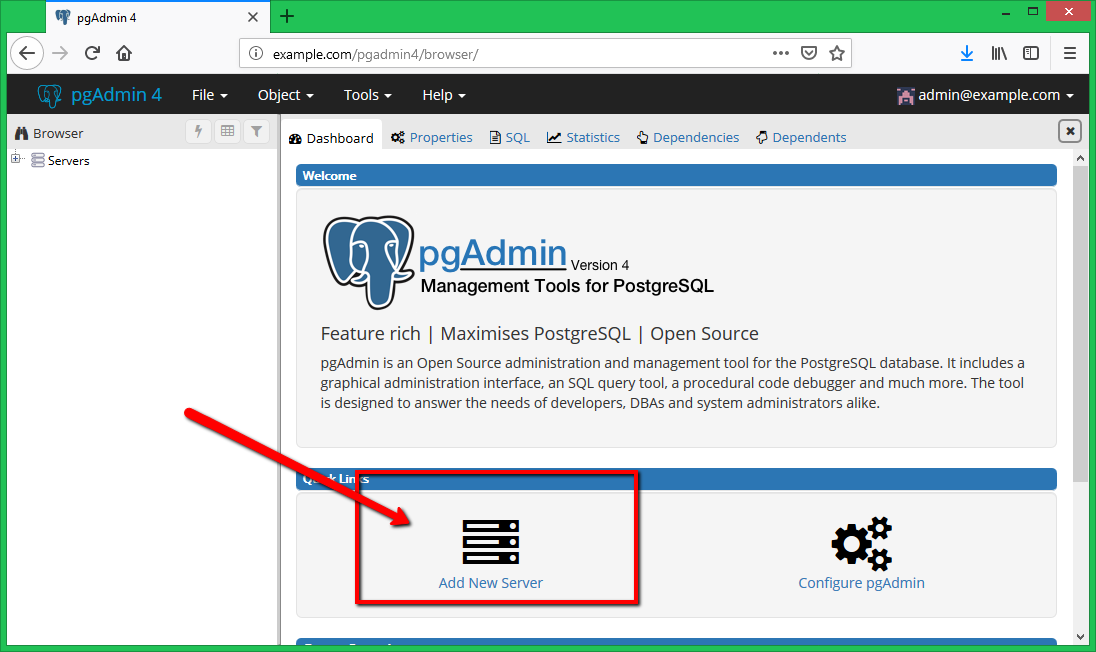
After successful login, you will be redirected to pgAdmin4 dashboard. As this is a new installation, there will be no servers connected.
Now, connect your first PostgreSQL instance by clicking on “Add New Server“.
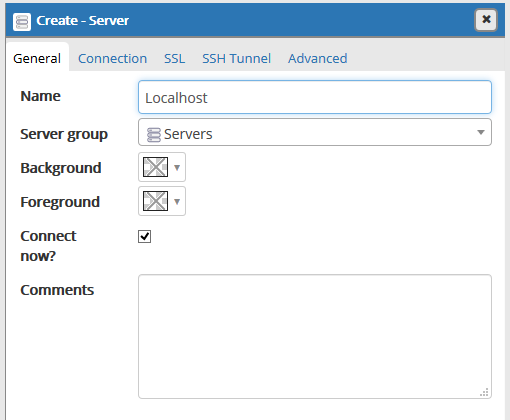
This will open a popup window. This tutorial is using the basic settings to connect the database instance. Enter the user-friendly name for the new instance connection under the General tab.
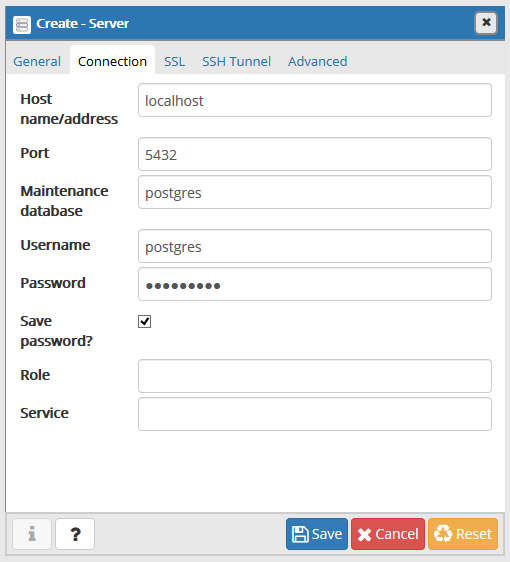
Then switch to Connection tab. Enter hostname or IP address of your PostgreSQL instance. In my case, it’s running on localhost system, so I just the put localhost as the hostname. Then enter the username and password for PostgreSQL authentication.
After that click Save button.
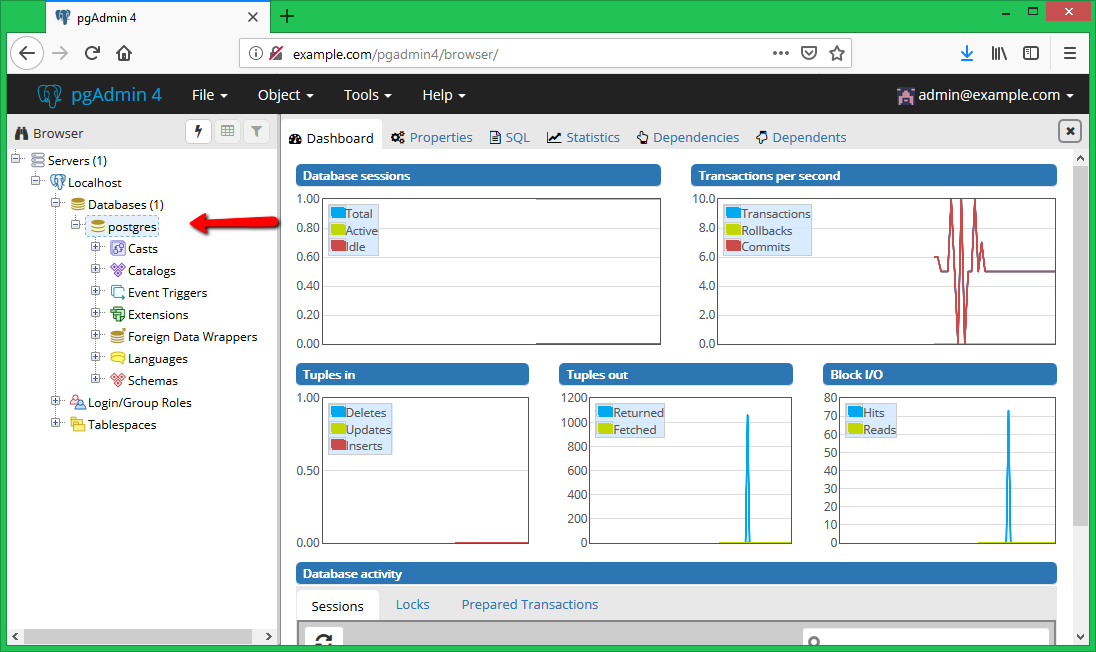
After successful adding new instance, you will see an instance in the left sidebar. Here you can manage the database instance.
Conclusion
You have installed pgAdmin4, a web-based interface for the PostgreSQL server management. Now connect as many as PostgreSQL instances with the pgAdmin4.
7 Comments
Hola…muy bueno el tuto, mi duda es cuando quiero realizar un backup a una base de datos me arroja un error de dump??, como puedo solucionar este error.
you need to reset postgres database user password.
Run sudo -u postgres psql postgres.
\password postgres.
Enter a password.
Close psql. \q.
Login Again
I can’t connect to server because I don’t know password for user postgres
What is default password for user postgres or how to set password for user postgres?
it works
try /pgadmin4
(in lowercase)
Doesn’t work on Debian 9. I get a 404, when accessing /pgAdmin4
Same
Hi guys,
same issue
please try /pgadmin4
(in lowercase)
it works!