Phalcon is a high performance Php framework with MVC support. It is a very useful framework for developing dynamic applications rapidly. This article will help you install and enable the Phalcon PHP framework in your Ubuntu system.
Prerequsities
Firstly you need to install some prerequisites packages in your system using the following commands.
sudo apt-get install gcc libpcre3-dev software-properties-common
Then install PHP 5.6 or later version with required modules.
sudo add-apt-repository ppa:ondrej/php
sudo apt-get update
sudo apt-get install php php-curl php-gd php-json php-mbstring
Install Apache2
sudo apt-get install apache2 libapache2-mod-php
Install MySQL
sudo apt-get install mysql-server php-mysql
Install Phalcon PHP Framework
Phalcon framework is available as of PHP module. Run the following command to install.
sudo apt-get install php-phalcon
Verify Phalcon
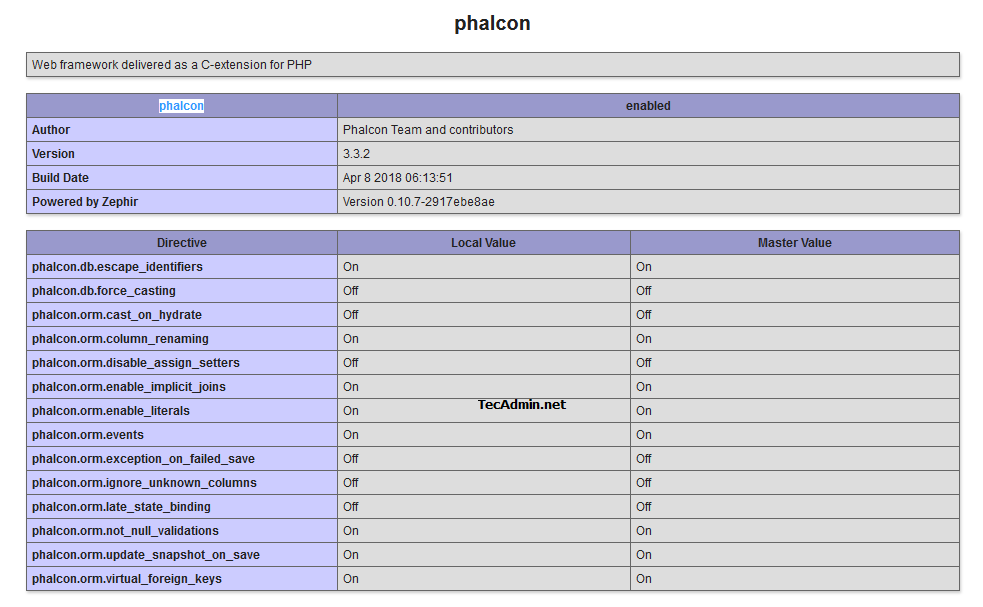
Before proceeding for development, make sure Phalcon PHP framework has been successfully installed with your PHP.
Create a info.php on your web document root with following content and access it in browser.
<?php
  phpinfo();
?>
You will see output like below.
Create Project with Phalcon
As you have successfully installed Phalcon PHP module to your system. Let’s visit below URL to install Phalcon Developer Tools for creating a project and add components in the project.
https://tecadmin.net/creating-project-with-phalcon-developer-tools-in-linux/


1 Comment
Hey Rahul,
Thanks for the steps. Everything worked, except adding the extensions.
For that, I had to do the following:
#Add extension
echo ‘extension=phalcon.so’ | sudo tee -a /etc/php5/mods-available/phalcon.ini
cd /etc/php5/mods-available
sudo php5enmod phalcon
# Restart apache
sudo /etc/init.d/apache2 restart
I can’t take credit as I found this mentioned elsewhere.
Thanks.
Sri