
This article is a step-by-step guide on how to install and configure phpMyAdmin on a Debian operating system. phpMyAdmin is a web-based application used for managing MySQL and MariaDB databases. It provides a graphical interface, making it easier to manage, create, and modify databases, tables, fields, etc.
Before we start, please ensure you have administrative access to the Debian system and that the LAMP (Linux, Apache, MySQL/MariaDB, PHP) stack is installed on your server.
Step 1: Update Your System
Firstly, you need to update your system to ensure that all the packages on the server are up-to-date. Open your terminal and execute the following command:
sudo apt-get update -ysudo apt-get upgrade -y
Step 2: Install phpMyAdmin on Debian
Once your system is up-to-date, you can install phpMyAdmin. Use the following command to install phpMyAdmin:
sudo apt-get install phpmyadmin
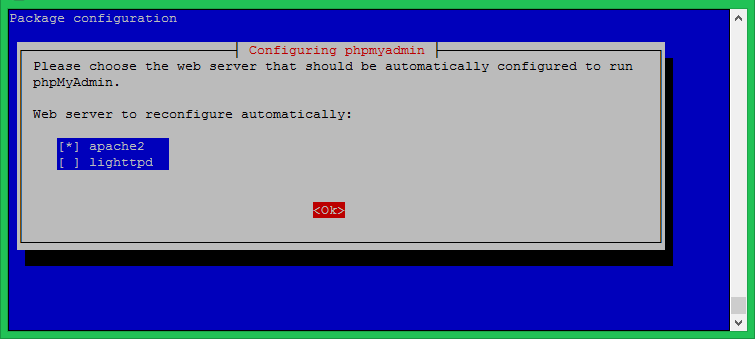
During the installation process, you will be asked to choose the web server to configure. Select ‘Apache2’ and continue.
For this option click ok.
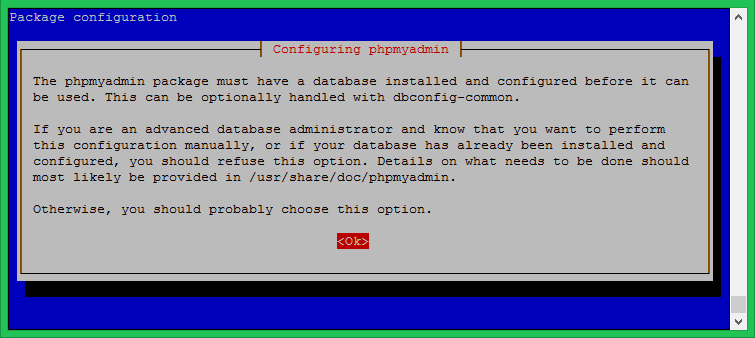
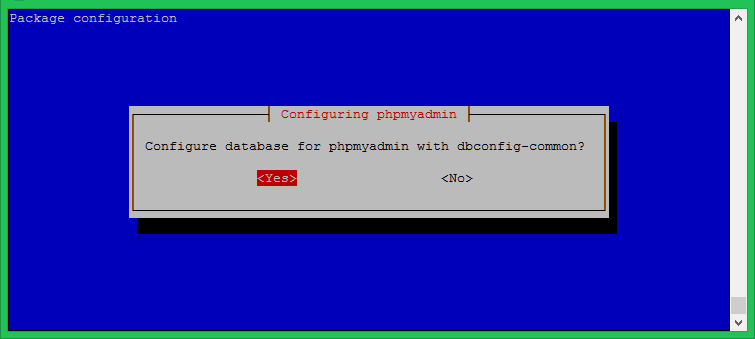
The installer will then prompt you to configure the database for phpMyAdmin with ‘dbconfig-common’. Choose ‘Yes’ and press ‘Enter’.
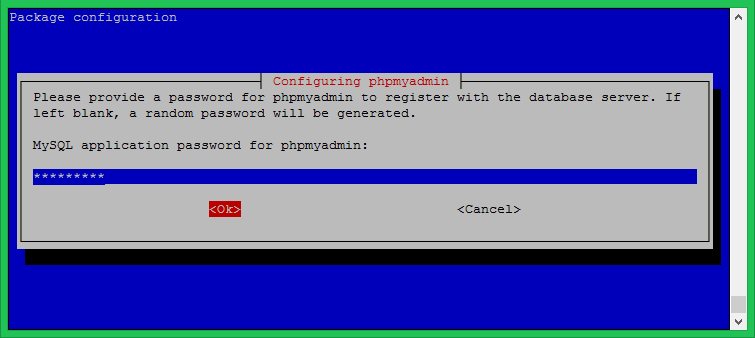
Next, you will be asked to set a password for phpMyAdmin to register with the database. Set a strong password and remember it.
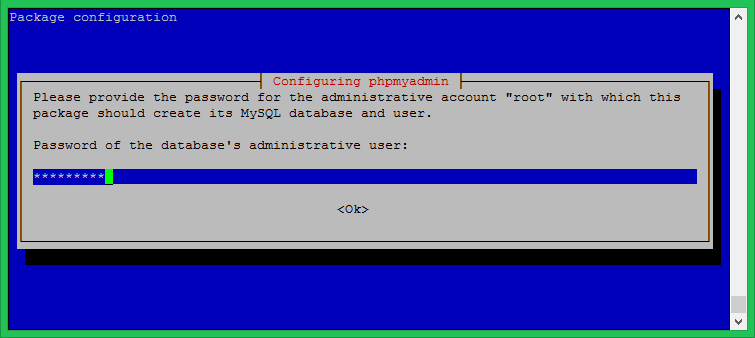
Enter MySQL root user password required by the installer to create new user and database.
Step 3: Enable Necessary PHP Extensions
phpMyAdmin requires several PHP extensions to function correctly. Enable them by typing:
sudo phpenmod mbstringsudo phpenmod mysqli
Then, you’ll need to restart the Apache service to apply the changes:
sudo systemctl restart apache2
Step 4: Secure Your phpMyAdmin Instance
By default, phpMyAdmin can be accessed from any IP address. However, this is not safe, and it is recommended to restrict the IP addresses that can access phpMyAdmin.
To restrict access, edit the Apache configuration file for phpMyAdmin:
sudo nano /etc/apache2/conf-available/phpmyadmin.conf
Find the line that reads <Directory /usr/share/phpmyadmin> and underneath it, add the line Require ip your_server_ip, replacing ‘your_server_ip’ with your actual server IP address. Save and close the file.
Finally, restart Apache again:
sudo systemctl restart apache2
Step 5: Access phpMyAdmin
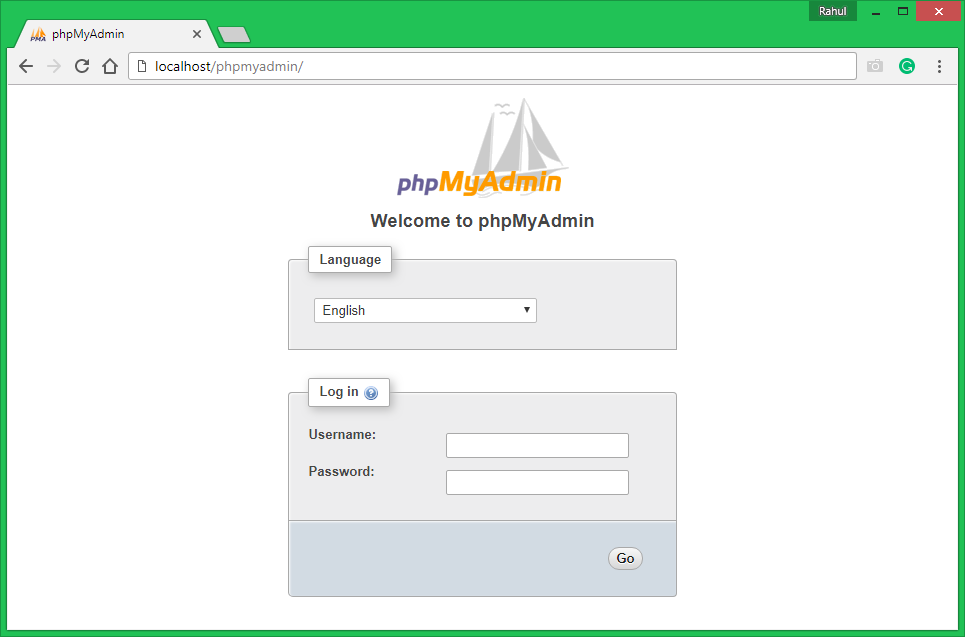
After completing the installation and setup, you can now access phpMyAdmin through your web browser. Just type http://your_server_ip/phpmyadmin in your browser, replace ‘your_server_ip’ with the actual IP of your server.
You will be presented with the login screen. Enter the username and password for the MySQL account you want to use, and you’re in!
Step 6: Test the Installation
To test if phpMyAdmin is working correctly, try creating a new database. If you’re able to create, view, and delete a database, it indicates that phpMyAdmin has been set up correctly.
Conclusion
Congratulations, you have successfully installed and configured phpMyAdmin on your Debian server. With phpMyAdmin, you can easily manage your MySQL and MariaDB databases through a web-based interface, greatly simplifying database management tasks.
Always remember that the phpMyAdmin interface should be protected since it can be a potential security risk if not properly secured. Regularly update your installation and follow security best practices to keep your databases safe.