phpMyadmin is the best web based client for accessing MySQL servers. It is freely available to download and install on your server. You can host this on any server running with Apache and PHP.
The phpMyAdmin is written on PHP. The current phpMyAdmin version is compatible with PHP 7.1 and newer and MySQL 5.5 or MariaDB 5.5 or newer.
This tutorial will help you to install and configure phpMyAdmin on Ubuntu 20.04 Linux system.
Step 1 – Install Apache and PHP
We are assuming you already have installed the MySQL server on Ubuntu system. So just install the other required packages to run and access phpMyAdmin.
sudo apt install apache2 wget unzipsudo apt install php php-zip php-json php-mbstring php-mysql
Once the installation finished, enable and start Apache web server.
sudo systemctl enable apache2sudo systemctl start apache2
Step 2 – Install phpMyAdmin on Ubuntu 20.04
phpMyAdmin is also available under the default packages repository but mostly they have older version. In this tutorial, we will download latest phpMyAdmin and configure on our system.
Your system is ready for the phpMyAdmin installation. Download the latest phpMyAdmin archive from the official download page, or use the below commands to download phpMyAdmin 5.1.1 on your system.
After downloading extract archive and move to the proper location.
wget https://files.phpmyadmin.net/phpMyAdmin/5.1.1/phpMyAdmin-5.1.1-all-languages.zipunzip phpMyAdmin-5.1.1-all-languages.zipmv phpMyAdmin-5.1.1-all-languages /usr/share/phpmyadmin
Next, create tmp directory and set the proper permissions.
mkdir /usr/share/phpmyadmin/tmpchown -R www-data:www-data /usr/share/phpmyadminchmod 777 /usr/share/phpmyadmin/tmp
Step 3 – Configure phpMyAdmin
Now, you need to configure web server to serve phpMyAdmin on network. Create Apache configuration file for phpMyAdmin and edit in text editor:
sudo vi /etc/apache/conf-available/phpmyadmin.conf
add the below content to file.
1 2 3 4 5 6 7 8 9 10 11 12 13 14 15 16 17 18 19 | Alias /phpmyadmin /usr/share/phpmyadmin Alias /phpMyAdmin /usr/share/phpmyadmin <Directory /usr/share/phpmyadmin/> AddDefaultCharset UTF-8 <IfModule mod_authz_core.c> <RequireAny> Require all granted </RequireAny> </IfModule> </Directory> <Directory /usr/share/phpmyadmin/setup/> <IfModule mod_authz_core.c> <RequireAny> Require all granted </RequireAny> </IfModule> </Directory> |
Save your file. Press ESC key to switch to command more. Then type : (colon) and type w after the colon and hit Enter.
After making all the changes, make sure to start the Apache service to reload all settings.
sudo a2enconf phpmyadminsudo systemctl restart apache2
Step 4 – Adjusting FirewallD
The systems with enabled firewalls need to allow HTTP service from the firewall. Run the below commands to open a port for the webserver in the firewall.
sudo firewall-cmd --permanent --add-service=httpsudo firewall-cmd --reload
Step 5 – Access phpMyAdmin
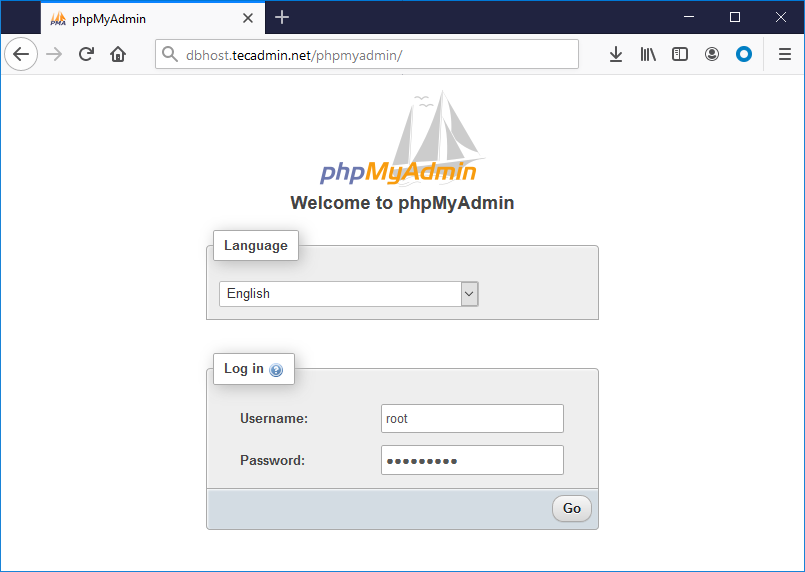
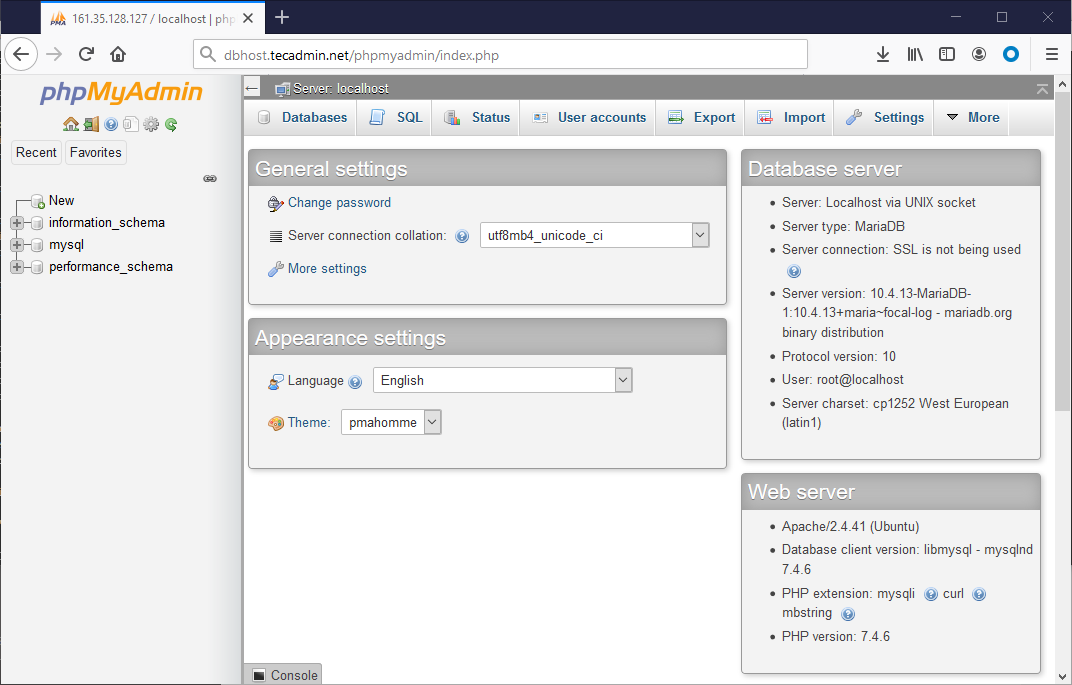
All done. You have finished the setup with the phpMyAdmin on Ubuntu Linux system. Now access phpMyAdmin with the server IP address or domain name.
http://your-server-ip-domain /phpmyadmin
Replace
Log in with the username and password used to access MySQL on the command line.
Conclusion
You have successfully configured phpMyAdmin on Ubuntu system. Let’s disable root user login for the phpMyAdmin for security purposes.


17 Comments
Hello Rahul,
Thank you fro quick reply to all above questions.
I’m not able to save the file vi /etc/apache2/conf-available/phpmyadmin.conf. It showing as “phpmyadmin.conf” E166: Can’t open linked file for writing
Can you help me?
Hello,
This is not working for me, IDK what could be the issue. I’m running ubuntu 20.04 on a local machine with PHP 8.1 Everything works OK and I don’t get any errors, but when I go to localhost/phpmyadmin I just see the content of the index.php file
<?php
declare(strict_types=1);
use PhpMyAdmin\Common;
use PhpMyAdmin\Routing;
if (! defined('ROOT_PATH')) {
// phpcs:disable PSR1.Files.SideEffects
define('ROOT_PATH', __DIR__ . DIRECTORY_SEPARATOR);
// phpcs:enable
}
if (PHP_VERSION_ID < 70205) {
die('PHP 7.2.5+ is required.Currently installed version is: ‘ . PHP_VERSION . ”);
}
// phpcs:disable PSR1.Files.SideEffects
define(‘PHPMYADMIN’, true);
// phpcs:enable
require_once ROOT_PATH . ‘libraries/constants.php’;
/**
* Activate autoloader
*/
if (! @is_readable(AUTOLOAD_FILE)) {
die(
‘File ‘ . AUTOLOAD_FILE . ‘ missing or not readable.’
. ‘Most likely you did not run Composer to ‘
. ‘‘
. ‘install library files.’
);
}
require AUTOLOAD_FILE;
global $route, $containerBuilder, $request;
Common::run();
$dispatcher = Routing::getDispatcher();
Routing::callControllerForRoute($request, $route, $dispatcher, $containerBuilder);
Make sure you have installed the “libapache2-mod-php8.1” package on your system.
I got this error when i ran a2enconf phpmyadmin
ERROR: Conf phpmyadmin does not exist!
Use apache2 instead:
sudo nano /etc/apache2/conf-available/phpmyadmin.conf
Hi Rahul,
Fastest applied and successful first try tutorial I have ever done.
very good work.
I got 403 forbidden error after following these steps help
Great tutorial.
just do sudo apt-get install phpmyadmin
Yes, but generally the repositories contains older package versions. That’s why I prefer to install phpmyadmin from source code.
I tried this first but it did not work. It did not create phpmyadmin.conf for some reason.
This tutorial worked like a charm!
how i save
step 3 PLS HELP ME XD
To save file, Press ESC key to switch to command more. Then type
:(colon) and typewafter the colon and hit Enter.Thanks, that was a big help Rahul. Just a suggestion, I think
`vi /etc/apache/conf-enabled/phpmyadmin.conf`
should be
`vi /etc/apache2/conf-available/phpmyadmin.conf`
Thanks Jeff, Updated tutorial.
It still shows sudo vi /etc/apache/conf-available/phpmyadmin.conf. Probably need to clear cache or something 🙂