
Postfix is fast and popular SMTP server widely used. The main job of Postfix is to relay mail locally or to an intended destination outside the network. Some of the most popular SMTP servers are Sendmail, Postfix, and Qmail. This article will help you to install Postfix on Ubuntu 18.10, 18.04 LTS, 16.04 LTS, and 14.04 LTS systems.
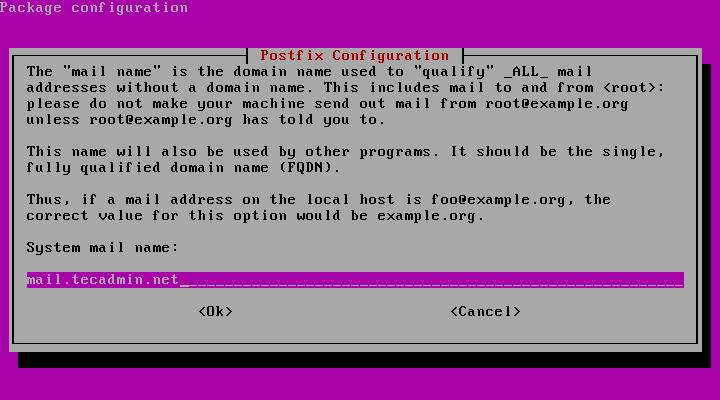
For this tutorial, we are using the FQDN as mail.tecadmin.net for configuring this host.
Step 1 – Install Postfix
Postfix packages are available under default repositories of Ubuntu operating systems. Simply use the following command to install Postfix SMTP server on your Ubuntu system.
sudo apt-get install postfix
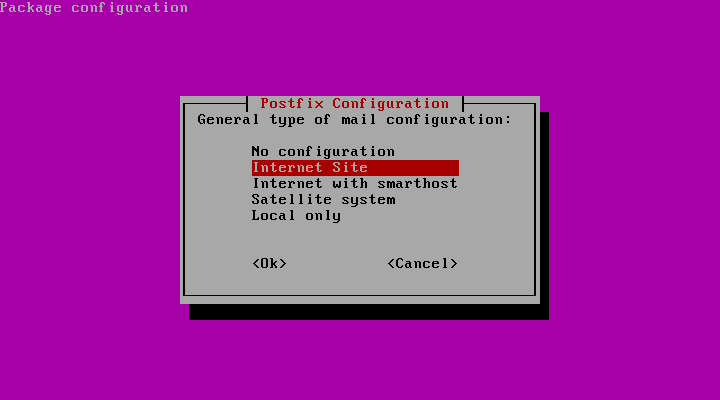
The installation process will ask you for some inputs like below. Just
Step 2 – Configure Postfix
Let’s start Postfix configuration. Edit Postfix configuration file /etc/postfix/main.cf in your favourite editor and make following changes. Change myhostname, mydomain as per your requirements.
  myhostname = host.tecadmin.net
  mydomain = tecadmin.net
  myorigin = $mydomain
  mydestination = $myhostname, localhost, $mydomain, localhost.localdomain
  mynetworks = 127.0.0.0/8, /32
  relay_domains = $mydestination
  inet_interfaces = all
  inet_protocols = all
  home_mailbox = Maildir/
Step 3 – Restart Postfix Service
As we have done basic Postfix configuration, So restart Postfix service to read changes of configuration. Also, configure to autostart on system boot.
sudo service postfix restart
3 Comments
Hi can you please share the steps of prerequisites for this process (how to add FQDN)
Cant I use Squirrelmail as a web client. Or what other web client for email do you recomend.
Thanks in advance.
hi i get an error on the command chkconfig:
“chkconfig command not found”
Ubuntu 15.04