The PostgreSQL Development Team has announced the latest version PostgreSQL 12. PostgreSQL is an open-source object-relational database system. It is one of the leading database servers used for production servers. PostgreSQL allows us to execute stored procedures in various programming languages, like C/C++, Python, Java, Perl, Ruby, and its own PL/pgSQL, which is similar to Oracle’s PL/SQL. This tutorial will help you with installing the PostgreSQL database server on your Ubuntu 18.04 LTS, Ubuntu 16.04 LTS, and 14.04 LTS systems.
- Recommended => Install pgAdmin4 on Ubuntu
Step 1 – Enable PostgreSQL Apt Repository
PostgreSQL packages are also available in default Ubuntu repository. So you need to add PostgreSQL apt repository to your system suggested on official PostgreSQL website using following command.
Start with the import of the GPG key for PostgreSQL packages.
sudo apt-get install wget ca-certificates
wget --quiet -O - https://www.postgresql.org/media/keys/ACCC4CF8.asc | sudo apt-key add -
Now add the repository to your system.
sudo sh -c 'echo "deb http://apt.postgresql.org/pub/repos/apt/ `lsb_release -cs`-pgdg main" >> /etc/apt/sources.list.d/pgdg.list'
Step 2 – Install PostgreSQL on Ubuntu
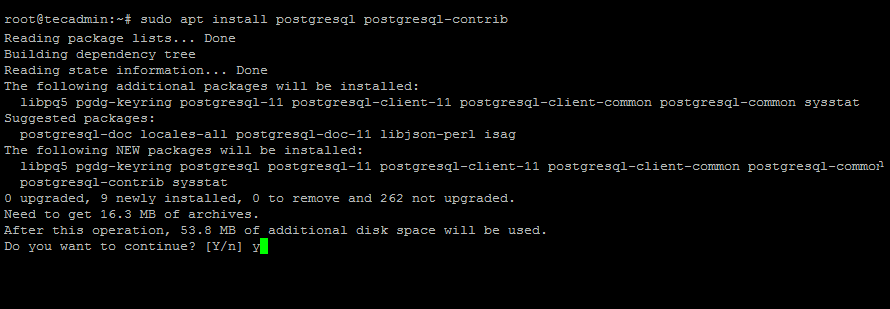
Now as we have added PostgreSQL official repository in our system, First we need to update the repository list. After that install Latest PostgreSQL Server in our Ubuntu system using the following commands.
sudo apt-get update
sudo apt-get install postgresql postgresql-contrib
Multiple other dependencies will also be installed. PostgreSQL 12 is the latest available version during the last update of this tutorial.
Step 3 – Create User for PostgreSQL
By default, PostgresQL creates a user ‘postgres’ with the role ‘postgres’. It also creates a system account with the same name ‘postgres’. So to connect to Postgres server, log in to your system as user postgres and connect the database.
sudo su - postgres
psql
Now configure PostgreSQL to make is accessible by your normal users. Change your_username with your actual user already created on your Ubuntu system.
postgres-# CREATE ROLE your_username WITH LOGIN CREATEDB ENCRYPTED PASSWORD 'your_password';
postgres-# \q
Then switch to the user account and run createdb command followed by the database name. This will create a database on PostgreSQL.
su - your_username
createdb my_db
After that connect to the PostgreSQL server. You will be logged in and get database prompt. To list all available databases use these commands.
psql

rahul=> \list
                              List of databases
   Name    |  Owner   | Encoding | Collate |  Ctype  |   Access privileges
-----------+----------+----------+---------+---------+-----------------------
 postgres  | postgres | UTF8     | C.UTF-8 | C.UTF-8 |
 my_db     | rahul    | UTF8     | C.UTF-8 | C.UTF-8 |
 template0 | postgres | UTF8     | C.UTF-8 | C.UTF-8 | =c/postgres          +
           |          |          |         |         | postgres=CTc/postgres
 template1 | postgres | UTF8     | C.UTF-8 | C.UTF-8 | =c/postgres          +
           |          |          |         |         | postgres=CTc/postgres
To disconnect from PostgreSQL database command prompt just type below command and press enter. It will return you back to the Ubuntu command prompt.
postgres-# \q
Conclusion
Your PostgreSQL installation has been completed successfully. Let’s move to install Graphical user interface for PostgreSQL like pgAdmin4 and phpPgAdmin of Ubuntu systems.


39 Comments
This also works on Ubuntu 20.04 LTS
Rahul, I owe you! Many thanks!
This post really got me out of a headache trying to understand the basics of setting up postgresql.
I have 2 questions though.
1 ) step 3 : I create a user that is the sudo user of the computer:
postgres-# CREATE ROLE your_username WITH LOGIN CREATEDB ENCRYPTED PASSWORD ‘my_postgres_password’;
But when I try to log with “$ su – my_user_name”, I am expected to enter my system password. When do I need the “my_postgres_password”?
2) When I run “psql my_usr_name” the first time, it did not work because psql was expecting a database name called “my_usr_name” and not “myDB”. I had to create a database with the name of the user. It works now, but I find that peculiar. In your example, you have no db called “rahul”.
Thanks for the nice post.
short, informative, and usefull post.
Rahul, thanks for your clear instructions regarding the Postgresql installation.
It gave me
>gpg: no valid OpenPGP data found
How I can resolve this?
Thanks in advance!
Awesome tutorial!
Great short and descriptive. Amazing. Thank you RAHUL !
May I know how to restore database from docker postgres? Thank you
sudo usermod -a -G sudo postgres 🙂
How can I know what the password is and how can I change it?
I tried : sudo -u postgres psql
but got : postgres is not in the sudoers file. This incident will be reported.
Did you get this resolved? I am having the same issue.
you are executing the command with non sudoers user, you should try with user that has sudo access
Is the ca-certificates package needed for PostgreSQL?
No, This is used by wget and Apt package manager for verification of 3’rd party packages.
Works fine for Ubuntu! Thanks!!
sudo sh -c ‘echo “deb http://apt.postgresql.org/pub/repos/apt/ `cat /etc/os-release | grep UBUNTU_CODENAME | sed s/UBUNTU_CODENAME=//`-pgdg main” > /etc/apt/sources.list.d/pgdg.list’
I get an apt error:
E: The repository ‘http://apt.postgresql.org/pub/repos/apt sylvia-pgdg Release’ does not have a Release file
Is there a way to fix this?
Hi. Do you use Mint? Please, run this:
root@mint2:/home/shmakovpn# cat /etc/os-release
NAME=”Linux Mint”
VERSION=”19 (Tara)”
ID=linuxmint
ID_LIKE=ubuntu
PRETTY_NAME=”Linux Mint 19″
VERSION_ID=”19″
HOME_URL=”https://www.linuxmint.com/”
SUPPORT_URL=”https://forums.ubuntu.com/”
BUG_REPORT_URL=”http://linuxmint-troubleshooting-guide.readthedocs.io/en/latest/”
PRIVACY_POLICY_URL=”https://www.linuxmint.com/”
VERSION_CODENAME=tara
UBUNTU_CODENAME=bionic
root@mint2:/home/shmakovpn#
Then run
root@mint2:/home/shmakovpn# lsb_release -cs
tara
— — —
Thus you should use UBUNTU_CODENAME instead of VERSION_CODENAME
—
Try this
cat /etc/os-release | grep UBUNTU_CODENAME | sed ‘s/UBUNTU_CODENAME=//’
bionic (in my case)
—–
So the solution is
sudo sh -c ‘echo “deb http://apt.postgresql.org/pub/repos/apt/ `cat /etc/os-release | grep UBUNTU_CODENAME | sed s/UBUNTU_CODENAME=//`-pgdg main” > /etc/apt/sources.list.d/pgdg.list’
Enjoy
Cool mate. This works on my 14.04. Thanks!
Thank you. However, as far as I know phpPgAdmin is not supporting PostgreSQL 10. Please take that into account.
Very clear and easy-to-follow tutorial here.
Thanks! You’re help me for make progress for my final project.
Awsome, worked like a charm.
It was breeze… I was able to install it in less than 2 minutes on my Ubuntu 16.04.
Many thanks!
We installed 9.6 but it did not get loaded completely or correctly. Learned that a few directories that should have had something in them were empty, more or less confirming that the install was incorrect. With your instructions we were able to get it loaded correctly.
Thanks!
Thanks very much for this tutorial
\conninfo and \q
Thanks 🙂
In newer versions of psql, you need to run
\conninfo
not
conninfo
🙂
Thank you for posting this tutorial.
I am running into issue while apt-get update. I see following two errors. I did try to follow bunch of links which mentioned about this but no luck so far.
Err http://apt.postgresql.org vivid-pgdg/main i386 Packages
404 Not Found [IP: 213.189.17.228 80]
W: Failed to fetch http://apt.postgresql.org/pub/repos/apt/dists/vivid-pgdg/main/binary-i386/Packages 404 Not Found [IP: 213.189.17.228 80]
Run smooth! Thanks
Thanks
I do all the steps but I need the graphic interface. When I search for “postgre” in my computer it seems that postgresql is not installed!
Instead, when I do all the last steps it seems that it is stalled, so I don’t understand anything:
user@COMPUTER2:~$ sudo su – postgres
[sudo] password for user:
postgres@COMPUTER2:~$ psql
psql (9.5.1)
Type “help” for help.
postgres=# conninfo
You are connected to database “postgres” as user “postgres” via socket in “/var/run/postgresql” at port “5432”.
postgres=#
How can I install the graphic interface?
Thank you!
You can install pgadmin3. If you are using ubuntu download pgadmin3 with sudo apt-get install pgadmin3 command
Thanks! It helps a lot!!
How to change password. what is the default / current password
sudo -u postgres psql
# \password
большое спасибо!
thank for this tutorial..