Roundcube is a self hosted webmail interface. You can host this on your own server and access emails from your system though a web interface. This tutorial will help you to install Roundcube Webmail on CentOS 7 Linux system.
Before We Begin
- Launched a CentOS 7 instance on DigitalOcean.
- Login to instance via SSH as root account
- To access user Mailbox you need to install and configure Dovecot on your system.
Step 1 – Install LAMP
Roundcube webmail required PHP programming language to run on server. We will use Apache as web server and MySQL as database server to configure Roundcube.
First of all enable the required yum repository contains updated packages:
yum install epel-release
rpm -Uvh http://rpms.famillecollet.com/enterprise/remi-release-7.rpm
rpm -Uvh  https://repo.mysql.com/mysql80-community-release-el7-1.noarch.rpm
Once you enabled the repositories, install Apace and PHP with required PHP extensions:
sudo yum --enablerepo=epel,remi-php74 install httpd \
  mysql mysql-server \
  php php-common php-curl php-json php-xml php-mbstring php-imap \
  php-mysql php-pear-DB php-pspell php-imagick php-mcrypt php-cli php-gd
Once the installation finished. enable and start the Apache and MySQL database service.
systemctl enable httpd.service
systemctl start httpd.service
systemctl enable mysqld.service
systemctl start mysqld.service
You can find the MySQL root password from log files. Run the below command to find the password.
grep "A temporary password" /var/log/mysqld.log | tail -n1
Now you have the MySQL root account password, let’s run the post installation script to secure database server.
sudo mysql_secure_installation
Complete the configuration wizard. Your CentOS 7 system is ready for the Roundcube installation.
Step 2 – Setup Roundcube Database
We are using MySQL as database server for the Roundcube webmail. First login to the MySQL server via command line.
mysql -u root -p
Then create database and a user for authentication:
mysql> CREATE DATABASE roundcubemail;mysql> CREATE USER 'roundcube'@'localhost' IDENTIFIED BY 'DFksfkksd89k32&ks';mysql> GRANT ALL ON roundcubemail.* to 'roundcube'@'localhost';mysql> FLUSH PRIVILEGES;mysql> exit
Step 3 – Download Roundcube
Now, visit the Roundcubemail official github repository and download the latest avaialble release. At the time of writing this tutirial, Roundcubemail 1.4.3 is the latest available version. You can download it using the below command.
wget https://github.com/roundcube/roundcubemail/releases/download/1.4.3/roundcubemail-1.4.3-complete.tar.gz
Once download finished, extract it. Then move the directory to the proper location to configure as webroot.
tar -zxvf roundcubemail-1.4.3-complete.tar.gz
mv roundcubemail-1.4.3 /var/www/html/roundcubemail
And set the proper username and permissions to run on web server. The default Apache server runs with user and group named “apache”. The Nginx users can use “www-data” as username and group.
chown -R apache:apache /var/www/html/roundcubemail
chmod -R 755 /var/www/html/roundcubemail
Step 4 – Configure Apache Web Server
In this step, we need to configure Apache server to host Roundcubemail application. Create an Apache virtualhost configuration file and add the following values.
vim /etc/httpd/conf.d/roundcubemail.conf
1 2 3 4 5 6 7 8 | <VirtualHost *:80> ServerAdmin admin@example.org ServerName mail.tecadmin.net DocumentRoot /var/www/html/roundcubemail <Directory /var/www/html/roundcubemail> Allowoverride all </Directory> </VirtualHost> |
Save your file and restart Apache service.
service httpd restart
Step 5 – Run Roundcube Web Installer
The Roundcube webmail is configured with Apache. You can access application in your web browser. Here you need to complete the web installer wizard, Which you can access as following:
Open the below URL in browser. Change domain with your domain name:
https://mail.tecadmin.net /installer/
On the first page, you will see the server environment. Make sure there is no error message showing. All the required PHP extensions are properly installed.
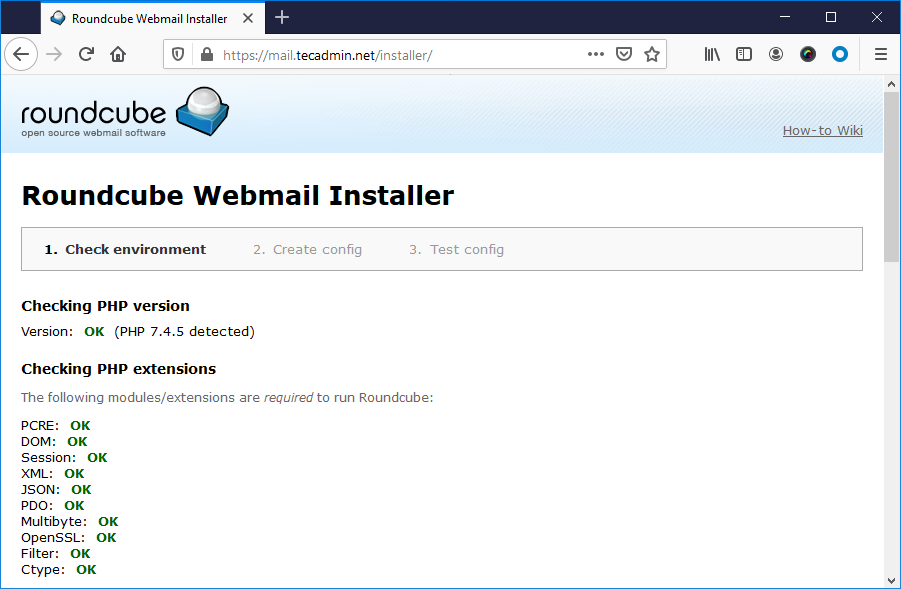
Once you verify that all the required extension’s are installed. Slide down to bottom of page and click “Next” to continue wizard.
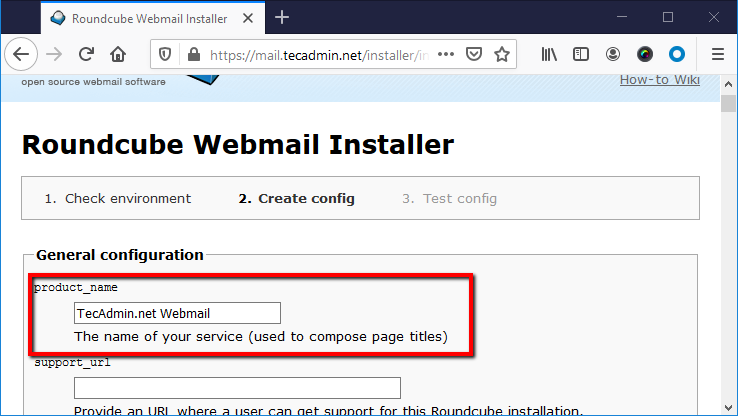
Enter the product name as per your requirements. This will be identification of your webamil. Generally, You will see this in page titles.
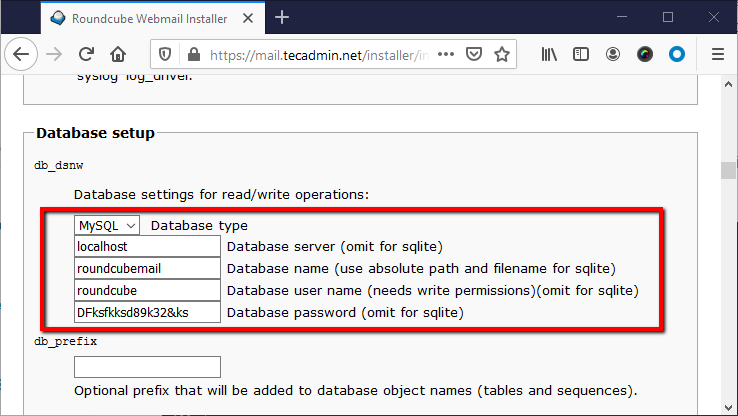
Slide down to the “Database Setup” section. Update the details as per created database and user in above steps.
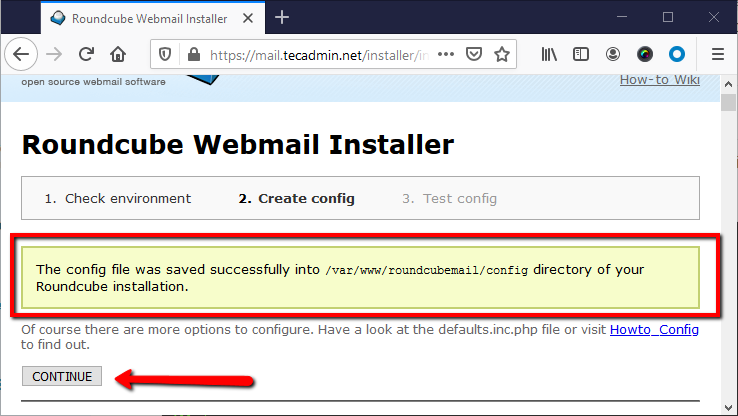
Again slide down to the bottom of the page and click on “CREATE CONFIG” button. You will see the message like below screenshot.
Once the configuration file created successfully, click on “Continue” button.
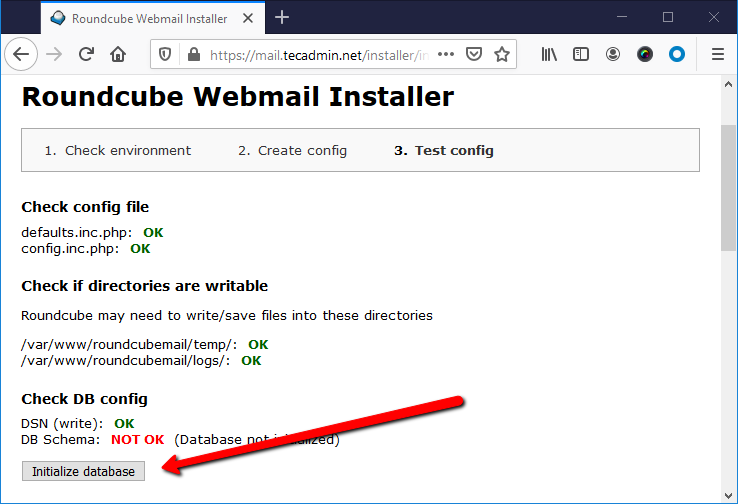
In the final page of wizard, click on “Initialize database” button. If you don’t see any button, make your the database details you entered in previous step are correct.
The installation wizard has been completed here.
Step 6 – Access Roundcube Web Interface
As the installation has been completed. The wizard will show you a message to remove installer directory. You need to remove it manually. Do it with below command
sudo rm -rf /var/www/html/roundcubemail/installer/
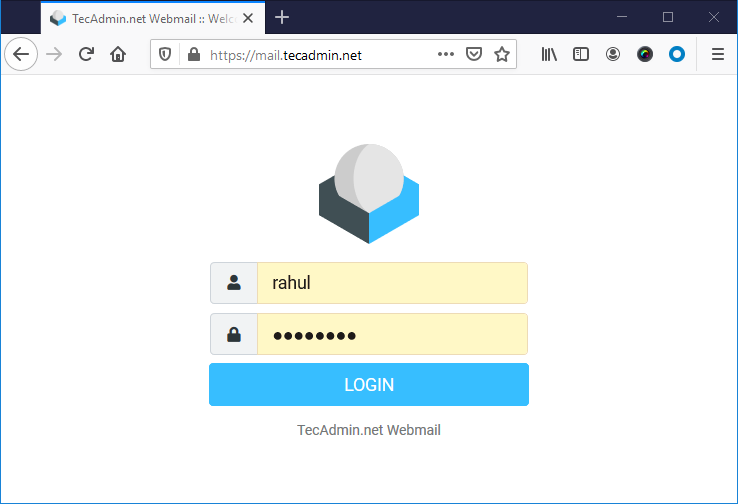
All done. Access the webmail interface in another tab with the domain you configured. You will see the login page. Enter the login details here:
If you see any error, make sure user is able to access mailbox with imap protocol on terminal. To verify connection connect imap using mutt.
mutt -f imap://rahul@localhost
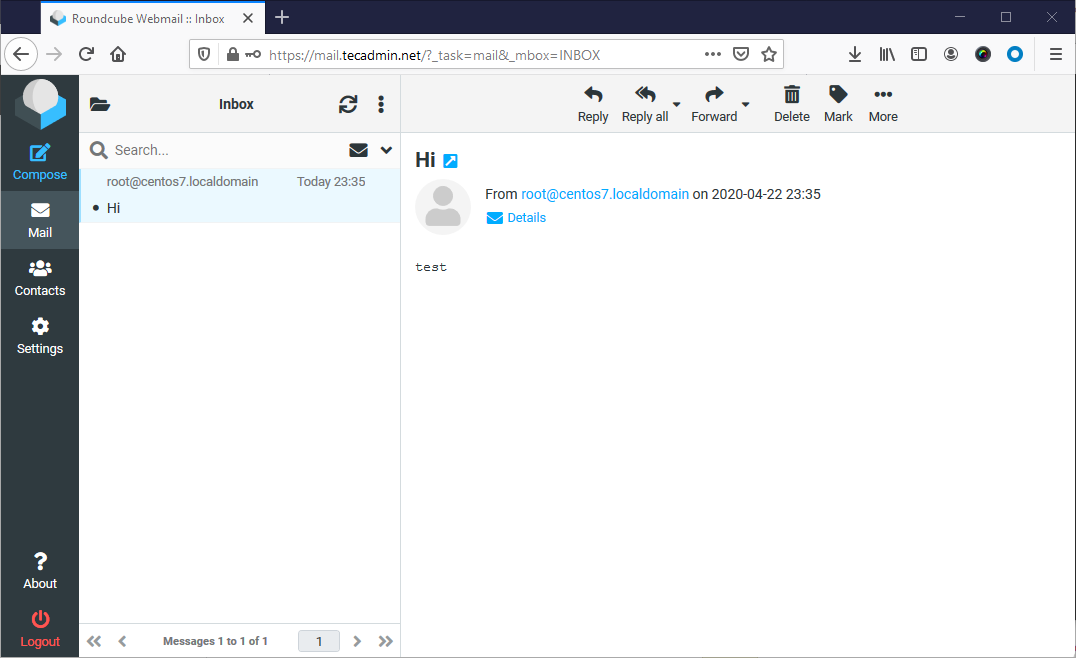
Once you logged in successfully on Roubcube webmail, you will see the dashbaoad like below. This will also show you the email from you account here.
If you are not seeing any emails here, you need to check Dovecot configuration. The most probably the Mailbox location configured on email server (postfox/sendmail) is not matching the location on Dovecot server.
Conclusion
In this tutorial, you have configured the Roundcube webmail interface on your CentOS 7 linux system. Let’s enjoy emailing with the webmail.
