Today, there are more than a few excellent code editors that developers can use to build and edit their code. For example, the cross-platform Visual Studio Code editor is a lightweight code editor that supports many different languages. Moreover, it has some neat features that help you quickly find and fix problems in your code.
With a built-in debugger, GitHub integration, and IntelliSense code completion, Visual Studio Code is a powerful tool for web developers and other coders using macOS. Since it’s not available in the macOS App Store, you’ll need to install it manually. In this blog post, you will discover how to install Visual Studio Code on macOS so you can start using it right away. Read on to learn more!
Step 1 – Pre-Requisites
Before starting the installation of the Visual Studio Code editor using this tutorial you must have the following prerequisites
- Terminal: You must have Mac Terminal access and little knowledge about working with the terminal application.
- Homebrew: Homebrew is a popular package management tools used for installing most open-source software like Node. Here is the Homebrew installation tutorial
Step 2 – Install Visual Studio Code on macOS
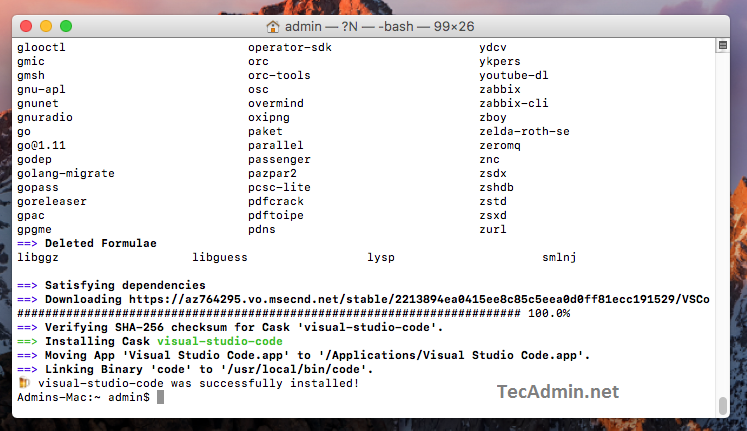
First, fetch the latest version of homebrew and formula. Then tap the Caskroom/Cask repository from Github. After that search for the visual-studio-code package.
brew updatebrew tap caskroom/caskbrew cask search visual-studio-code
Then install Visual Studio Code by running the following command.
brew cask install visual-studio-code
Wait for the installation complete
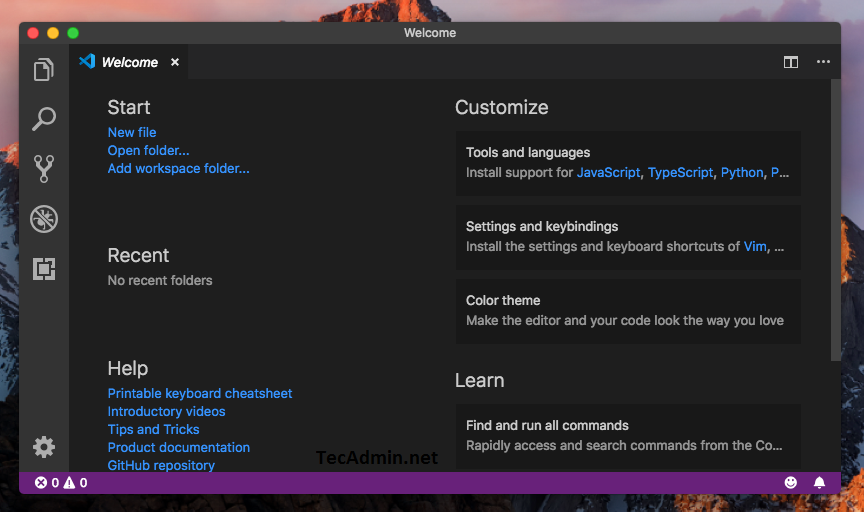
Step 3 – Launch Application
Once the Visual Studio Code installation is finished on your macOS. You can use the launcher icon to start the application on your macOS system. You can also add the required extensions to the editor as per your application.
All done. Let’s start with the development.
Conclusion
Now, you can start coding and developing your applications using Visual Studio Code, a lightweight environment based on Electron. The best part is that you can install it on macOS to use it with Single Page Apps, Web Apps and other types of web-based applications.
We are using the Caskroom/Cask repository to install the software, it automatically updates itself when a new version is released. The best part is that you can double-check every one of your codes using the built-in debugger, which includes step-over, step-forward, step-backward, and breakpoints. Moreover, you can quickly edit your code using the IntelliSense code completion feature.


1 Comment
Thanks much, Rahul. I could install VSCode using the steps mentioned in here. Can you please let me know how to enable intelligence in VSCode editor similar to how it works in PowerShell ISE?