
Visual Studio Code is an optimized, feature-rich code editor for building web and cloud applications. It is developed by the Microsoft team. It includes features like embedded Git, supports debugging, syntax highlighting, intelligent code completion, snippets, and code refactoring.
The Visual Studio Code is freely available for most modern operating systems like Windows, Linux (RPM and Debian installations are also available), and macOS.
This tutorial will help you to install Visual Studio Code on Ubuntu 18.04 LTS Linux system using Apt package manager and using snap package.
Prerequisites
Login to your Ubuntu 18.04 system with sudo privileged account. You must have Ubuntu Dekstop installed on your system.
Step 1 – Installing Visual Studio Code
Visual Studio Code is available as the Snap package as well official apt repository with the Debian package. Choose one of the below methods as per your choice. The Ubuntu 18.04 does not have the Snap tool installed. So, we are providing the installation methods using the Debian package first.
1. Install using Apt Repository
First of all, Import the GPG key to your system to verify packages before installation. To import gpg key, type:
curl https://packages.microsoft.com/keys/microsoft.asc | gpg --dearmor > microsoft.gpgsudo mv microsoft.gpg /etc/apt/trusted.gpg.d/microsoft.gpgMicrosoft team provides an repository for the Debian packages installation. To enable the Visual Studio code Apt repository, type:
echo "deb [arch=amd64] http://packages.microsoft.com/repos/vscode stable main" | sudo \
   tee /etc/apt/sources.list.d/vs-code.list
Once you successfully added the repository to your system, Execute the following commands to install Visual Studio Code on the Ubuntu system.
sudo apt updatesudo apt install codePress ‘y’ for any confirmation prompted by the installer.
2. Install using Snap Package
The snap package contains all the requirements for any application. Make sure you have Snapd service installed on your system or use the following command to install it.
sudo apt install snapdOnce snpad deamon installed on your system, execute the below command on your system terminal:
sudo snap install code --classicThe above command will download VS Code snap package and install on your system. Once the installation is completed successfully, you will see the following output.

That’s it. The Visual Studio Code snap package has been successfully installed on your system.
Step 2 – Launch Visual Studio Code
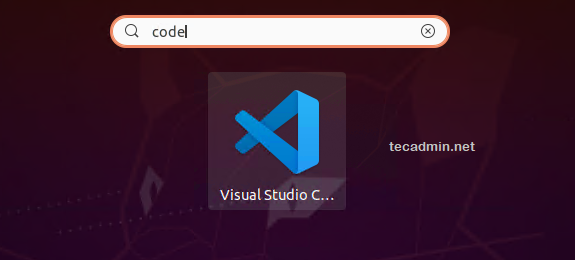
Now, The Visual Studio Code has been installed on your Ubuntu 20.04 system. To launch the application type “code” in the search application and click on it.
The Visual Studio Code editor is ready to use.

There are a large number of extensions available for Visual Studio Code like C#, Python, JavaScript, Google Chrome, etc. Install the required extensions to enhance your working experience with the Visual Studio Code.
Conclusion
This tutorial helps you to install Visual Studio Code on your Ubuntu 18.04 LTS Linux system.


1 Comment
I should have read this article a while before. Thanks for sharing.