WordPress is a free, open source a content-management system (CMS) and blogging tool based on PHP and MySQL. This tutorial will help you to install WordPress with Nginx on Ubuntu system.
Step 1 – Install PHP & MySQL
First of all, install PHP packages from Ondrej Apt repository on your system. Execute the following commands to install it.
sudo apt-get install python-software-properties
sudo add-apt-repository ppa:ondrej/php
sudo apt-get update
sudo apt-get install php7.3 php7.3-fpm  mysql-server php7.3-mysql
Step 2 – Install Nginx
Then install Nginx packages from the Nginx official Apt repository.
curl http://nginx.org/keys/nginx_signing.key | apt-key add -
echo "deb-src http://nginx.org/packages/mainline/ubuntu/ `lsb_release -cs` nginx"  >> /etc/apt/sources.list
echo "deb http://nginx.org/packages/mainline/ubuntu/ `lsb_release -cs` nginx" >> /etc/apt/sources.list
and now use following commands to install Nginx web server, PHP5 with PHP5-FPM and MySQL server.
sudo apt-get update
sudo apt-get install nginx
Step 3 — Configure PHP-FPM
PHP-FPM (FastCGI Process Manager) is an alternative PHP FastCGI implementation with some additional features. Set the listen parameter in /etc/php/7.3/fpm/pool.d/www.conf configuration file. Change 7.3 with your installed PHP version. You can find the current active PHP version by creating phpinfo file.
sudo nano /etc/php/7.3/fpm/pool.d/www.conf
Now make changes in the configuration file as below. Commend listen with socket file and enable it as service
;listen = /var/run/php5-fpm.sock
listen = 127.0.0.1:9000
Step 4 — Setup WordPress on Ubuntu
Download latest WordPress archive file from its official website using following command.
wget http://wordpress.org/latest.tar.gz
Extract archive in the document root of your domain and update permissions on files.
tar xzf latest.tar.gz
sudo mv wordpress /var/www/example.com
sudo chown -R apache.apache /var/www/example.com
sudo chmod -R 755 /var/www/example.com
Step 5 — Create MySQL DB and User
After extracting WordPress codebase, Let’s create a MySQL database and user account for configuring WordPress. Use the following set of command to do it
mysql -u root -p
Enter password:

mysql> CREATE DATABASE wp_db;
mysql> GRANT ALL ON wp_db.* to 'wp_user'@'localhost' IDENTIFIED BY 'password_';
mysql> FLUSH PRIVILEGES;
mysql> quit
Step 6 — Configure Nginx VirtualHost
Finally, do the configuration of Nginx server block (Virtual Host). For this example, we are creating a new configuration file for our domain example.com.
sudo nano /etc/nginx/conf.d/example.com.conf
and make changes as below.
server {
        listen   80;

        root /var/www/example.com;
        index index.php index.html;
        server_name  example.com www.example.com;

        location / {
                try_files $uri $uri/ /index.php?q=$request_uri;
        }

        error_page 404 /404.html;
        error_page 500 502 503 504 /50x.html;
        location = /50x.html {
              root /usr/share/nginx/www;
        }

        location ~ .php$ {
                try_files $uri =404;
                fastcgi_pass 127.0.0.1:9000;
                fastcgi_index index.php;
                fastcgi_param SCRIPT_FILENAME $document_root$fastcgi_script_name;
                include fastcgi_params;
        }
}
After installing all services on your system, start all required services.
sudo service nginx restart
sudo service php7.3-fpm restart
Step 7 — Start WordPress Web Installer
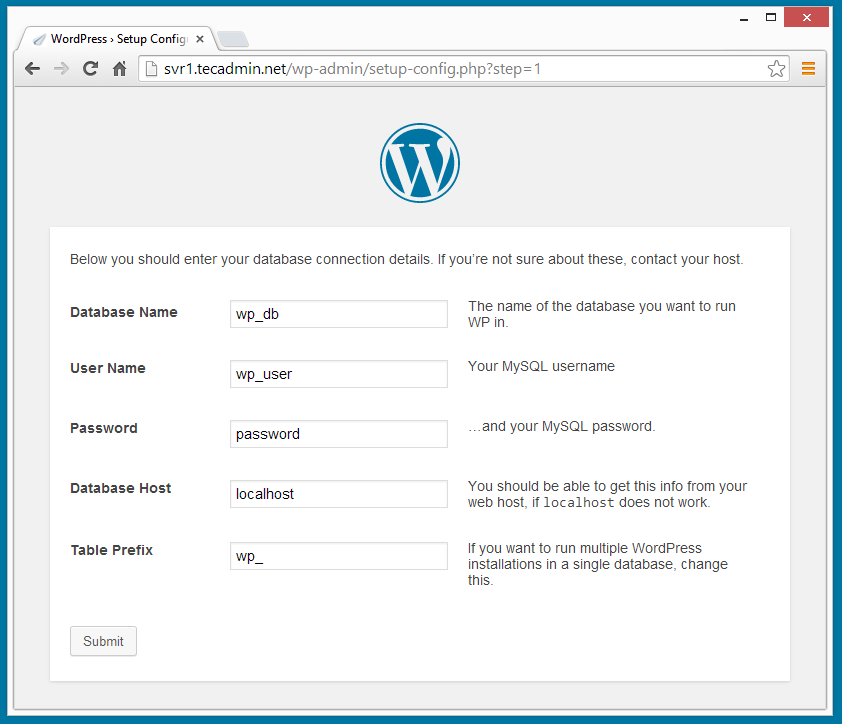
WordPress provides a web installer for easy to setup WordPress without editing files manually. After completing above steps just point your browser to your domain. Fill the database details and click “Submit
After submitting database details, click on “Run the Install”
Install WordPress Button
- Blog Title
- Username of admin account (for security do not use as “admin”)
- Admin password ( twice )
- Email ID
After completing above step, You have installed WordPress successfully, Now you will get WordPress success installation message.
Congratulation’s! You have successfully installed WordPress with LEMP Stack on your Ubuntu system.

2 Comments
Hi,
Thanks for posting such a great and informational article. However, i was wondering how the process will change if i have to setup a second website on the same server. Can you help me regarding this?
Thanks a lot…