XCache is a fast, stable PHP opcode cacher. This relatively new opcode caching software has been developed by mOo. XCache optimizes performance caching the compiled state of PHP scripts into the RAM and uses the compiled version straight from the RAM. This may increase php execution 1-5 times faster than default installation. Read more about XCache.
This article will help you to install and configure XCache on CentOS, RHEL and Fedora Systems.
Step 1: Install XCache for PHP
You can simply use yum command to install xcache for php from epel repository. If you do have installed epel repository, Enable it using this article.
# yum install php-xcache xcache-admin
Step 2: Configure XCache
During installation XCache creates its default php configuration file xcache.ini.
# nano /etc/php.d/xcache.ini
This file contains a long list of parameters. Read this article to know about its parameters
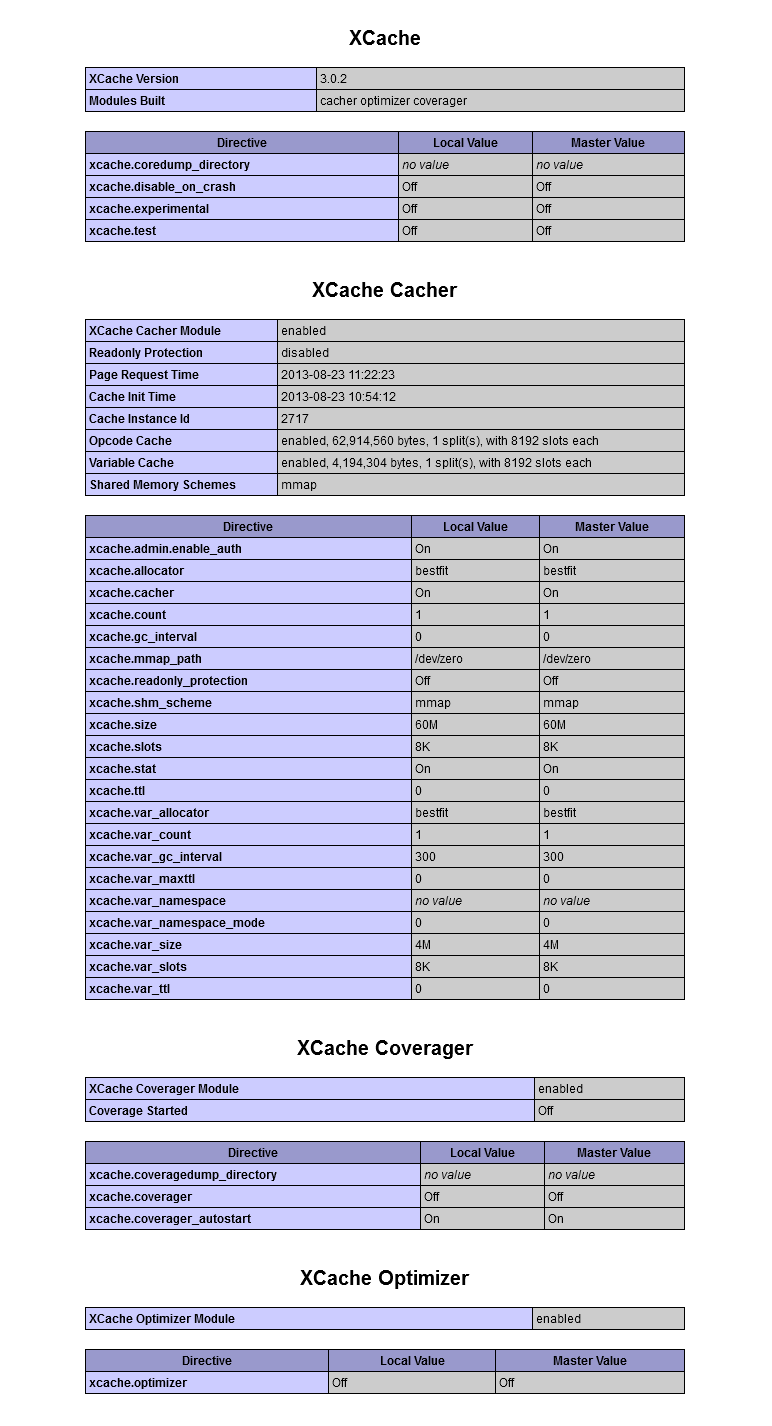
Step 3: Verify XCache
Create a php info file using below content and upload to your web server under document root. Open this file in browser and search for xcache.
1 2 3 | <?php phpinfo(); ?> |
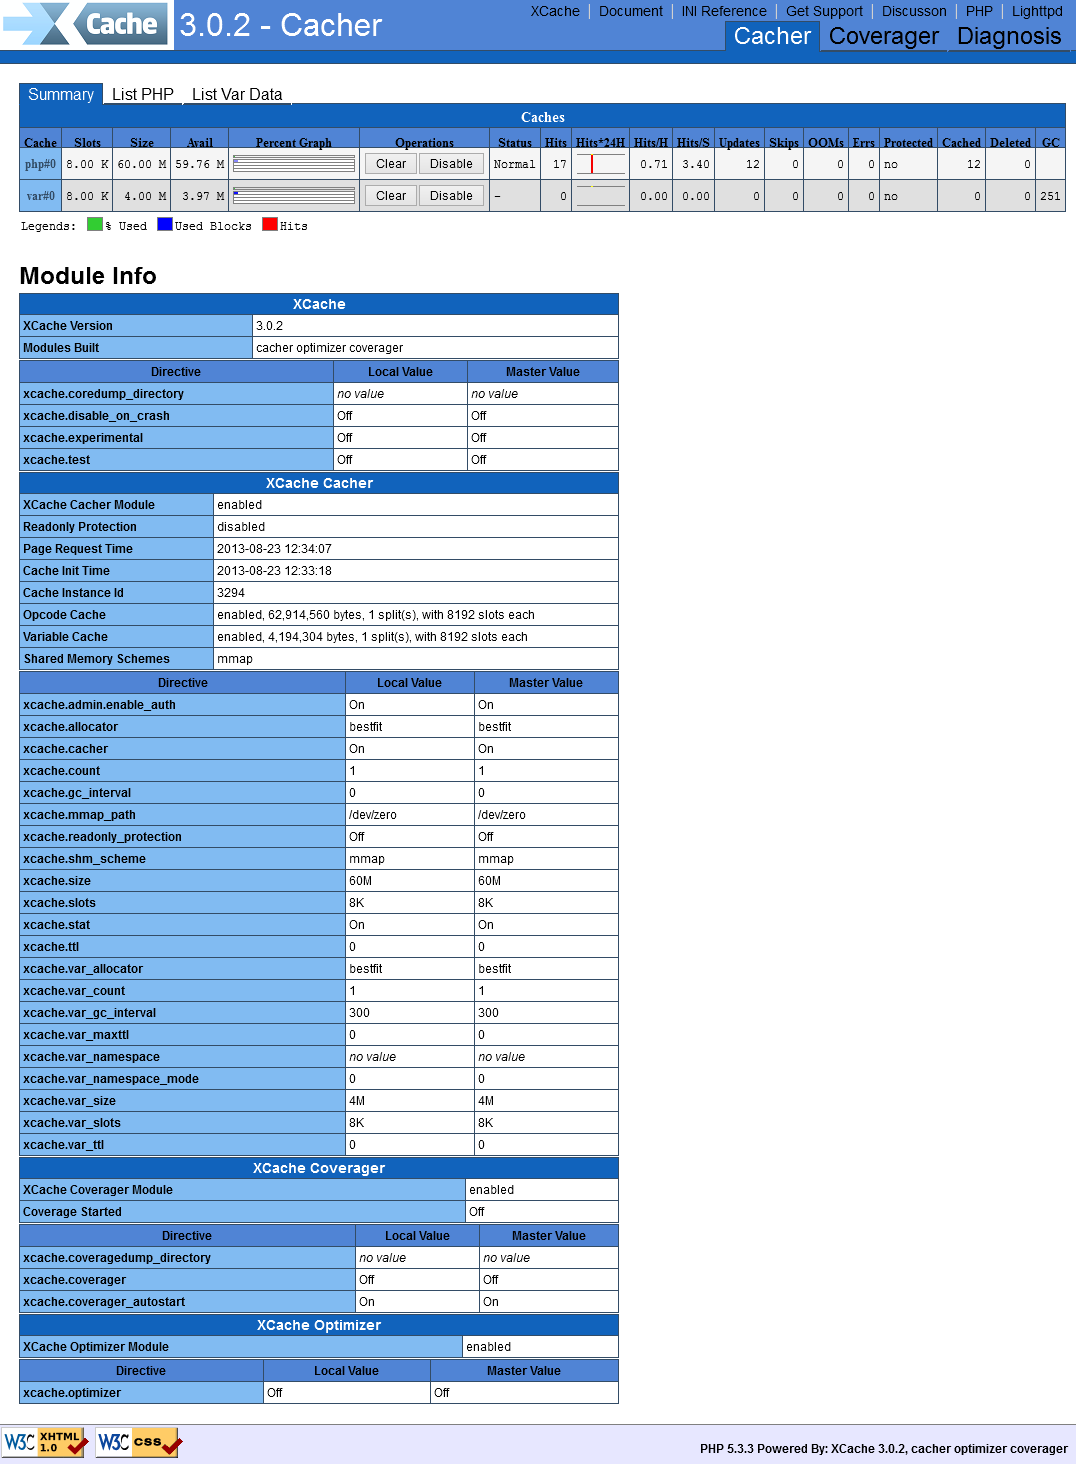
Step 4: Configure XCache Admin Panel
At this stage we have successfully configured XCache for php. XCache also provides admin panel by which we can view caching state, clear cache or disable. Using default installation it’s not enabled. Below setup will enable XCache admin panel with password protected.
Copy xcache folder to your document root of your web server. the xcache directory may differ with earlier version of php xcache.
# cp -r /usr/share/xcache /var/www/html/
Generate and setup password in xcache.ini file using below commands.
# echo -n "secreatpassword" | md5sum

753f51a9cca136b41c5f7cced1f813dd  -
Search [xcache.admin] section in xcache.ini and update as below.
[xcache.admin]
xcache.admin.enable_auth = On
xcache.admin.user = "xadmin"
; set xcache.admin.pass = md5($your_password)
; login use $your_password
xcache.admin.pass = "753f51a9cca136b41c5f7cced1f813dd"
Restart httpd server to enable new settings.
# /etc/init.d/httpd restart
Access XCache admin panel in browser using ip or domain name by location sub directory using above configured username password.
http://svr2.tecadmin.net/xadmin/

Login: xadmin / secreatpassword
1 Comment
Really great article…. keep it up