Java is a widely used programing language for creating software, and web applications. Basically, there are two types of Java environment available to configure. JDK is used for configuring the Java environment for developing Java applications and JRE is used for the runtime configuration.
Multiple ways to install Java on Ubuntu
You have two options available for installing Java on an Ubuntu system. You can choose one of them.
#1. How to Install Default Java on Ubuntu with Apt-get
This is the simple and quick way to install Java on Ubuntu systems. Run the following commands to install Java on an Ubuntu Linux system.
sudo apt-get update
sudo apt-get install default-jdk
JDK also contains JRE packages but you can install the default-jre package and install JRE only.
You can also install the specific Java version on your system using one of the following commands.
sudo apt-get install openjdk-9-jdk      ## Java 9
sudo apt-get install openjdk-8-jdk      ## Java 8
#2. How to Install Oracle Java on Ubuntu using PPA
The second options are to install Oracle Java. The Debian packages are not available for Oracle Java, but the Webup8 team has provided you with an easier way to install Oracle Java on an Ubuntu system.
Add the following PPA to your system:
sudo add-apt-repository ppa:webupd8team/java
sudo apt-get update
Java 8 is the LTS release available and Java 9 is the latest release available for installation. Now install the Java version of your choice as below.
sudo apt-get install oracle-java8-installer    ## Java 8
sudo apt-get install oracle-java9-installer    ## Java 9
Configure Default Java with Alternatives
The update-alternatives command is used for configuring the default version for your system. The systems have multiple Java versions installed can use the below command to set a specific Java version as the default
sudo update-alternatives --config java
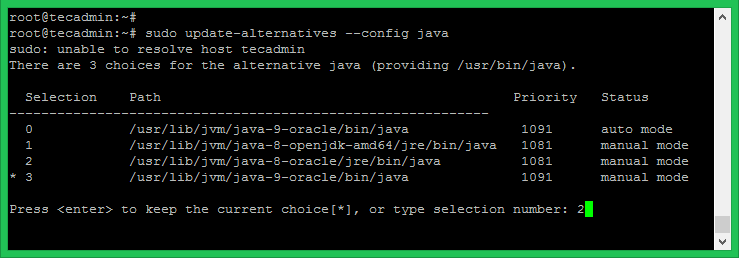
Type the selection number of Java version you want to set as default Java on your Linux system.