In this guide, we aim to provide a comprehensive, step-by-step walkthrough on how to install Nginx on two of the most popular Linux distributions, Ubuntu and CentOS. Whether you’re a seasoned developer or a beginner just starting out, this guide will provide clear instructions to get Nginx up and running on your system. We will cover everything from system updates and Nginx installation to firewall configurations and managing the Nginx process.
Prerequisites
Ensure that you have:
- A Linux system with sudo or root access.
- A stable internet connection.
- Basic understanding of the command-line interface.
Step 1: Update Your System
Before installing Nginx, it is recommended that you update your system to ensure that all the packages are up to date. To do this, open a terminal window and enter the following command:
- On Debian-bases systems, open your terminal and run:
sudo apt-get update - On RHEL-based systems, use the following command:
sudo yum update
These commands will fetch the latest updates from all your repositories and PPAs.
Step 2: Install Nginx
Once the system is updated, the next step is to install Nginx. To do this, enter the following command in the terminal:
- For RHEL/CentOS, run:
sudo apt-get install nginx - For Debian/Ubuntu, run:
sudo yum install nginx
Your system will prompt for confirmation by providing you with a Y/n option. Type ‘Y’ and hit Enter.
Step 3: Verify Nginx Installation
To verify that Nginx has been installed correctly, check its version.
Use this command on both Ubuntu and CentOS:
nginx -v
This will return the installed version of Nginx.
Step 4: Configuring Nginx
Nginx configuration files are located in the /etc/nginx directory. The main configuration file is nginx.conf, which includes other configuration files located in the conf.d directory. To edit the configuration files, use a text editor such as vi or nano.
For example, to edit the main configuration file, enter the following command:
sudo vi /etc/nginx/nginx.conf
Make the necessary changes to the configuration files and save them.
Step 5: Start and Enable Nginx Service
Start the Nginx service and enable it to start up at system boot.
On Ubuntu and CentOS, use:
sudo systemctl start nginxsudo systemctl enable nginx
Step 6: Configure Firewall
If you’re using a firewall, you need to allow connections to Nginx.
- On Ubuntu/Debian with UFW, run:
sudo ufw allow 'Nginx HTTP'sudo ufw reload - On CentOS/RHEL with firewalld, use:
sudo firewall-cmd --permanent --zone=public --add-service=httpsudo firewall-cmd --reload
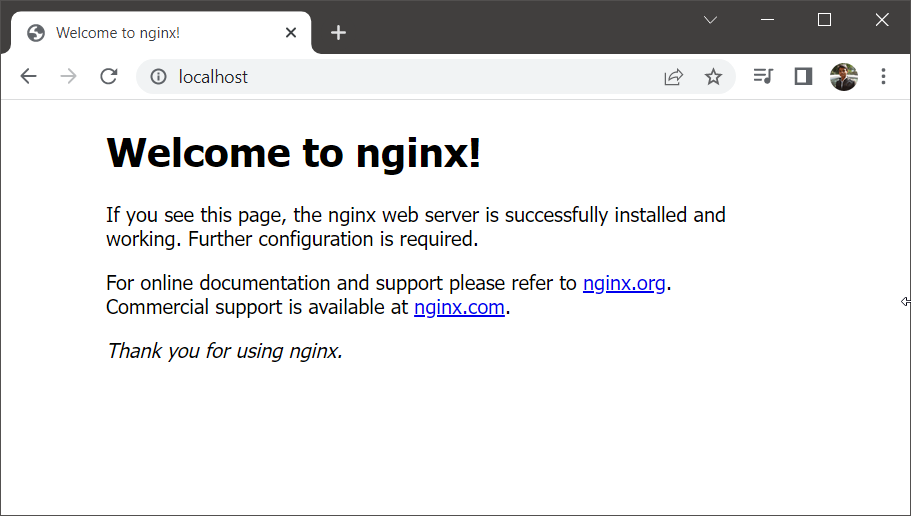
Step 7: Test the Setup
To verify that Nginx is running, open your web browser and enter your server’s IP address. You should see a welcome page stating, “Welcome to nginx!” if everything is set up correctly.
Step 8: Manage Nginx Process
Finally, let’s go through some basic commands to manage the Nginx service:
- To stop your web server:
sudo systemctl stop nginx - To start the web server when it is stopped:
sudo systemctl start nginx - To restart the service:
sudo systemctl restart nginx - To reload Nginx without dropping connections (useful for configuration changes):
sudo systemctl reload nginx - By default, Nginx is set to start automatically when the server boots. To disable this behavior:
sudo systemctl disable nginx - To re-enable the service to start up at boot:
sudo systemctl enable nginx
Conclusion
Congratulations, you have now successfully installed and tested Nginx on your Linux system. This versatile web server is now at your disposal, ready to serve your websites and applications.
However, remember that installation is just the beginning. Nginx offers a plethora of configuration options suitable for various scenarios, ranging from serving static websites to acting as a reverse proxy for complex web applications. Therefore, as you continue your journey, make sure to explore the vast functionalities and capabilities Nginx has to offer. Happy coding!