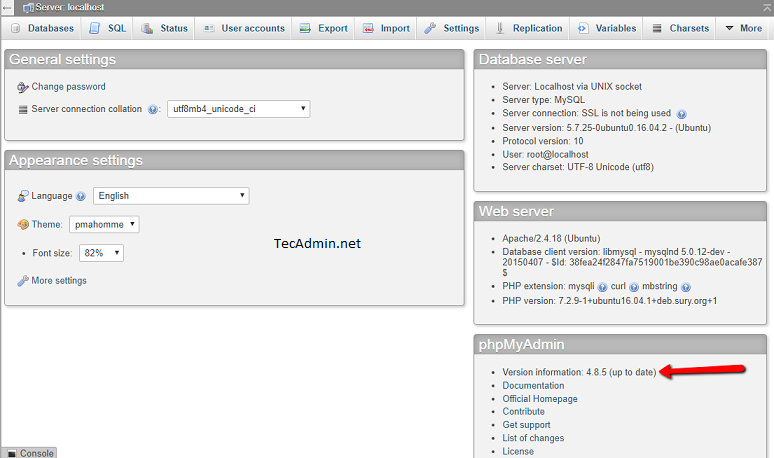
phpMyAdmin is a popular web-based tool for managing MySQL databases. Over time, new versions of phpMyAdmin are released to address security issues, introduce new features, and improve overall performance. This article will guide you through the steps to manually upgrade phpMyAdmin on an Ubuntu system.
phpMyAdmin installation via Apt package manager create multiple directories:
- /etc/phpmyadmin – Configuration files
- /var/lib/phpmyadmin – Library and tmp directries
- /usr/share/phpmyadmin – Main phpMyAdmin installation
Step 1: Backup phpMyAdmin
You should take a back up of your current phpMyAdmin directory. However, I have just renamed it to phpmyadmin.bak at the same location.
sudo mv /usr/share/phpmyadmin/ /usr/share/phpmyadmin.bak
Step 2: Download the Latest Version of phpMyAdmin
Now, download the latest phpMyAdmin archive file from its official download page. During last update of this article phpMyAdmin 5.2.1 is latest version available for download.
wget www.phpmyadmin.net/downloads/phpMyAdmin-latest-all-languages.zip
unzip phpMyAdmin-latest-all-languages.zip
You will see a directory phpMyAdmin-[VERSION]-all-languages in the current location. Move this latest directory to the appropriate location.
sudo mkdir /usr/share/phpmyadmin
sudo mv phpMyAdmin-*/* /usr/share/phpmyadmin/
Step 3: Update Configuration
As I told the existing phpMyAdmin was installed with Apt package manager. Therefore you need to specify the TEMP_DIR and CONFIG_DIR location under the vendor_config.php file.
Edit vendor_config.php file in your favorite text editor
sudo vim /usr/share/phpmyadmin/libraries/vendor_config.php
and update the following values.
define('TEMP_DIR', '/var/lib/phpmyadmin/tmp/');
define('CONFIG_DIR', '/etc/phpmyadmin/');
Save the file and access the phpMyAdmin in a web browser.
Conclusion
Upgrading phpMyAdmin manually might seem daunting at first, but following the steps laid out in this guide should make the process smoother. Always remember to back up your data and configurations before proceeding with any upgrades. Regularly checking for updates ensures you’re leveraging the latest features and security fixes, keeping your database management tasks efficient and secure.


23 Comments
Thank you, but I’m having error
PHP 7.1.3+ is required.
Currently installed version is: 7.0.33-57+ubuntu18.04.1+deb.sury.org+1
when I run php –version I have 7.4
Which php version does phpmyadmin uses?
Check what PHP version is active in Apache: https://tecadmin.net/create-phpinfo-file/
Thank you
Nice article. But some code errors occurred. (Ex) – sudo mv /usr/share/phpmyadmin/ /usr/share/phpmyadmin.bak its worng (sudo mv /usr/share/phpmyadmin/ /usr/share/phpmyadmin.pak)
I have always been using this post for years, to install the new versions of phpmyadmin.
Thank you so mutch.
Thank you!! it worked great.
Helped a lot, ty ^^
Thanks a lot, my problem has been perfectly after following your instructions.
*perfectly solved I means
Brilliant! Thanks. Just remember to log back into phpmyadmin after you make the changes.
thanks for this article
Thanks a ton. Helped me a lot.
Thank you.
Great work! You made it so easy! 🙂
Thanks. It was a lot easier than I expected.
Excellent article, impeccable, clear and perfect! It helped me and it was very simple following your instructions. Greetings from Peru!
Thank you, bro!
Shortly and clear.
I had no problem when made upgrade
echo
echo “Backing up”
mv /usr/share/phpmyadmin/ /usr/share/phpmyadmin.bak
echo “Getting lastest PHPMyAdmin version…”
mkdir -p /usr/share/phpmyadmin/
cd /usr/share/phpmyadmin/
wget https://www.phpmyadmin.net/downloads/phpMyAdmin-latest-all-languages.tar.gz
tar xzf phpMyAdmin-latest-all-languages.tar.gz
mv phpMyAdmin-*/* /usr/share/phpmyadmin
echo “Updating vendor_config”
sed -i -r “s/(‘TEMP_DIR’\s*,)[^\)]*/\1 ‘\/var\/lib\/phpmyadmin\/tmp\/’/” /usr/share/phpmyadmin/libraries/vendor_config.php
sed -i -r “s/(‘CONFIG_DIR’\s*,)[^\)]*/\1 ‘\/etc\/phpmyadmin\/’/” /usr/share/phpmyadmin/libraries/vendor_config.php
echo “Cleaning up…”
rm /usr/share/phpmyadmin/phpMyAdmin-latest-all-languages.tar.gz
rm -rf /usr/share/phpmyadmin/phpMyAdmin-*
rm -rf /usr/share/phpmyadmin.bak
echo “Done!”
echo
This was a tremendous help to me. I did have one error after installing the new version.
“File ./vendor/autoload.php missing or not readable. Most likely you did not run Composer to install library files”
I had to run. composer update –no-dev. within the phpmyadmin directory.
https://www.digitalocean.com/community/questions/file-vendor-autoload-php-missing-or-not-readable-most-likely-you-did-not-run-composer-to-install-library-files
Excellent article
it served me a lot like all your articles
many thanks
Nice and easy thank you so much
Thanks for this article
I have tried other articles and not works with me
you saved my time
Thank you very much for this article. I was facing depreciation issue in phpmyadmin after upgrading to php8.2. After upgrading PHPMyadmin, all issues gone automatically.