
The .NET Framework is an essential part of the .NET ecosystem. It’s a collection of APIs that can be used to write applications and services in almost any programming language (including Ruby, Java, Python, C#, JavaScript, and many more).
For most developers using .NET to build software, the .NET Framework isn’t something they need to understand in detail. Instead, it’s something that needs to be kept up to date for all of their projects as new versions are released. But what does the .NET Framework actually do? In this article, you’ll learn 4 ways to find the installed .NET framework version on a Windows system.
Method 1: Check .NET Framework Version in PowerShell
PowerShell is a cross-platform task automation solution made up of a command-line shell, a scripting language, and a configuration management framework. You can check the installed .NET framework version with the PowerShell on Windows. Launch the PowerShell application (run as administrator) and type the following command to check the version of .NET installed and press Enter:
Get-ChildItem 'HKLM:\SOFTWARE\Microsoft\NET Framework Setup\NDP' -Recurse | Get-ItemProperty -Name version -EA 0 | Where { $_.PSChildName -Match '^(?!S)\p{L}'} | Select PSChildName, version
You will see the output like below screenshot:

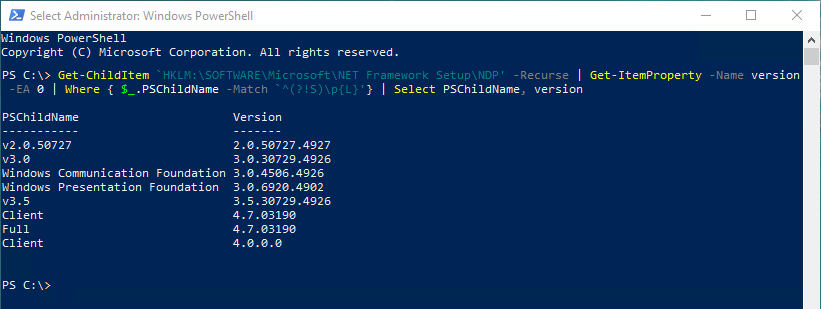
The screenshot shows that you this system has .NET framework 4.7 installed.
Method 2: Check .NET Framework Version in Command Prompt
Windows Command Line, is the command-line interface for Windows operating systems. It is similar to the Unix/Linux Command Prompt and is used to execute entered commands. You can also check for the isntalled .NET Framework version directly from the command prompt by querying the Windows registry.
Launch the Windows command prompt as administrator and type:
reg query "HKLM\SOFTWARE\Microsoft\Net Framework Setup\NDP" /s
You can directly check for the version 4.x is installed, execute this command:
reg query "HKLM\SOFTWARE\Microsoft\Net Framework Setup\NDP\v4" /s
You will see the output like below screenshot:

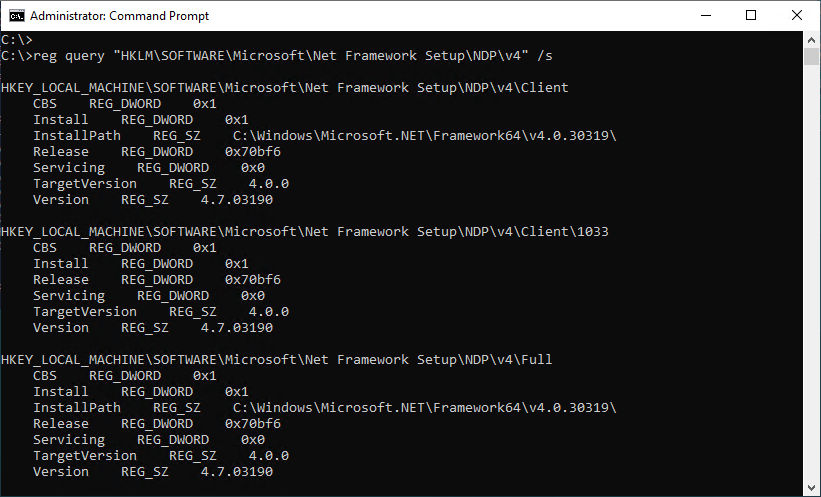
The screenshot shows that you this system has .NET framework 4.7 installed.
Method 3: Check .NET Framework Version in Registry
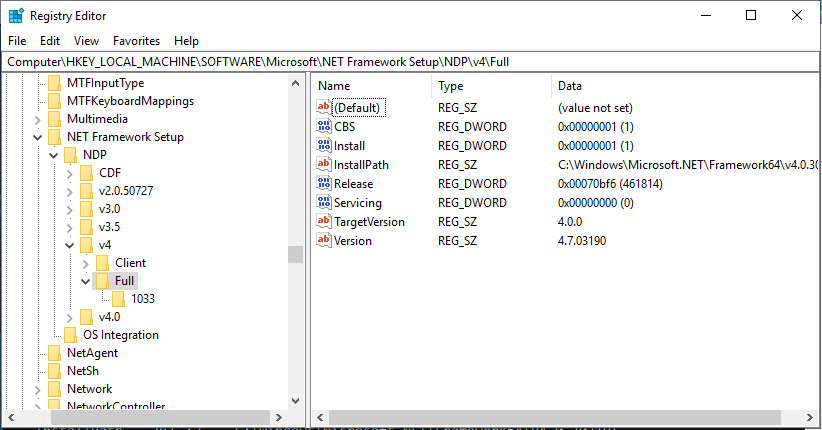
The previous method uses command prompt to query to the Windows registry. You can directly open the revisory editor in your system and check for the .NET framework versions.
- Open Start menu.
- Search for “regedit” and click the “Registry Editor” app from the search results.
- Navigate to the following path:
HKEY_LOCAL_MACHINE\SOFTWARE\Microsoft\NET Framework Setup\NDP - Expand the main version key (like: v4 or v4.0)
- Then select Full.
You will find the installed .NET framework version as seen in below screenshot:

Method 4: Check .NET Framework Version in File Manager
You can also check the .NET framework version directly from the Windows file explorer. Follow the below stpes:
- Open the file explorer or press the “CTRL + e” shortcut keys.
- Browse the following path: C:\Windows\Microsoft.NET\Framework
- Then open the folder showing like: v4.0.30319
- Right-click on any of the “.dll” files and select the Properties option.
- Select the Details tab.
- You can find the version under “Product version” property.
See the below screenshot:

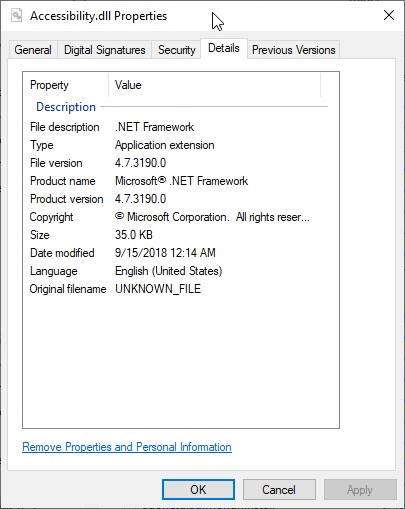
The above screenshot shows that your system have .NET framework 4.7 installed.
Conclusion
In this tutorial, we have discussed 4 methods to find .NET framework version on a Windows system. You can any of the methods, PowerShell, command prompt, registry editor, or file manager to check .NET framework version.