
We always say, Security first. It should be the first priority to keep your hard work safe from the hackers. This tutorial will take few minutes to secure Gitlab server using Let’s Encrypt SSL certificates. Let’s Encrypt provides free SSL certificates to secure your domains and an easy way to auto updates.
This tutorial will help you to secure Gitlab service with Let’s Encrypt SSL certificate with enabling the auto renew feature. If you are going with a fresh installation have a look at below guides.
Prerequisites
Login to your Gitlab system with a sudo privileged account.
Also make sure to create an A Record points your domain/subdomain to the public IP address of your Gitab server. It is recommended to complete the let’s encrypt validation for issuing a new certification. For example, You need to configure your Gitlab server to access with https://gitlab.tecadmin.net. So make A record in DNS for gitlab.tecadmin.net pointing to server ip address.
Configure Let’s Encrypt SSL with Gitlab
Gitlab keeps the configuration files under /etc/gitlab directory. You can edit the main configuration file /etc/gitlab/gitlab.rb in a text editor of your choice.
sudo vim /etc/gitlab/gitlab.rb
Make the following changes:
- First change the external_url setting with domain start with https.1external_url "https://gitlab.tecadmin.net"
- Add or update the following entries to the configuration file. Set letsencrypt[‘enable’] to true, this will request a SSL certificate and configure to the Gitlab instance. You can also provide an optional contact email used by lets encrypt authority to send alerts for the ssl certificates.12345# Enable the Let's encrypt SSLletsencrypt['enable'] = true# This is optional to get SSL related alertsletsencrypt['contact_emails'] = ['email@your-domain.com']
- Also configure Gitlab to renew SSL certificate automatically on a regular interval.1234567# Enable the auto renew featureletsencrypt['auto_renew'] = true# This example renews every 7th day at 12:30letsencrypt['auto_renew_hour'] = "12"letsencrypt['auto_renew_minute'] = "30"letsencrypt['auto_renew_day_of_month'] = "*/7"
Save the configuration file and exit from editor.
Next, run the reconfigure command to apply changes to Gitlab server.
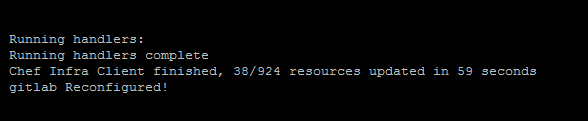
sudo gitlab-ctl reconfigure
This will take some time to complete the installation. At the end, you will see a message “gitlab Reconfigured!” on your screen.
Verify SSL
Access the Gitlab web interface in a web browser. This will automatically redirects you to secure URL.
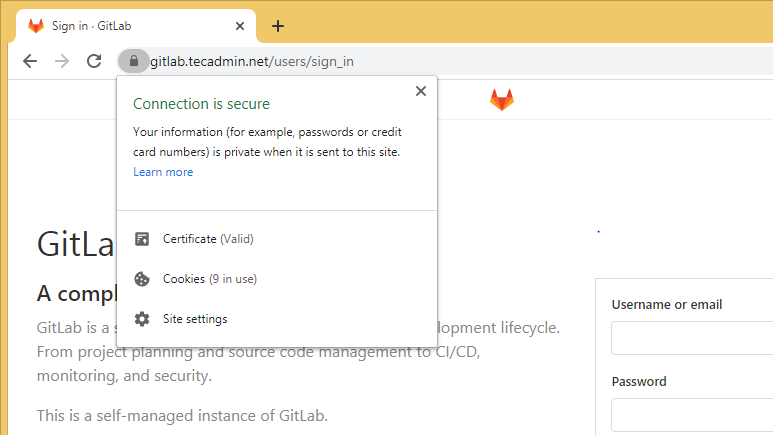
That’s it. You have successfully configured let’s encrypt SSL on Gitlab.
Conclusion
In this tutorial, you have learned to configure Let’s Encrypt SSL certificate on Gitlab instance. Also enable to auto renew certificate on a regular interval.