Apache Hadoop 3.1 have noticeable improvements any many bug fixes over the previous stable 3.0 releases. This version has many improvements in HDFS and MapReduce. This tutorial will help you to install and configure Hadoop 3.1.2 Single-Node Cluster on Ubuntu 18.04, 16.04 LTS and LinuxMint Systems. This article has been tested with Ubuntu 18.04 LTS.

Step 1 – Prerequsities
Java is the primary requirement for running Hadoop on any system, So make sure you have Java installed on your system using the following command. If you don’t have Java installed on your system, use one of the following links to install it first.
- Install Oracle Java 11 on Ubuntu 18.04 LTS (Bionic)
- Install Oracle Java 11 on Ubuntu 16.04 LTS (Xenial)
Step 2 – Create User for Haddop
We recommend creating a normal (nor root) account for Hadoop working. To create an account using the following command.
adduser hadoop
After creating the account, it also required to set up key-based ssh to its own account. To do this use execute following commands.
su - hadoop
ssh-keygen -t rsa -P '' -f ~/.ssh/id_rsa
cat ~/.ssh/id_rsa.pub >> ~/.ssh/authorized_keys
chmod 0600 ~/.ssh/authorized_keys
Now, SSH to localhost with Hadoop user. This should not ask for the password but the first time it will prompt for adding RSA to the list of known hosts.
ssh localhost
exit
Step 3 – Download Hadoop Source Archive
In this step, download hadoop 3.1 source archive file using below command. You can also select alternate download mirror for increasing download speed.
cd ~
wget http://www-eu.apache.org/dist/hadoop/common/hadoop-3.1.2/hadoop-3.1.2.tar.gz
tar xzf hadoop-3.1.2.tar.gz
mv hadoop-3.1.2 hadoop
Step 4 – Setup Hadoop Pseudo-Distributed Mode
4.1. Setup Hadoop Environment Variables
Setup the environment variables used by the Hadoop. Edit ~/.bashrc file and append following values at end of file.
export HADOOP_HOME=/home/hadoop/hadoop
export HADOOP_INSTALL=$HADOOP_HOME
export HADOOP_MAPRED_HOME=$HADOOP_HOME
export HADOOP_COMMON_HOME=$HADOOP_HOME
export HADOOP_HDFS_HOME=$HADOOP_HOME
export YARN_HOME=$HADOOP_HOME
export HADOOP_COMMON_LIB_NATIVE_DIR=$HADOOP_HOME/lib/native
export PATH=$PATH:$HADOOP_HOME/sbin:$HADOOP_HOME/bin
Then, apply the changes in the current running environment
source ~/.bashrc
Now edit $HADOOP_HOME/etc/hadoop/hadoop-env.sh file and set JAVA_HOME environment variable. Change the JAVA path as per install on your system. This path may vary as per your operating system version and installation source. So make sure you are using the correct path.
vim $HADOOP_HOME/etc/hadoop/hadoop-env.sh
Update below entry:
export JAVA_HOME=/usr/lib/jvm/java-11-oracle
4.2. Setup Hadoop Configuration Files
Hadoop has many configuration files, which need to configure as per requirements of your Hadoop infrastructure. Let’s start with the configuration with basic Hadoop single node cluster setup. first, navigate to below location
cd $HADOOP_HOME/etc/hadoop
Edit core-site.xml
<configuration>
<property>
  <name>fs.default.name</name>
    <value>hdfs://localhost:9000</value>
</property>
</configuration>
Edit hdfs-site.xml
<configuration>
<property>
 <name>dfs.replication</name>
 <value>1</value>
</property>

<property>
  <name>dfs.name.dir</name>
    <value>file:///home/hadoop/hadoopdata/hdfs/namenode</value>
</property>

<property>
  <name>dfs.data.dir</name>
    <value>file:///home/hadoop/hadoopdata/hdfs/datanode</value>
</property>
</configuration>
Edit mapred-site.xml
<configuration>
 <property>
  <name>mapreduce.framework.name</name>
   <value>yarn</value>
 </property>
</configuration>
Edit yarn-site.xml
<configuration>
 <property>
  <name>yarn.nodemanager.aux-services</name>
    <value>mapreduce_shuffle</value>
 </property>
</configuration>
4.3. Format Namenode
Now format the namenode using the following command, make sure that Storage directory is
hdfs namenode -format
Sample output:
WARNING: /home/hadoop/hadoop/logs does not exist. Creating.
2018-05-02 17:52:09,678 INFO namenode.NameNode: STARTUP_MSG:
/************************************************************
STARTUP_MSG: Starting NameNode
STARTUP_MSG:   host = tecadmin/127.0.1.1
STARTUP_MSG:   args = [-format]
STARTUP_MSG:   version = 3.1.2
...
...
...
2018-05-02 17:52:13,717 INFO common.Storage: Storage directory /home/hadoop/hadoopdata/hdfs/namenode has been successfully formatted.
2018-05-02 17:52:13,806 INFO namenode.FSImageFormatProtobuf: Saving image file /home/hadoop/hadoopdata/hdfs/namenode/current/fsimage.ckpt_0000000000000000000 using no compression
2018-05-02 17:52:14,161 INFO namenode.FSImageFormatProtobuf: Image file /home/hadoop/hadoopdata/hdfs/namenode/current/fsimage.ckpt_0000000000000000000 of size 391 bytes saved in 0 seconds .
2018-05-02 17:52:14,224 INFO namenode.NNStorageRetentionManager: Going to retain 1 images with txid >= 0
2018-05-02 17:52:14,282 INFO namenode.NameNode: SHUTDOWN_MSG:
/************************************************************
SHUTDOWN_MSG: Shutting down NameNode at tecadmin/127.0.1.1
************************************************************/
Step 5 – Start Hadoop Cluster
Let’s start your Hadoop cluster using the scripts provides by Hadoop. Just navigate to your $HADOOP_HOME/sbin directory and execute scripts one by one.
cd $HADOOP_HOME/sbin/
Now execute start-dfs.sh script.
./start-dfs.sh
Then execute start-yarn.sh script.
./start-yarn.sh
Step 6 – Access Hadoop Services in Browser
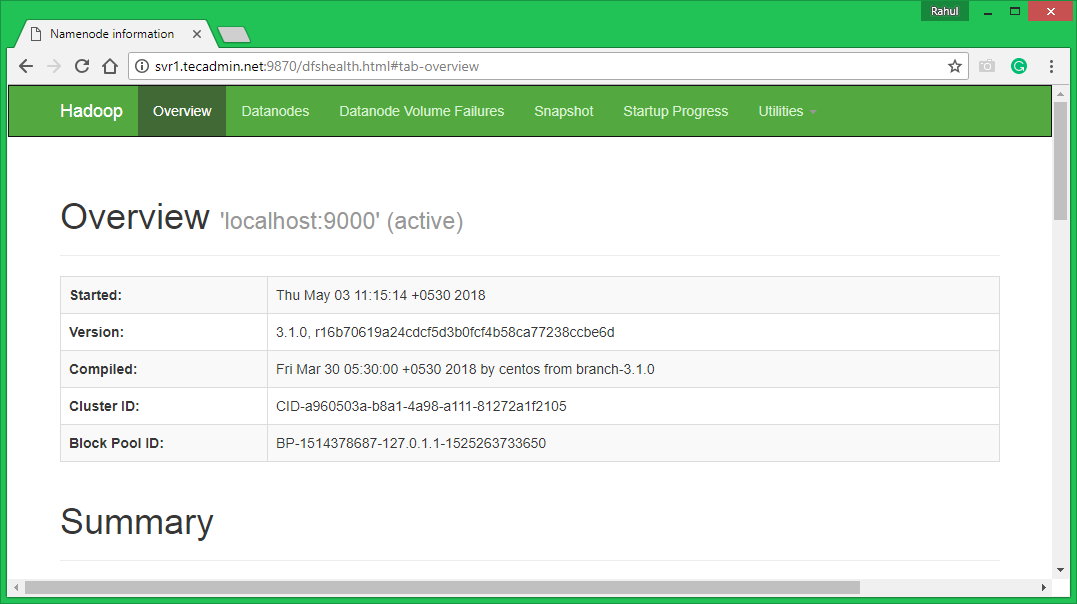
Hadoop NameNode started on default port 9870. Access your server on port 9870 in your favorite web browser.
http://svr1.tecadmin.net:9870/
Now access port 8042 for getting the information about the cluster and all applications
http://svr1.tecadmin.net:8042/

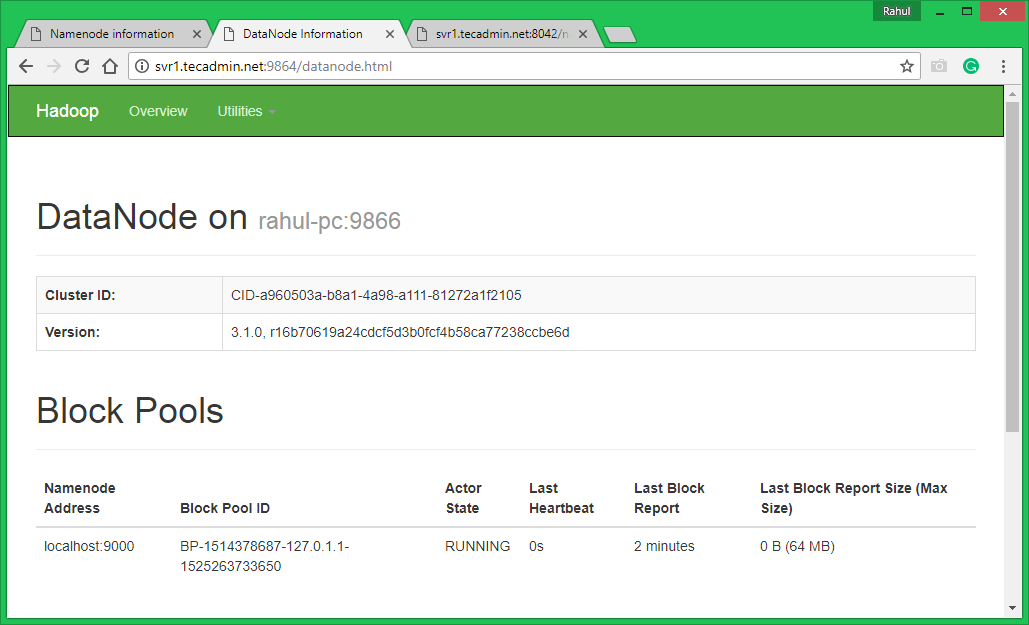
Access port 9864 to get details about your Hadoop node.
http://svr1.tecadmin.net:9864/
Step 7 – Test Hadoop Single Node Setup
7.1. Make the HDFS directories required using following commands.
bin/hdfs dfs -mkdir /user
bin/hdfs dfs -mkdir /user/hadoop
7.2. Copy all files from local file system /var/log/httpd to hadoop distributed file system using below command
bin/hdfs dfs -put /var/log/apache2 logs
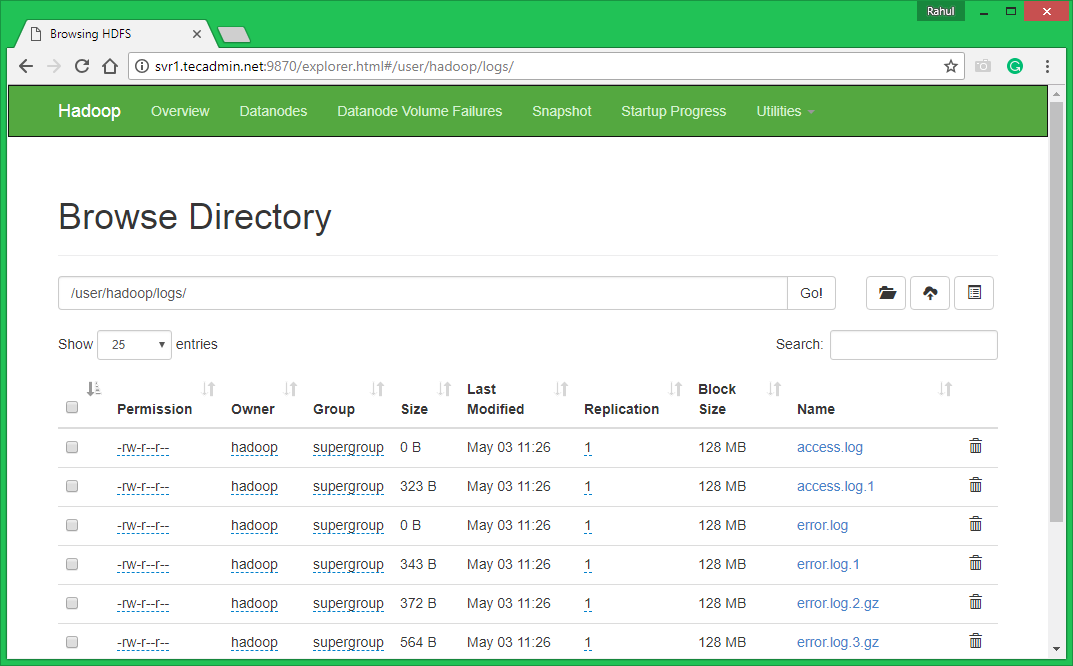
7.3. Browse Hadoop distributed file system by opening below URL in the browser. You will see an apache2 folder in the list. Click on the folder name to open and you will find all log files there.
http://svr1.tecadmin.net:9870/explorer.html#/user/hadoop/logs/
7.4 – Now copy logs directory for hadoop distributed file system to local file system.
bin/hdfs dfs -get logs /tmp/logs
ls -l /tmp/logs/
You can also check this tutorial to run wordcount mapreduce job example using command line.
")

13 Comments
Thanks for the steps. Worked like a charm for me. I executed these on WSL2 Ubuntu on Windows 10.
Hi, thanks for tutorial. I have this problem when executing ./start-dfs.sh and i still not connected to localhost/9860 please help.
“20/05/02 12:18:44 WARN util.NativeCodeLoader: Unable to load native-hadoop library for your platform… using builtin-java classes where applicable Starting namenodes on [localhost]”
Add the following line to ~/.bashrc
export HADOOP_OPTS=”$HADOOP_OPTS -Djava.library.path=$HADOOP_HOME/lib/native”
and execute
source ~/.bashrc
hdfs namenode -format
bive me error
ERROR conf.Configuration: error parsing conf core-site.xml
and other !
Hi Thanks for the steps. I was able to figure out most of the errorings. However, after I run the ./start-dfs.sh and ./start-yarn.sh, and go the the website “http://svr1.tecadmin.net:9870/”, the browser gives me :
Hmm. We’re having trouble finding that site.
We can’t connect to the server at svr1.tecadmin.net.
I will be very appreciated if someone can help:)
Try accessing http://localhost:9870
Thanks for your post,
Have you tested with Java 11, because as mentioned in Hadoop website, Java 11 support is in progress https://cwiki.apache.org/confluence/display/HADOOP/Hadoop+Java+Versions
I have got a solution for this problem with Java 11:
We have to add java.activation package to hadoop jars.
The following stackoverflow url https://stackoverflow.com/questions/53562981/hadoop-hdfs-3-1-1-on-java-11-web-ui-crash-when-loading-the-file-explorer I found to solve the problem with Java 11
./start-dfs.sh
giving this error-
localhost: ssh: connect to host localhost port 22: Connection refused
please help
Make sure openssh is running on your localhost machine.
systemctl status ssh
Executing the following commands worked for me:
sudo apt-get remove openssh-client openssh-server
sudo apt-get install openssh-client openssh-server
hdfs namenode -format
always given hdfs command not found
please help
/home/hadoop/hadoop/bin/hadoop namenode -format