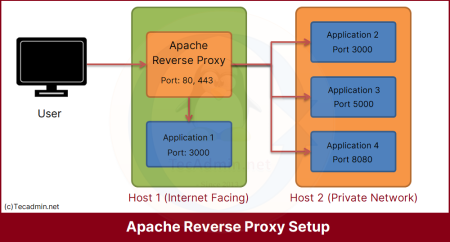
In the interconnected world of today, networking plays a crucial role in our digital lives. One essential aspect of networking that many Linux users have to navigate is setting up an HTTP proxy. This article will guide you through the process of configuring an HTTP proxy on your Linux system.
What is an HTTP Proxy?
Before diving into the process, let’s understand what an HTTP proxy is. An HTTP Proxy acts as an intermediary for requests from clients seeking resources from servers that provide those resources. In other words, a proxy server acts as a middleman between your computer and the internet, offering anonymity and potentially enhanced network performance.
Why Use an HTTP Proxy?
HTTP Proxies are used for a variety of reasons:
- Anonymity: Proxy servers can provide you with a different IP address, masking your identity and making your web activity difficult to track.
- Bypassing Geographical Restrictions: If a service is unavailable in your region, a proxy server located in a region where the service is available can help you access it.
- Network Performance: Proxy servers can cache (save a copy of the website locally) commonly accessed websites, improving load times.
- Security: By intercepting requests, a proxy can enforce an added level of security, helping to block malicious content.
Configuring an HTTP Proxy on Linux
The process of setting up an HTTP proxy on Linux involves setting environmental variables. This allows your system to recognize the HTTP proxy and route your network traffic accordingly. You can set these variables temporarily (for the current session) or permanently (for all sessions).
Temporary Configuration
To temporarily set the HTTP proxy environment variable, open the terminal and use the following command:
export http_proxy="http://proxy-server-ip:port/"
Replace “proxy-server-ip” with the IP address of your proxy server and “port” with the port number.
For HTTPS, use the command:
export https_proxy="http://proxy-server-ip:port/"
Please note, these settings are temporary and will be reset when you close your terminal or log out.
Permanent Configuration
To make the proxy setting permanent, you’ll need to set the environment variables in a startup script like ~/.bashrc or ~/.bash_profile file.
Open the desired file in a text editor. For example, to open ~/.bashrc, you can use nano:
nano ~/.bashrc
Then add these lines at the end of the file:
1 2 | export http_proxy="http://proxy-server-ip:port/" export https_proxy="http://proxy-server-ip:port/" |
Save and exit the file. Then, make sure to source the file to apply the changes immediately:
source ~/.bashrc
The above method will apply proxy settings for the user who owns the bash_profile or bashrc. To apply the settings system-wide (i.e., for all users), you need to set the environment variables in the /etc/environment file in the same way.
Testing Your Proxy
To verify if your proxy settings are working, you can use the curl command:
curl -I http://google.com
If your proxy is working correctly, you should see a standard HTTP response. If not, you may see a connection error.
Conclusion
While this guide covers the basics of setting up an HTTP proxy on Linux, the possibilities are vast. Remember to consult the documentation specific to your proxy server for more advanced configurations. By mastering these techniques, you will be well on your way to leveraging the full power of networking on Linux. Happy browsing!


