Parse Dashboard is a standalone dashboard for managing your Parse apps. You can use it to manage your Parse Server apps and your apps that are running on Parse.com.
Requirements:
Make sure your server met following dependencies. If you don’t have installed any of below, use tutorials install Nodejs and install Parse server on your system.
- Node.js version >= 4.3
- Parse Server version >= 2.1.4
Install Parse Dashboard
At this step you must have Nodejs and npm installed on your system. Now use following command to install parse-dashboard using npm.
npm install -g parse-dashboard
After successful installation of parse-dashboard, Now create a configuration file for parse dashboard. Use below commands to first create seprate directory to place configuration file then create file.
mkdir /opt/parsh-dashboard && cd /opt/parsh-dashboard
nano parse-dashboard-config.json
Add following content in parse-dashboard-config.json. Change highlighted values as per your Parse server installation and application settings.
{
"apps": [
{
"serverURL": "http://SERVER_IP :1337/parse",
"appId": "App_ID ",
"masterKey": "Master_Key ",
"appName": "App_Name "
}
],
"users": [
{
"user":"username ",
"pass":"password "
}
]
}
More details about required changes in above script.
- SERVER_IP: Change with your parse server ip or domain. Use server address if accessing dashboard from outside of localhost.
- App_ID: Parse server application id.
- Master_Key: Parse server application master key.
- App_Name: Application name (could be any) to display in dashboard.
- username: Required to access from outside of localhost.
- password: Password for user authentication.
Start Parse Dashboard
Your parse dashboard is ready to use. Use following command to start parse dashboard.
parse-dashboard --config parse-dashboard-config.json
After starting parse dashboard using above command will be accessible over https:// protocol. If you want to make it accessible over http: protocol use –allowInsecureHTTP false parameter with command.
parse-dashboard --config parse-dashboard-config.json --allowInsecureHTTP false
Your pare server will start on port 4040 default.
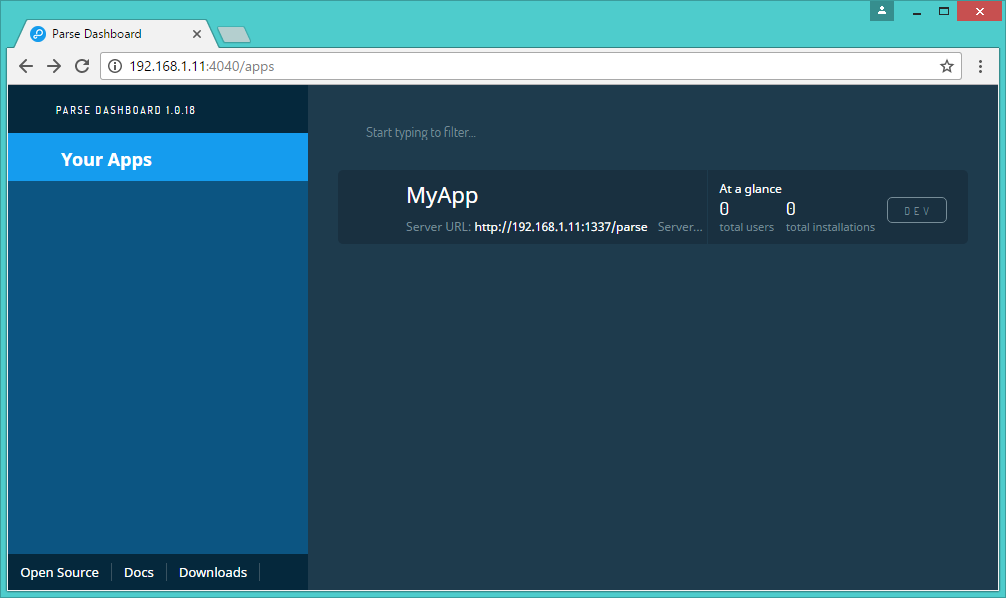
Access Parse Dashboard
Now access your server on Port 4040 and you will got parse dashboard. For accessible parse dashboard outside of localhost. You must have configured users in configuration to authenticate it.
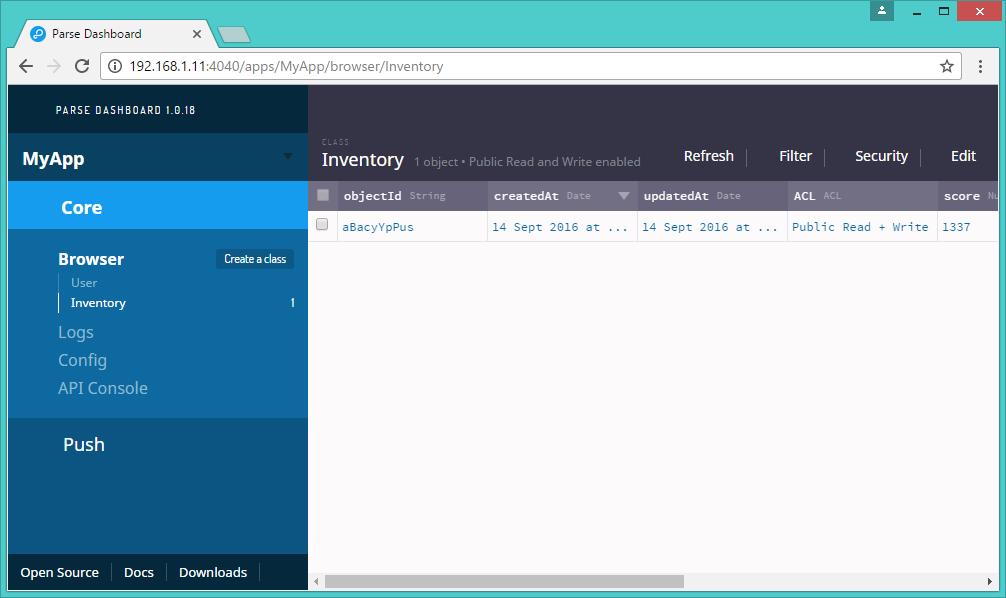
Click on application and you will get more details like below.


2 Comments
Nice post!
Hi,
thank you for this post !
I have an issue and i really don’t know where it can come from.
I am on Ubuntu 16.04 (upgraded today)
When I run :
parse-dashboard –config parse-dashboard-config.json
I have got :
The dashboard is now available at http://0.0.0.0:4040/
On firefox 50.0.2, when I go to 0.0.0.0:4040 or localhost:4040, i have a redirect to http://0.0.0.0:4040/login or http://localhost/login and a blank page
When I press F12, i can see “SyntaxError: expected expression, got ‘ v6.9.1
npm -v -> v3.10.8
I follow strictly the tuto and nothing special appeared.
I did it again at work and it worked perfectly but impossible on my computer at home :/
Maybe I need to install a specific package ? is it possible that these versions are not compatible ?
Do you have any tips ?
Thanks a lot !
Dylan