
PHPList is a opensource newsletter manager which allows us to add and manage subscribers along with creating and sending email newsletters. PHPList is created with PHP and MySQL. This article will help you to setup PHPList in Linux server.
Features of PHPList:
PHPList has a very long list of features, Anyone can use it easily for their business by sending emails. Below is few features listed of PHPList.
- One-way email announcement delivery system
- Tracks links and URLs. Statistics by message, URL and subscriber.
- Lets you write and send messages, and manage phplist over the internet.
- Allow you to choose many different combinations of templates, languages, user attributes and lists.
- You can use Subscriber Attributes in message content to make each and every email message personalized.
- Subscribers can be given the choice between text or html email messages.
- Use CSV and tab delimited files to import your existing list of users or to export the users.
- keeps your database clean of unused and non-existent email addresses.
- Read more…
Step 1: Setup LAMP Environment
We assume that you already have configured LAMP environment on your server. In case you do not have it already, please refer to below articles
For CentOS/RHEL => https://tecadmin.net/installing-apache-mysql-php-on-centos-redhat/
For Ubuntu => https://tecadmin.net/install-apache2-mysql-php5-on-ubuntu-systems/
Step 2: Download PHPList Archive
Lets download PHPList latest package from official download page. For this tutorial we are downloading PHPList 3.0.6 (Latest at time of writing article) using below command. and extract it
# wget http://prdownloads.sourceforge.net/phplist/phplist-3.0.6.zip?download
# unzip phplist-3.0.6.zip
Now upload lists directory to your web server document root. For this example I am using default document root as /var/www/html
# cd phplist-3.0.6/public_html
# mv lists /var/www/html
# chown -R apache:apache /var/www/html/lists
# chmod -R 755 /var/www/html/lists
Step 3: Configure Database for PHPList
Login to your mysql database server with root user and create a new database for PHPList. Also create a mysql user with full permission on phplist database.
# mysql -u root -p

mysql> CREATE DATABASE phplistdb;
mysql> GRANT ALL on phplistdb.* to 'phplist'@'localhost' IDENTIFIED BY '_password_';
mysql> FLUSH PRIVILEGES;
mysql> quit
Now edit PHPList configuration file config/config.php and update following values. Change value of TEST variable to 0 to disable test mode (0=disable test mode, 1=enable test mode) .
  $database_host = "localhost";
  $database_name = "phplistdb";
  $database_user = "phplist";
  $database_password = '_password_';

  define ("TEST",0);
Step 5: Open PHPList Web Installer
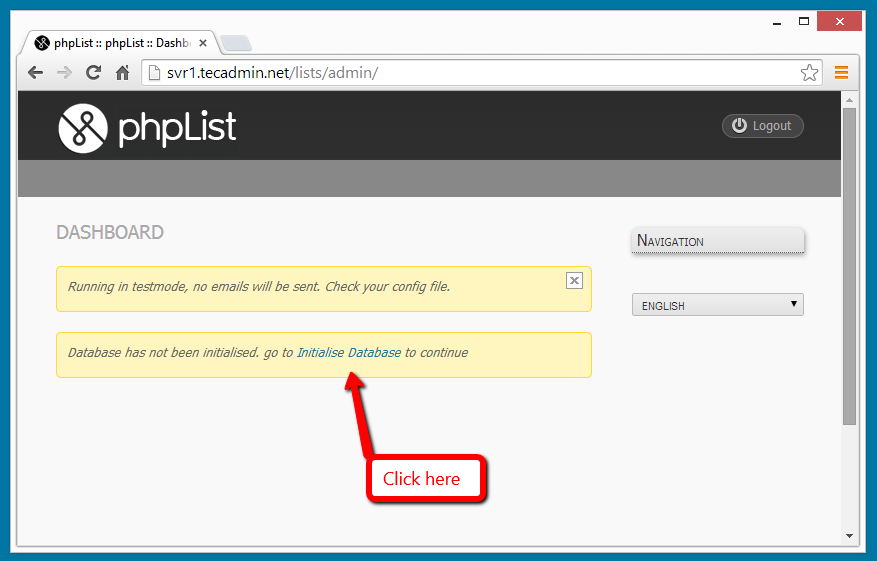
At this stage we have completed basic configuration of PHPList, Now its ready to install using web installer. Open phplist in your browser like below
http://svr1.tecadmin.net/lists/admin/
5.1. Click on initialize database
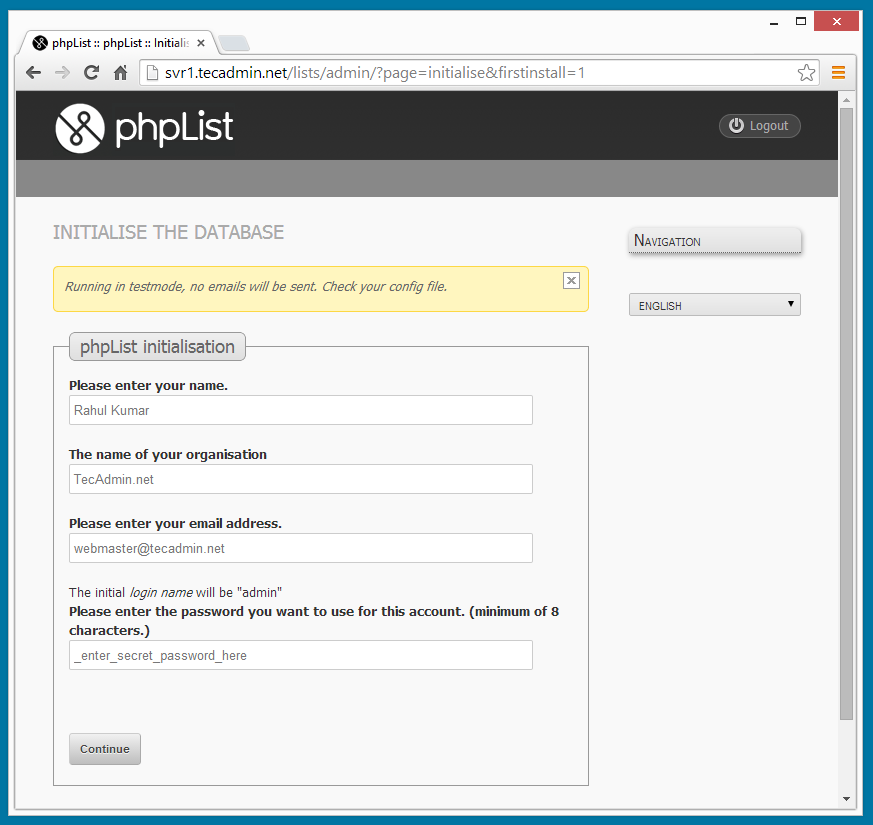
5.2. Enter Name, oranization details and set password for admin user
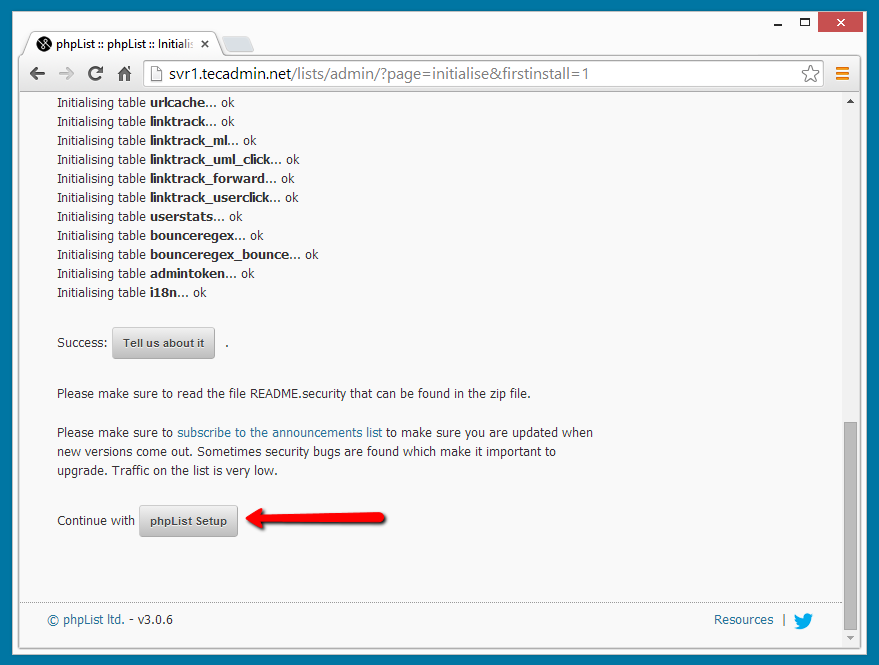
5.3. Showing that installation has been completed.
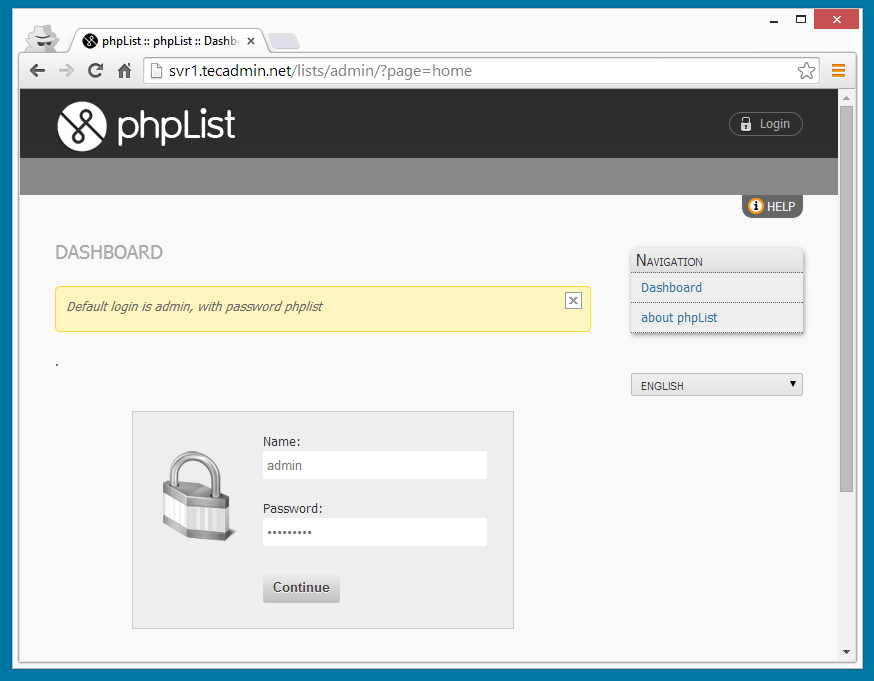
5.4. Login with useradmin admin and password used above.
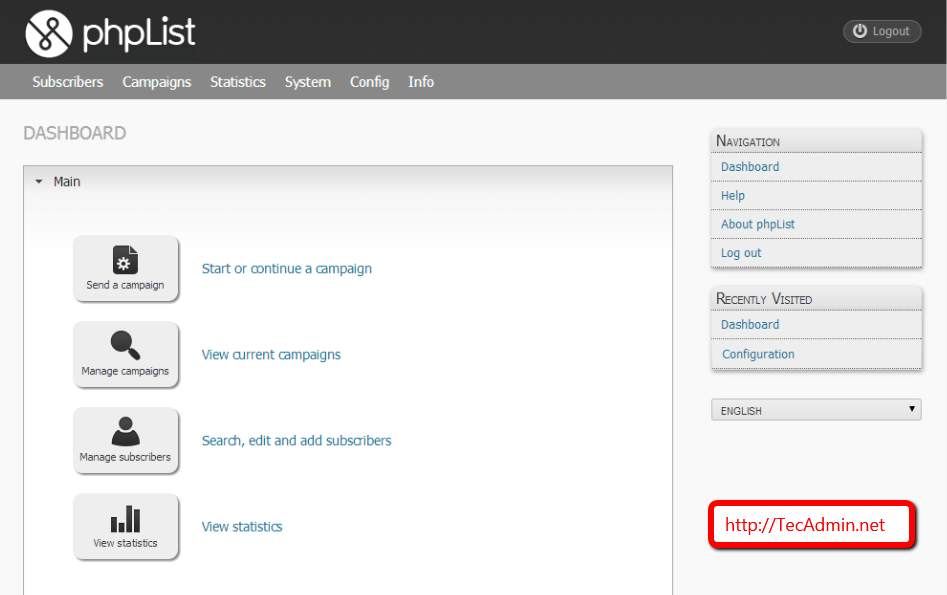
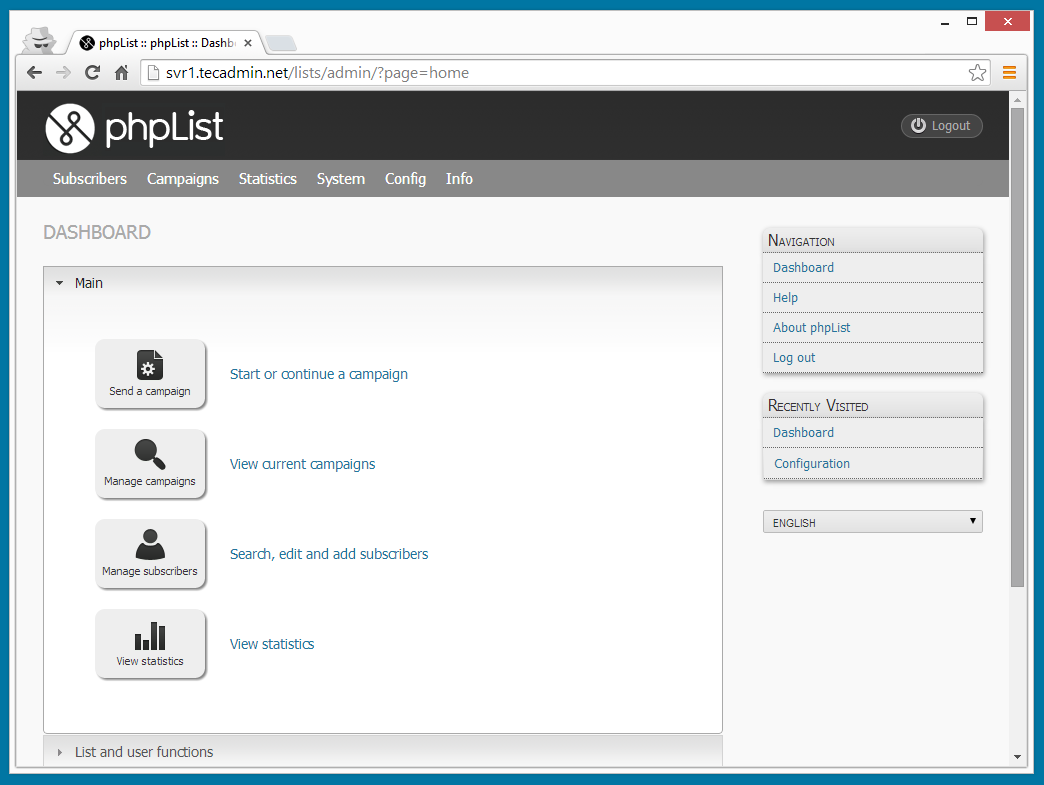
5.5. PHPList Dashboard.
2 Comments
Great Article My Friend
followed all steps in your article and every thing went well without any error. but when i start phplist using my ip address i get a blank page without any error.
Please help
Hi Neil,
I think you have fixed issue… I can see page properly on given url.