This tutorial will help you to set up Selenium with ChromeDriver on Fedora systems. This tutorial also includes an example of a Java program that uses the Selenium standalone server and ChromeDriver and runs a sample test case.
This tutorial described how to set up a selenium server with a chrome driver on a Fedora system. Also, you will get a sample Java program to run a small test over selenium with a headless chrome driver.
Prerequisites
Login to your Fedora system with Sudo privileged account. Launch a terminal and execute the following commands to install the required packages on your system.
sudo dnf install unzip wget java-11-openjdk java-11-openjdk-devel
Step 1 – Installing Google Chrome
Enable the Google chrome repository for installing latest versions. Execute the following commands, this will enable google-chrome repo on your Fedora system:
sudo dnf install fedora-workstation-repositoriessudo dnf config-manager --set-enabled google-chrome
Next install the Google chrome web browser:
sudo dnf install google-chrome-stable
Step 2 – Install ChromeDriver
You are also required to set up ChromeDriver on your system. ChromeDriver is a standalone server which implements WebDriver’s wire protocol for Chromium. The WebDriver is an open-source tool for automated testing of web apps across multiple browsers.
wget https://chromedriver.storage.googleapis.com/2.41/chromedriver_linux64.zipunzip chromedriver_linux64.zip
You can find the latest ChromeDriver on its official download page. Now execute below commands to configure ChromeDriver on your system.
sudo mv chromedriver /usr/bin/chromedriversudo chown root:root /usr/bin/chromedriversudo chmod +x /usr/bin/chromedriver
Step 3 – Download Required Jar Files
The Selenium Server is required to run Remote Selenium WebDrivers. You need to download the Selenium standalone server jar file using the below commands or visit here to find the latest version of Jar file.
wget https://selenium-release.storage.googleapis.com/3.13/selenium-server-standalone-3.13.0.jar
Also, download the TestNG jar file on your system.
wget http://www.java2s.com/Code/JarDownload/testng/testng-6.8.7.jar.zipunzip testng-6.8.7.jar.zip
Your Selenium server is now running with Chrome. Use this server to run your test cases written in Selenium using the Google Chrome web browser. The next step is an optional step and doesn’t depend on Step 5.
Step 4 – Testing with Sample Java Application
This is an optional step. It describes running a single test case using the Selenium standalone server and ChromeDriver. Let’s create a Java program using the Selenium server and Chrome Driver. This Java program will open a specified website URL and check if the defined string is present on the webpage or not.
Create a Java program by editing a file in text editor.
vim TecAdminSeleniumTest.java
Add the below content to the file.
1 2 3 4 5 6 7 8 9 10 11 12 13 14 15 16 17 18 19 20 21 22 23 24 25 26 27 28 29 | import java.io.IOException; import org.openqa.selenium.WebDriver; import org.openqa.selenium.chrome.ChromeOptions; import org.openqa.selenium.chrome.ChromeDriver; import org.testng.annotations.Test; public class TecAdminSeleniumTest { public static void main(String[] args) throws IOException, InterruptedException { System.setProperty("webdriver.chrome.driver", "/usr/bin/chromedriver"); ChromeOptions chromeOptions = new ChromeOptions(); chromeOptions.addArguments("--headless"); chromeOptions.addArguments("--no-sandbox"); WebDriver driver = new ChromeDriver(chromeOptions); driver.get("https://google.com"); Thread.sleep(1000); if (driver.getPageSource().contains("I'm Feeling Lucky")) { System.out.println("Pass"); } else { System.out.println("Fail"); } driver.quit(); } } |
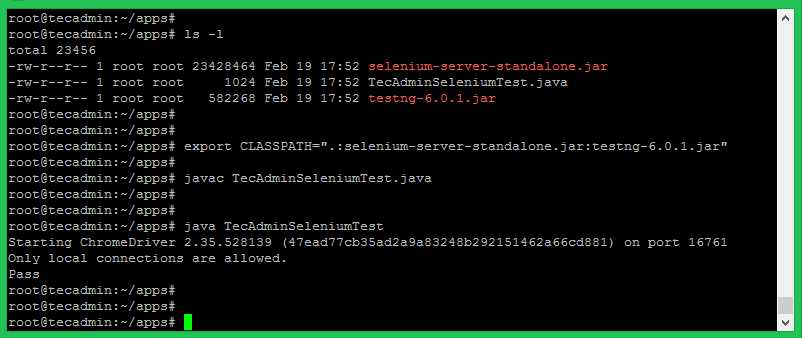
You can change the URL “https://google.com” with any other URL of your choice, Then also change the search string like “I’m Feeling Lucky” used in the above Java program. Save your java program and execute it. First, you need to set the Java CLASSPATH environment variable including the selenium-server-standalone.jar and testng-6.8.7.jar. Then compile the java program and run it.
export CLASSPATH=".:selenium-server-standalone.jar:testng-6.8.7.jar"javac TecAdminSeleniumTest.java
Then run command:
java TecAdminSeleniumTest
OutputStarting ChromeDriver 2.41.578700 (2f1ed5f9343c13f73144538f15c00b370eda6706) on port 10968 Only local connections are allowed. Feb 01, 2020 10:51:40 AM org.openqa.selenium.remote.ProtocolHandshake createSession INFO: Detected dialect: OSS Pass
You will see the results below. If the defined search string is found, You will get the message “Pass” and if the string is not found on the webpage, you will get the “Fail” message on the screen.
Conclusion
You have successfully configured Selenium with ChromeDrive on your Fedora system. Now you can automate your test cases and run them periodically. I hope this tutorial contributes a little help to you with the automation testing. Please do not forget to share this tutorial.


3 Comments
One nice thing about Selenium is you are not forced into a single language. You can run it with Python, JavaScript, among others. I don’t know why Java was chosen specifically. Seems like a poor choice compared to the popularity of Python and JavaScript.
most of these commands are for debian/ubuntu, wtf?!? Also, layout for the captcha should be fixed so it isn’t everlayed with the submit button, seriously, an RHCE shouldn’t be making these rookie mistakes
Hi Emlay, Thanks for pointing out the mistake.. Tutorial has been updated with proper commands.