Varnish is an Web accelerator used for content-heavy dynamic web sites. Its used as front-end caching server for web servers. This tutorial will help you to setup Varnish on your System.
Step 1: Add Atomic Repository
There are latest release available in Atomic repository in RPM format.
For RHEL/CentOS 5:
# rpm -Uvh http://www6.atomicorp.com/channels/atomic/centos/5EL/i386/RPMS/atomic-release-1.0-16.el5.art.noarch.rpm
For RHEL/CentOS 6:
# rpm -Uvh http://www6.atomicorp.com/channels/atomic/centos/6/i386/RPMS/atomic-release-1.0-16.el6.art.noarch.rpm
Step 2: Install Apache and Configure
Use following commands to install Apache on your system.
# yum install httpd
Configure Apache to work on port 82. Edit Apache configuration file /etc/httpd/conf/httpd.conf and change value of Listen from 80 to 82
Listen 82
Create a test file check.html in document root using test content.
# cat /var/www/html/check.html
<h1> Welcome to Apache Server !!!</h1>
Step 3: Install Varnish
Install Varnish using yum command line tool using following command.
# yum install varnish
Step 4: Configure Varnish
4.1 Configure /etc/varnish/default.vcl file
This file used to tell varnish where the actual content are. We will configure it to find content from service running on local machine on port 82 ( Apache ).
# vim /etc/varnish/default.vcl
backend default {
  .host = "127.0.0.1";
  .port = "82";
}
4.2 Configure /etc/sysconfig/varnish file
We will change the default listening port by varnish in this file. Generally this file contains all start-up configuration. Edit file and change following values.
# vim /etc/sysconfig/varnish
VARNISH_LISTEN_PORT=80
VARNISH_STORAGE_SIZE=512M
- VARNISH_LISTEN_PORT: Port on which varnish will listen
- VARNISH_STORAGE_SIZE: Max amount of RAM used by Varnish
All other default configuration are fine and there are no need to make changes for initial configuration.
Step 5: Restart Services
After completing configuration restart both service varnish and apache.
# service httpd restart
# service varnish restart
Step 5: Test Configuration
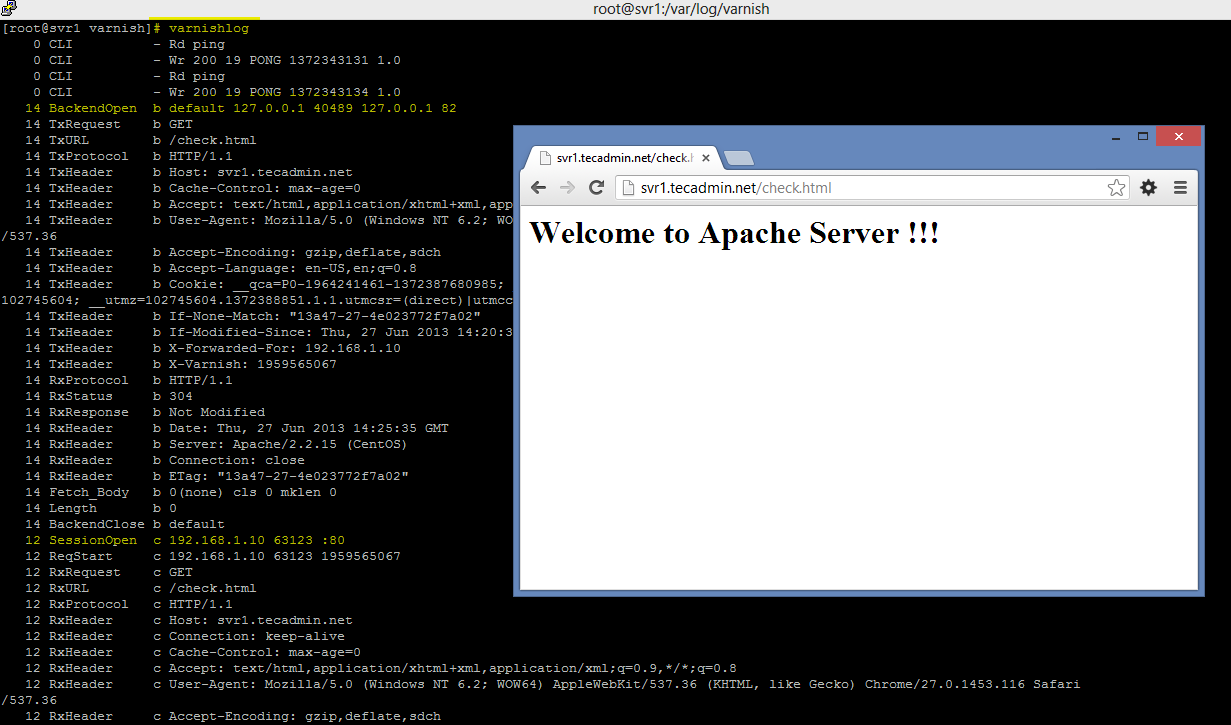
To check your configuration, Open your host in browser pointing to port 80. As the varnish is running on port 80, it will connect to Apache running on port 82 and get back the results to browser.
http://svr1.tecadmin.net/check.html
To confirm that varnish is working, you can check the varnish logs using following command.
# varnishlog
Above command will show you detailed log information about what happening with requests.