
Ubuntu, a leading Linux distribution, offers a variety of Display Managers to enhance user experience. This article delves into how to switch between three popular Display Managers: GNOME Display Manager (GDM), LightDM, and Simple Desktop Display Manager (SDDM). Whether you’re a seasoned Linux user or new to Ubuntu, this guide will provide step-by-step instructions for optimizing your system’s graphical login interface.
Understanding the Display Manager
A Display Manager is a graphical login program and session manager that is responsible for user authentication. It is a totally separate application from the desktop environment.
Display Manager is also known as “login manager”. In this tutorial, we will discuss 3 popular display managers that are GDM, SDDM, and LightDM. Some of the display managers are installed by default with the desktop environment.
- GDM3: is the default display manager for Gnome Desktop Environment
- LightDM: is the an lightweight and opensource display manager
- SDDM: is a display manager for the X11 and Wayland windowing systems. KDE Plasma 5 is using this as default display manager.
Preparing for the Switch
Ensure your Ubuntu system is updated to avoid compatibility issues. Use the following command:
sudo apt update && sudo apt upgrade
Installing Display Manager on Ubuntu
Although, multiple Display Managers are available for the Ubuntu desktop environment. But we would focus on three prominent ones – GDM, LightDM, XDM, and SDDM. GDM (GDM3) is the default Display Manager for Ubuntu 16.10 and newer versions. Still, some of the other Ubuntu flavors prefer to use LightDM as the default display manager.
Use one of the below commands to install Display Manager on the Ubuntu system.
- Installing GDM3:
sudo apt install gdm3 - Installing LightDM:
sudo apt install lightdm - Installing SDDM:
sudo apt install sddm
After installation, you’ll be prompted to select the default Display Manager. Choose preferred display manager and reboot your system.
Switching Display Manager After Installation
During the installation of the display manager, the installer will prompt to change the default display manager.
After installation, you can also switch the display manager with the below-mentioned command. Open a terminal and type:
sudo dpkg-reconfigure gdm
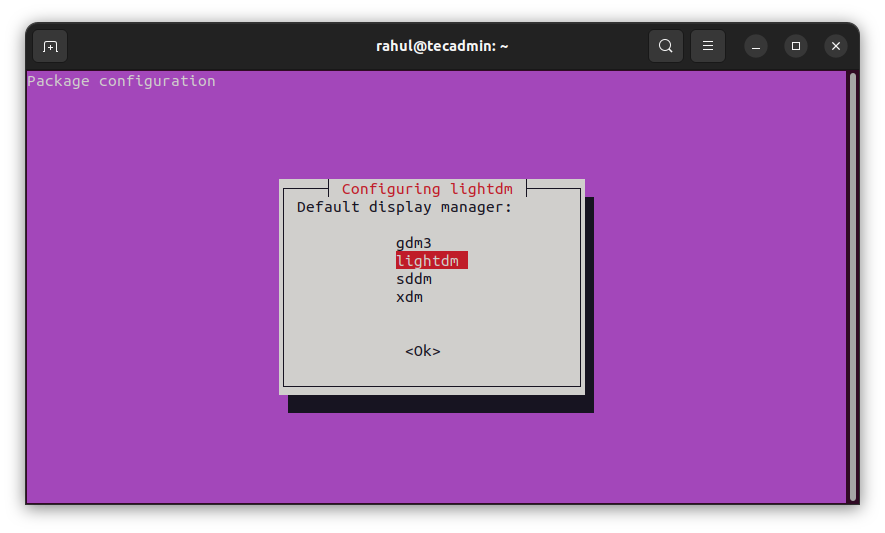
Use the UP + DOWN keys to select the display manager and hit the Ok button.
In case the above command fails, you can directly edit the /etc/X11/default-display-manager file and set the new display manager.
Customization Tips
Each Display Manager offers unique customization options. GDM can be tweaked using GNOME Tweaks, LightDM has various greeters for different looks, and SDDM themes can be changed to match KDE Plasma aesthetics.
Conclusion
Switching between Display Managers in Ubuntu allows users to tailor their graphical login experience. Whether you prefer GDM, LightDM, or SDDM, each brings a unique aspect to your Ubuntu experience. Remember to back up your data before making changes and enjoy the fresh look of your Ubuntu login screen!