How to Upgrade Ubuntu 16.04 to Ubuntu 18.04 LTS. Ubuntu 18.04 is an LTS release will be supported till 2023. Ubuntu provids two types of releases Standard release and Long Term Support (LTS) release. Ubuntu provides support for standard releases for approx 1 year while Long Term Support is useful for approx 5 years.
A new Ubuntu 18.04 LTS release is available to upgrade. The Ubuntu desktop users can upgrade to the latest release. But if you are running Ubuntu Server and especially production server, we recommend waiting for a few months before the upgrade to Ubuntu 18.04 LTS.
Step 1 – Backup Your Data
We strongly recommended to backup all your important data from your Server or Desktop to a remote location. Also, take a complete system snapshot (if possible).
Step 2 – Upgrade Ubuntu 16.04 to 18.04 LTS
After taking the complete backup of the system. Let’s move to upgrade process. Execute commands to upgrade current system packages.
sudo apt-get update
sudo apt-get upgrade
Now install the update-manager-core package on your system.
sudo apt-get install update-manager-core
After that edit /etc/update-manager/release-upgrades file and make sure Prompt value is set to lts like below. This tells upgrader to only search for the LTS upgrade available. For any non LTS version, it will not show.
Prompt=lts
Finally, Your system is ready to upgrade. Just execute a command to upgrade your Ubuntu 16.04 to Ubuntu 18.04 LTS system.
sudo do-release-upgrade -d
Follow on-screen instructions and your upgrade will be completed. This process may take some time according to your network speed and system performance.
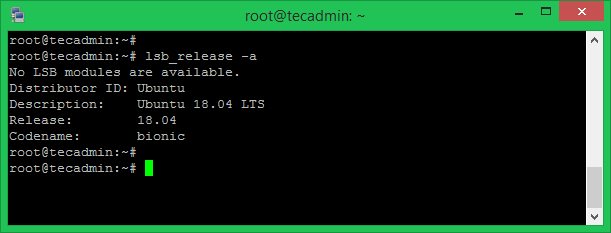
3. Check Ubuntu Distribution Details
After completing the upgrade process, reboot your system. Then check the version of the upgraded system. To Check Ubuntu distribution details for servers using the command line.
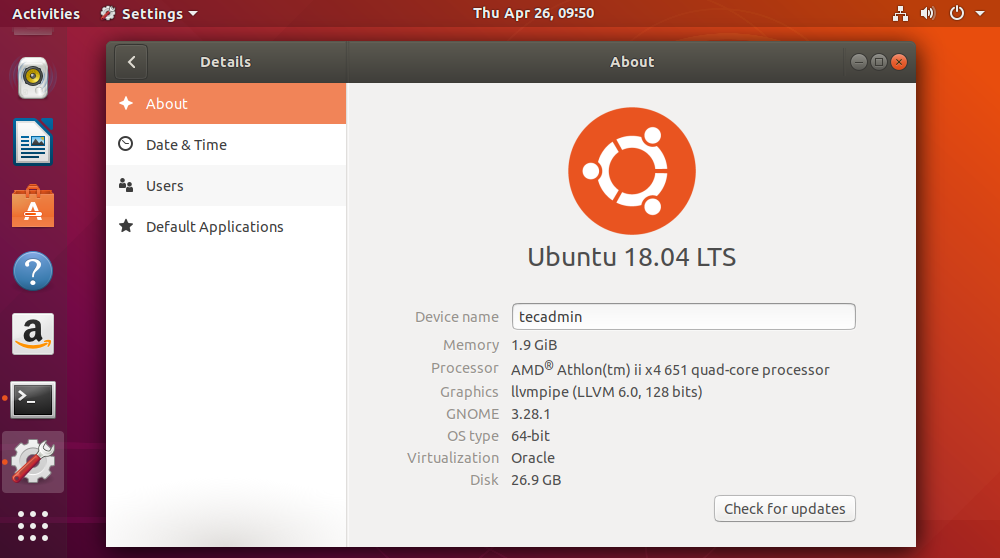
For Desktop editions open Settings >> About section to view distribution details.
The world’s best operating system has been installed on your system. Let’s enjoy it.


2 Comments
is there way that i can upgrade offline using iso from ubuntu 16.04 to 18.04?
Hi,
After upgrading the Ubuntu 16.04 to 18.04 the problem coming unable to access internet & ping but able to ping the local network. Pls suggest