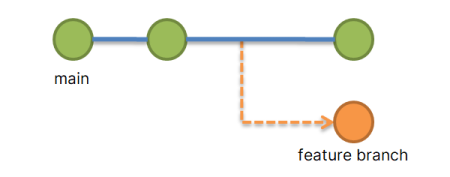
In the course of your development work, you may often encounter situations where two or more branches in your Git repository need to be merged. This operation, while routine, can sometimes run into complications. One such issue is the error message: error: You have not concluded your merge (MERGE_HEAD exists). This error typically occurs when a merge has been initiated but not completed.
In this article, we will walk through the steps to troubleshoot and resolve this error.
Understanding the Error
When you attempt to merge two branches in Git, the tool creates a temporary .git/MERGE_HEAD file. This file contains the reference to the commit of the branch that is being merged. If the merge is completed successfully, Git automatically removes this file. However, if the merge operation is interrupted (by conflicts, for example), the MERGE_HEAD file remains, leading Git to believe that a merge operation is still in progress.
If you try to execute other Git operations (like checkout, pull, or merge) while Git considers a merge to be in progress, it throws the error: You have not concluded your merge (MERGE_HEAD exists) message. Essentially, this message is Git’s way of saying “I can’t do that right now; there’s a merge operation that hasn’t been finished yet.”
Troubleshooting Steps
Here are the steps you need to take to troubleshoot and fix this error:
- Confirm the State of the Merge: Before proceeding, you’ll need to determine the status of your working tree. Use the command `git status` to check the current status of the repository. This command will list any uncommitted modifications and any merge conflicts that may exist.
- Resolve Merge Conflicts: If there are merge conflicts indicated, you will need to resolve these before you can conclude the merge. Open each of the files with conflicts and manually resolve the differences between the two branches. The conflicting areas will be marked with ‘<<<<<<<', ‘=======’, and ‘>>>>>>>’ denoting the changes from both branches. After resolving the conflicts, you should add the resolved files to the staging area using `git add <file-name>`. Repeat this for all the conflicting files.
- Commit the Merge: Once all conflicts are resolved and all changes are added to the staging area, you can commit the merge with the command `git commit -m “Your commit message”`. This will finalize the merge operation and remove the MERGE_HEAD file, resolving the error.
If You Want to Abort the Merge
If you’ve initiated a merge and decide you want to cancel it (maybe you’re not ready to deal with the conflicts, or you’ve decided the merge isn’t what you want), you can use the git merge --abort command. This will stop the merge process and revert your working tree to the state it was in before you initiated the merge.
git merge --abort
Note: The git merge --abort option is only possible if the merge you started has resulted in conflicts. Git has the ability to auto-resolve certain conflicts; in those cases, git merge --abort is not an option, because Git has already made the changes.
Preventing the Error
To avoid this error in the future, always make sure to conclude your merges either by committing the merge or aborting it, especially before starting another operation. Developing a habit of checking your Git status before initiating operations can help ensure that you’re not interrupting an ongoing process.
Conclusion
While error: You have not concluded your merge (MERGE_HEAD exists) can seem alarming, it’s actually Git’s helpful way of keeping you from complicating your repository’s history. By following the steps outlined above, you can successfully troubleshoot this error and get back to your development work.
Remember, the key to successful Git use is understanding the steps Git is taking behind the scenes (like creating the MERGE_HEAD file). With this understanding, you can navigate even complex Git situations with confidence.


1 Comment
Thank you this article helped me to resolve my issue. Did Troubleshooting Steps correctly (y)