Zabbix is an open source software for networks and application monitoring. Zabbix provides agents to monitor remote hosts as well as Zabbix includes support for monitoring via SNMP, TCP and ICMP checks. Click here to know more about zabbix.
This article will help you to step by step install Zabbix 3.0 Server on CentOS/RHEL 7/6 systems. Before starting installation read below basic requirements to run Zabbix 3.4.
- Apache: 1.3.12 or later.
- PHP: 5.4.0 or later.
- MySQL: 5.0.3 or later.
- OpenIPMI: Required for IPMI support.
- libssh2: Required for SSH support. Version 1.0 or higher.
- fping: Required for ICMP ping items.
- libcurl: Required for web monitoring.
- libiksemel: Required for Jabber support.
- net-snmp: Required for SNMP support.
Step 1 – SetUp Apache, MySQL and PHP
In order to use Zabbix, we required a Web Server, database server, and PHP to work. In this steps we are going to set up these services, You may skip this step if you have already configured it.
Install All Services
yum install httpd httpd-devel
yum install mysql mysql-server
yum install php php-devel php-bcmath  php-pear php-gd php-mbstring php-mysql php-xml
Start All Services
service httpd start
service mysqld start
MySQL Initial Setup
Run the following command to setup MySQL initially and secure it
mysql_secure_installation
Step 2 – Configure Yum Repository
You can file zabbix repositories package on zabbix official website. You can also use one of following commands to add zabbix repository in your system.
CentOS/RHEL 7:
rpm -Uvh https://repo.zabbix.com/zabbix/4.0/rhel/7/x86_64/zabbix-release-4.0-2.el7.noarch.rpm

CentOS/RHEL 6:
rpm -Uvh https://repo.zabbix.com/zabbix/4.0/rhel/6/x86_64/zabbix-release-4.0-2.el6.noarch.rpm
Step 3 – Install Zabbix Server with MySQL
You have added Zabbix yum repository in above step. Now use the following command to install Zabbix server with MySQL database support packages on your system.
yum install zabbix-server-mysql zabbix-web-mysql zabbix-proxy-mysql
Step 4 – Setup Zabbix Apache Configuration
Zabbix creates its own apache configuration file /etc/httpd/conf.d/zabbix.conf. Edit this file and just update timezone. More timezone’s
php_value date.timezone Asia/Kolkata
After changing value restart Apache service.
service httpd restart
Step 5 – Configure MySQL Database for Zabbix
This installation is using MySQL as the backend of Zabbix, So we need to create MySQL database and User for Zabbix installation.
mysql -u root -p

mysql> CREATE DATABASE zabbixdb CHARACTER SET UTF8;
mysql> GRANT ALL PRIVILEGES on zabbixdb.* to zabbix@localhost IDENTIFIED BY 'password';
mysql> FLUSH PRIVILEGES;
mysql> quit
After creating database restore the default mysql database provided by zabbix. These files can be found at /usr/share/doc/zabbix-server-mysql-<version>/create/ directory.
zcat /usr/share/doc/zabbix-server-mysql*/create.sql.gz | mysql -uroot -p zabbixdb
zcat /usr/share/doc/zabbix-proxy-mysql*/schema.sql.gz | mysql -uroot -p zabbixdb
Now edit Zabbix server configuration file /etc/zabbix/zabbix_server.conf and update the following database configurations.
  DBHost=localhost
  DBName=zabbixdb
  DBUser=zabbix
  DBPassword=password
Step 6 – Start Zabbix Server
After completing the setup, let’s start the Zabbix server using the following command.
service zabbix-server start
After starting Zabbix service, let’s go to Zabbix web installer and finish the installation.
Step 7 – Complete Zabbix Web Installer Wizzard
Zabbix web installer can be accessed on /zabbix subdirectory URL on your servers IP or domain. For example, host.tecadmin.net is pointed to my Zabbix server. Now access the Zabbix using the following URL. You must change FQDN as per your setup.
http://host.tecadmin.net /zabbix/
and follow the steps as per given screenshots below.
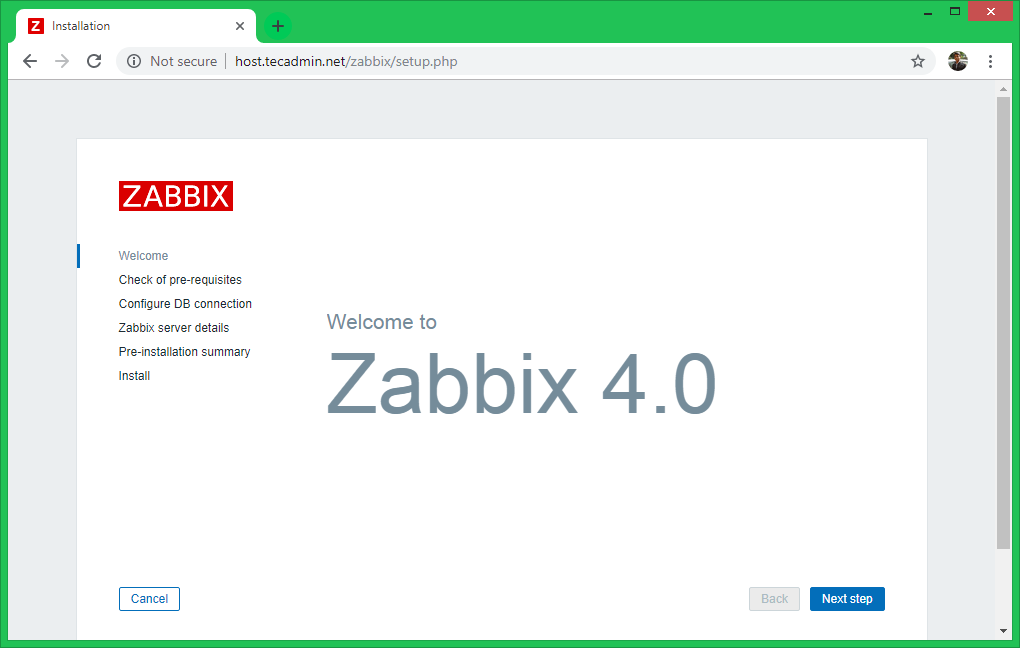
Zabbix Setup Welcome Screen
This is the welcome screen of Zabbix web installer. Go forward by click on next button.
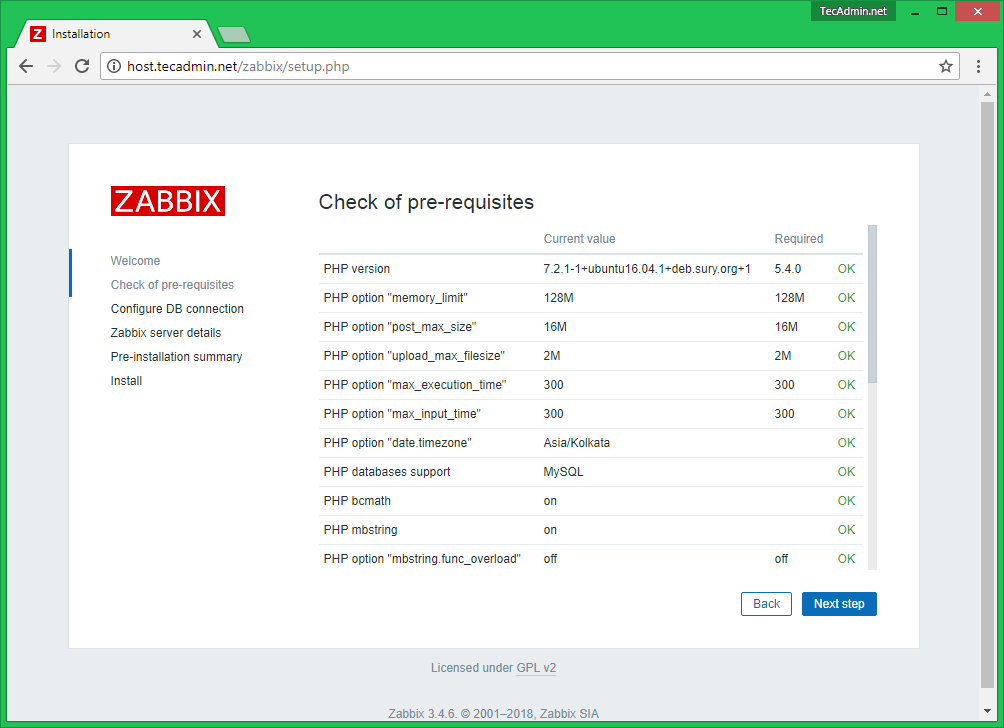
Check for pre-requisities
Check if your system has all required packages, if everything is ok click next.
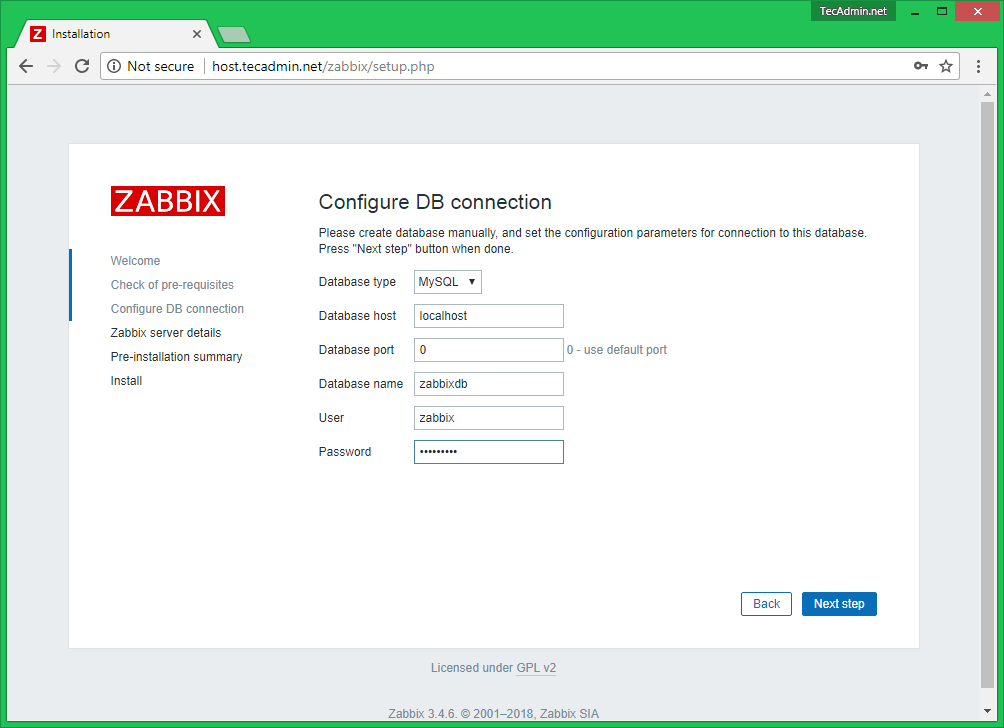
Configure DB Connection
Enter database details created in Step #4 and click next to continue.
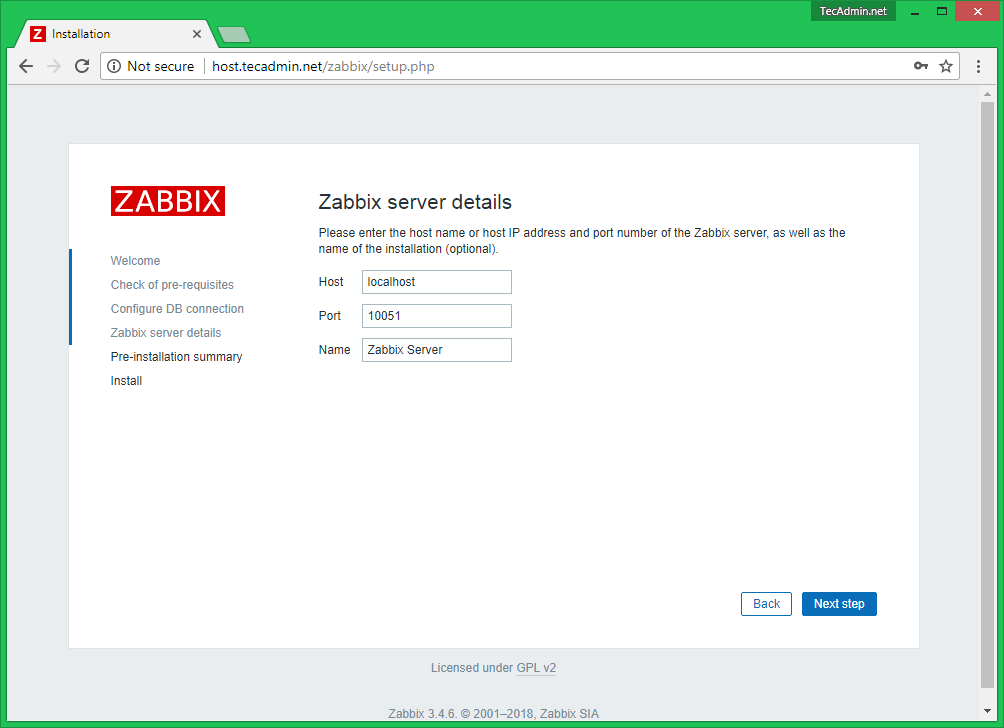
Zabbix Server Details
This is the host and port of running Zabbix server. As your Zabbix server is running on the same host, so keep the values unchanged. You can give a name for your instance.
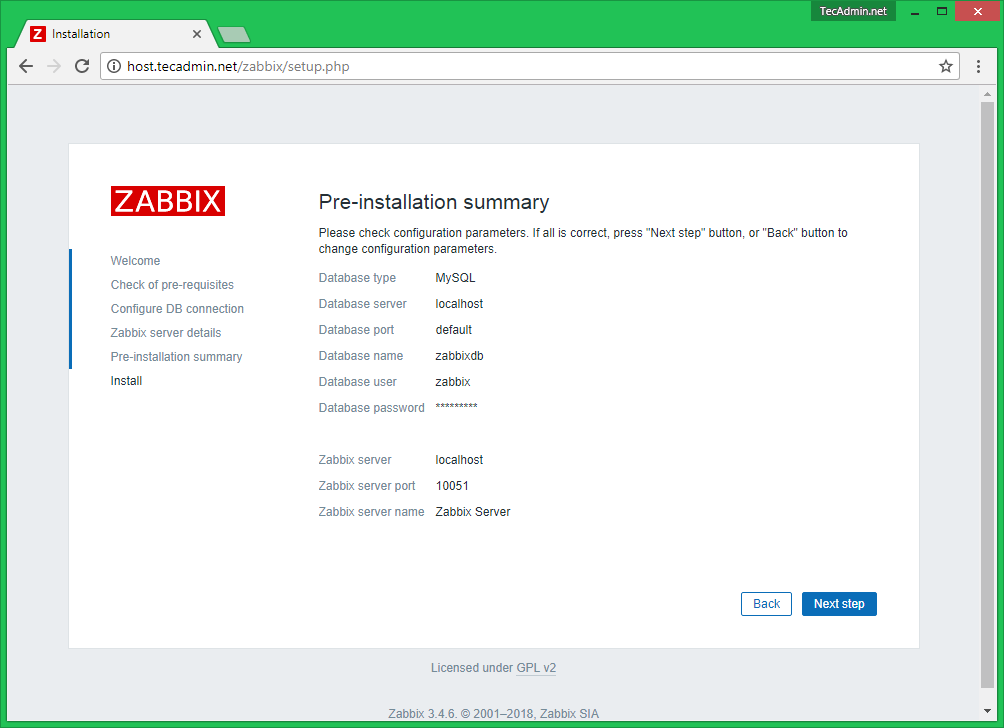
Pre-Installation Summary
In this step will show the summary you have entered previous steps, so simply click next.
Install Zabbix
If everything goes correctly, you will see a successful installation message on this page. This will also show you a message for the created configuration file.

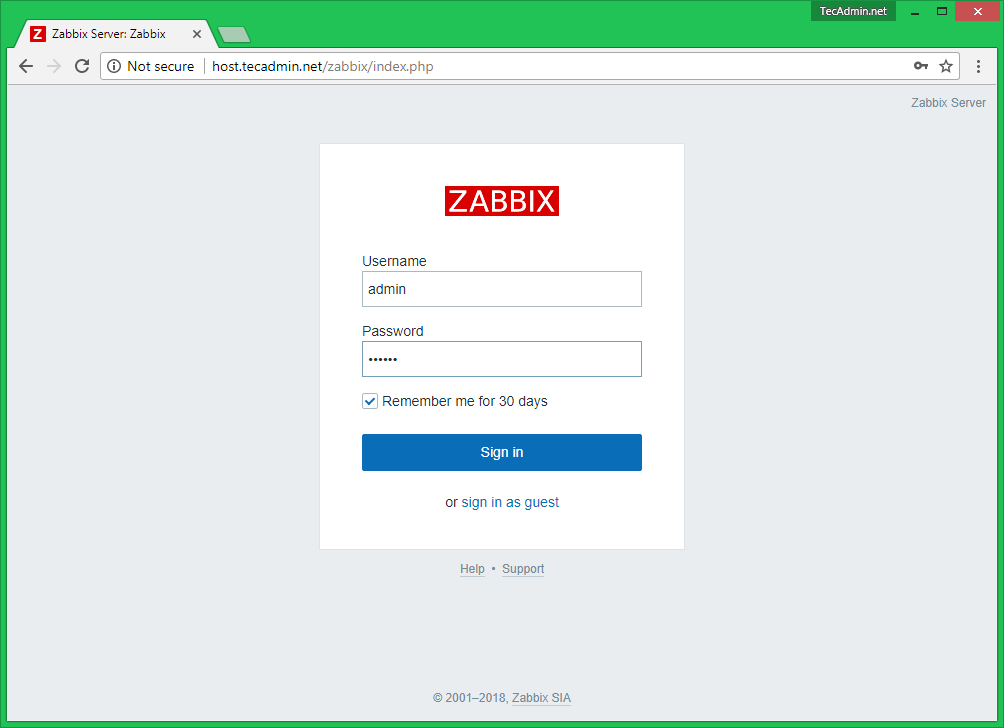
Zabbix Login Screen
Login to Zabbix using default credentials.
 Username:  admin
 Password:  zabbix
After successful login, You will get Zabbix dashboard like below.
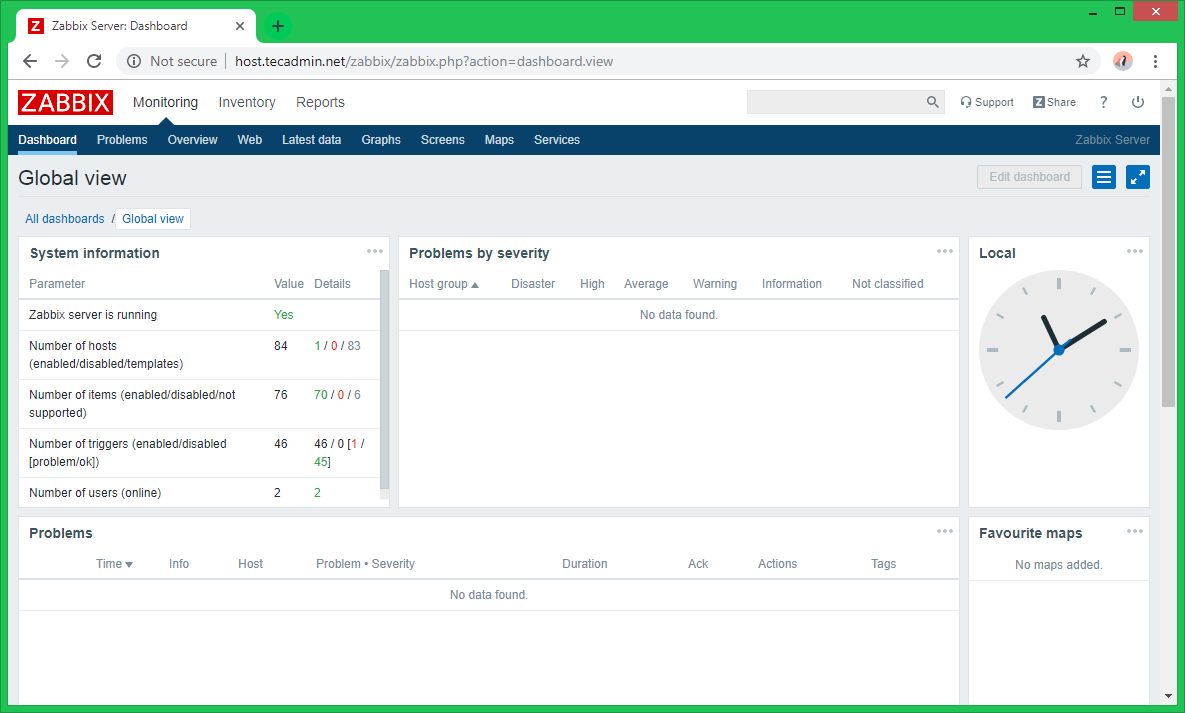
Congratulation! Your Zabbix setup has been completed. Read our next article to install zabbix agent and add host in zabbix server.
48 Comments
Hi, at Step 5
GRANT ALL PRIVILEGES on zabbixdb.* to zabbix@localhost IDENTIFIED BY ‘password’;
Fails.
ERROR 1064 (42000): You have an error in your SQL syntax; check the manual that corresponds to your MySQL server version for the right syntax to use near ‘IDENTIFIED BY ‘password” at line 1
What is the correct command for Server version: 8.0.15 MySQL Community Server ?
From what I have read that command is no longer valid in versions SQL 8+?
Is it happening when you copy/paste from here? If so, did you try changing the quotes around the password?
I wish to use encryption between server and agents. I am using Linux 6 and 7.
hi i follwed you tutorial and have the same ptoblem zabbix server is nort running the information displayed may not be current. upon typing command systemctl status zabbix-server Igot following output
systemctl status zabbix-server
● zabbix-server.service – Zabbix Server
Loaded: loaded (/usr/lib/systemd/system/zabbix-server.service; enabled; vendor preset: disabled)
Active: active (running) since Wed 2017-11-08 15:31:45 PKT; 26min ago
Process: 79711 ExecStop=/bin/kill -SIGTERM $MAINPID (code=exited, status=0/SUCCESS)
Process: 79718 ExecStart=/usr/sbin/zabbix_server -c $CONFFILE (code=exited, status=0/SUCCESS)
Main PID: 79720 (zabbix_server)
CGroup: /system.slice/zabbix-server.service
└─79720 /usr/sbin/zabbix_server -c /etc/zabbix/zabbix_server.conf
Nov 08 15:31:45 localhost.localdomain systemd[1]: zabbix-server.service: main process exited, code=exited, status=1/FAILURE
Nov 08 15:31:45 localhost.localdomain systemd[1]: Unit zabbix-server.service entered failed state.
Nov 08 15:31:45 localhost.localdomain systemd[1]: zabbix-server.service failed.
Nov 08 15:31:45 localhost.localdomain systemd[1]: Starting Zabbix Server…
Nov 08 15:31:45 localhost.localdomain systemd[1]: PID file /run/zabbix/zabbix_server.pid not readable (yet?) after start.
Nov 08 15:31:45 localhost.localdomain systemd[1]: Started Zabbix Server.
It’s same problem me too. How should i proceed next to this. Any one having idea..?
Hi,
Thanks for the great tutorial.
Some error while installing Zabbix:
I have executed the step 3 and got the following error :
Finished Dependency Resolution
Error: Package: zabbix-web-3.0.10-1.el7.noarch (zabbix)
Requires: php-mbstring
Error: Package: zabbix-web-3.0.10-1.el7.noarch (zabbix)
Requires: php-bcmath
You could try using –skip-broken to work around the problem
You could try running: rpm -Va –nofiles –nodigest
So tried with –skip-broken again with the step3 command and it executed fine with giving 5 dependencies packages skipped:
Skipped Packages:
dejavu-fonts-common noarch 2.33-6.el7 rhui-REGION-rhel-server-releases 64 k
dejavu-sans-fonts noarch 2.33-6.el7 rhui-REGION-rhel-server-releases 1.4 M
php-ldap x86_64 5.4.16-42.el7 rhui-REGION-rhel-server-releases 52 k
zabbix-web noarch 3.0.10-1.el7 zabbix 2.3 M
zabbix-web-mysql noarch 3.0.10-1.el7 zabbix 4.8 k
And after that I am trying to edit the zabbix.conf page but I couldn’t find the file.
Can you please help me with resolution.
Enter
#setenforce 0
Use setenforce 0 to enter permissive mode. Not sure it maybe fix your issue.
The requested URL /zabbix was not found on this server.
Hello Rahul, excellent tutorial. Thanks for that!
At least for CentOS7 I had to make some changes in order to make it work.
1) Step 5B has changed. default database now is /usr/share/doc/zabbix-server-mysql-/create.sql.gz You need to gunzip this file and than run
# mysql -u zabbix -p zabbixdb < create.sql
2) httpd was unreachable from outside the machine. Since I am just testing I dsabled the CentOS firewall (not recommended for production!)
systemctl disable firewalld
systemctl stop firewalld
3) Zabbix did not connect to MySQL. You need te manually edit /etc/zabbix/zabbix_server.conf
Make sure DBuser and DBpassword match up with the MySQL user created in step 5A.
4) Finally upon launch Zabbix was crashing stating it could not find the PID file. It turned out SeLinux was blocking access to it. Since this is only a production server I disabled SeLinux all together. Edit /etc/sysconfig/selinux and change the bottom line to SELINUXTYPE=disabled
5) In order to automatically startup services upon boot time:
systemctl enable httpd.service
systemctl enable mariadb.service
systemctl enable zabbix-server.service
I am not able to find the step 4 in my server6.5 , Where i did miss
vi /etc/httpd/conf.d/zabbix.conf
I am stuck at Step 7.
I am not able to access my zabbix server URL (http://IP-Address/zabbix/)
It is showing error like below.
Not Found
The requested URL /zabbix/ was not found on this server.
Please help.
Please follow below steps:
# firewall-cmd –permanent –add-service=http
# firewall-cmd –permanent –zone=public –add-port=10051/tcp
# firewall-cmd –permanent –zone=public –add-port=10050/tcp
# firewall-cmd –reload
I am not able to find the step 4 in my server6.5 , Where i did miss
vi /etc/httpd/conf.d/zabbix.conf
Add this manually.
Hi,
I wanted to know how ZABBIX 3.0 (latest version) can be installed?
Can you please provide me with the steps?
Thankyou
how to integration zabbix server with client
Hello
I am stuck at point no. 4
-bash: /usr/share/doc/zabbix-server-mysql-5.1.73/create/schema.sql: No such file or directory
If I browse the dir /doc there is only one zabbix folder
zabbix-release-2.2
Please advice.
you must install mysql
i am not able to install zabbix-web-mysql.
it showing the following error please help.
Error: Package: zabbix-web-2.2.9-1.el6.noarch (zabbix)
Requires: php-bcmath
Error: Package: zabbix-web-2.2.9-1.el6.noarch (zabbix)
Requires: php-mbstring
Thanks!!!
Loaded plugins: product-id, refresh-packagekit, replace, subscription-manager
Updating Red Hat repositories.
Setting up Install Process
No package php-devel available.
No package php-mbstring available.
Hi i am unable to install these two packages. please help me how to install.
no package php-devel available
no package php-mbstring available
error showing like that in Redhat 6.1.. please i don’t know how to solve that.. please help me
Hi everyone.
Thank you Rahul for this article.
I can install zabbix v2.4 but i can’t run zabbix server.
I found for zabbix_server.conf but i can’t find.
Please update article for install zabbix v2.4 on CentOS 6.5 or 7.0.
Please help me.
Thank you.
Thanks K1,
We will update this article as soon as possible.
Hello, K1,
You won’t start Zabbix Server 3.0 on CentOS 7 because you don’t have “Disabled” SELinux.
You can disabled SELinux right here: /etc/selinux/config.
After that, you must reboot your server with reboot or shutdown -r now. After reboot, confirm that the getenforce command returns Disabled.
Good Luck!
Hi Rahul,
Thanks for sharing this great article. It is really helpfull.
I am a newbie in monitoring as well as in zabbix.
I have created a web scenario for checking web app availability and login check for one of a web application for testing purpose. I have created web scenario by using real life web scenario on zabbix official documentation. But it is not working for me. If i put incorrect password in variable, still it shows no error.
Is there any tutorial created by you for web scenario, please share it. It is very urgent need.
Thanks,
Jitendra
Very nice! Thank you for sharing.
hello.. i want to ask why my zabbix_server.log be like this “13357:20140801:031609.456 [Z3001] connection to database ‘zabbix’ failed: [1045] Access denied for user ‘zabbix’@’localhost’ (using password: NO) ”
Thank you
Hi,
Check your zabbix database configuration file has correct password for mysql user ‘zabbix’.
Username for login at the end should be “Admin” with capital A
username = Admin
password = zabbix
why i cant log in use this username and password ??
Because you written “admin” with “A”.
You written “Admin” with “A”. Please type with “a”.
why when im finish install frontend zabbix.. i cant log in ?
Thanks a lot
Saikat
Nice tutorial Thanks !
I just have one question, if I want to install zabbix proxy, how can I do?
Awesome article million thanks
One small update . need to edit the below line , then only its working
# vi /etc/zabbix/zabbix_server.conf
DBHost=localhost
DBName=zabbix
DBUser=zabbix
DBPassword=zabbix
Yes, Everyone Plase follow this then only it will work .
Your tutorial is very helpful, thank you!
hi, nice tutorial, is possible to run zabbix from a remote database server? 1 node for apache, another node for databases, thanks in advance.
I am not able to install latest zabbix version 2.2.1. problem we are facing while installing zabbix rpm repository (# rpm -ivh .
Could you help to sort out this issue.
awesome doc, thx a million.
one update worth noting is the yum repo
url above is no longer good.
I used:
rpm –import http://repo.zabbix.com/RPM-GPG-KEY-ZABBIX
and
rpm -Uv http://repo.zabbix.com/zabbix/2.2/rhel/6/x86_64/zabbix-release-2.2-1.el6.noarch.rpm
thx again!
These instructions fail off the top.
sudo rpm -Uv http://repo.zabbixzone.com/centos/zabbixzone-release-0.0-1.noarch.rpm
rpm: RPM should not be used directly install RPM packages, use Alien instead!
rpm: However assuming you know what you are doing…
Retrieving http://repo.zabbixzone.com/centos/zabbixzone-release-0.0-1.noarch.rpm
error: Failed dependencies:
gpg is needed by zabbixzone-release-0.0-1.noarch
I can’t find a package called gpg to install either to resolve this.
Hi Ebonweaver,
Please confirm, which operating system are you using to install Zabbix.
Ubuntu 12.0.4 LTS
I’m assuming there is something different with that distro compared to what you prepared these instructions for and I can’t seem to fill in the gap.
Hi,
Use below link to install on Ubuntu
http://tecadmin.net/install-zabbix-on-ubuntu/
Nice tutorial. It helps me and I wish I will help to others. …. thanks