In this guide, we will walk you through the process of installing and configuring Apache, MySQL, and PHP-FPM on Ubuntu 24.04. This guide is written in simple English and designed for beginners. We will also cover how to secure your Apache server to ensure your system is safe.
Step 1: Update Your System
Before we begin, it’s always a good practice to update your system to ensure you have the latest software versions and security patches.
- Open your terminal.
- Run the following commands to update your package list:
sudo apt updatesudo apt upgrade
Step 2: Install Apache
Apache is one of the most widely used web servers. To install Apache, follow these steps:
- In the terminal, run the following command:
sudo apt install apache2 - After installation, start Apache with the following command:
sudo systemctl start apache2 - Enable Apache to start automatically at boot:
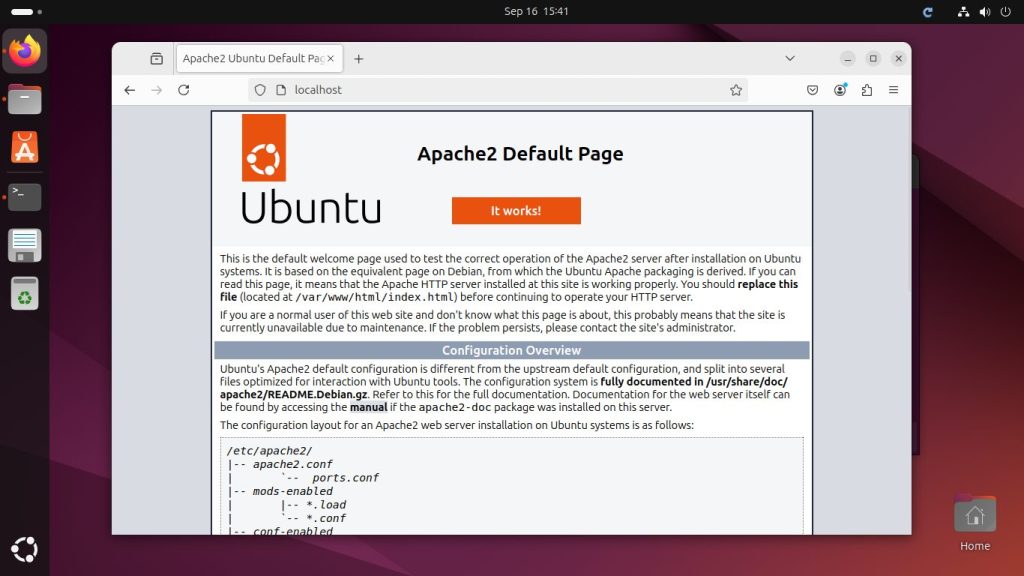
sudo systemctl enable apache2 - To check if Apache is running, open your browser and type your server’s IP address. You should see the Apache default welcome page. For example: http://your_server_ip/

Step 3: Secure Apache
Securing Apache is important to protect your server from attacks. Here’s how to secure Apache:
- Disable directory listing by editing the Apache configuration file:
sudo nano /etc/apache2/apache2.conf - Scroll down to the
<Directory /var/www/>section and change theOptionsline to:Options -Indexes +FollowSymLinks - Save and exit by pressing CTRL + X, then Y, and Enter.
- Restart Apache to apply changes:
sudo systemctl restart apache2 - To further secure your Apache installation, use the following command to hide version information:
sudo nano /etc/apache2/conf-available/security.conf - Set the following options:
ServerTokens Prod ServerSignature Off - Save and exit the file, then restart Apache:
sudo systemctl restart apache2
Step 4: Install MySQL
MySQL is the database that will store your website’s data. To install MySQL, follow these steps:
- Install MySQL server by running the following command:
sudo apt install mysql-server - Once installed, secure your MySQL installation:
sudo mysql_secure_installation- You will be prompted to set up a root password (choose a strong password).
- Follow the prompts to remove anonymous users, disable remote root login, and remove test databases.
- After securing MySQL, log in to the MySQL root account to test the installation:
sudo mysql -u root -p - Exit MySQL by typing:
exit;
Step 5: Install PHP and PHP-FPM
PHP-FPM (FastCGI Process Manager) improves the performance of PHP scripts when used with Apache. To install PHP and PHP-FPM using a PPA (Personal Package Archive), follow these steps:
- Add the PPA for PHP:
sudo add-apt-repository ppa:ondrej/phpsudo apt update - Install PHP along with PHP-FPM:
sudo apt install php8.3 php8.3-fpm libapache2-mod-fcgid(At the time of writing, PHP 8.3 is the latest version, but you can replace it with any newer version if necessary.)
- Enable the Apache modules for PHP-FPM:
sudo a2enmod proxy_fcgi setenvifsudo a2enconf php8.3-fpm - Restart Apache to enable PHP-FPM:
sudo systemctl restart apache2
Step 6: Test PHP with Apache
To check if PHP is working correctly with Apache, follow these steps:
- Create a simple PHP test file:
sudo nano /var/www/html/info.php - Add the following code to the file:
<?php phpinfo(); ?> - Save and exit by pressing CTRL + X, then Y, and Enter.
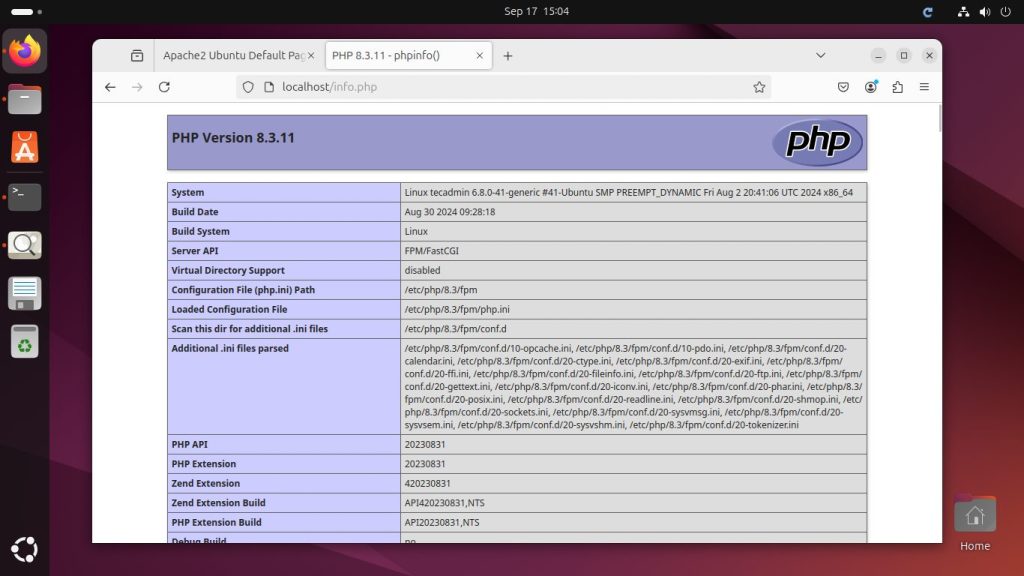
- Now, in your web browser, visit: http://your_server_ip/info.php
- After confirming PHP is working, remove the test file to avoid exposing sensitive information:
sudo rm /var/www/html/info.php

Step 7: Configure MySQL Database for Your Website
- Log in to MySQL as the root user:
sudo mysql -u root -p - Create a new database:
CREATE DATABASE your_database_name; - Create a new MySQL user and grant them privileges:
CREATE USER 'your_username'@'localhost' IDENTIFIED BY 'your_password'; GRANT ALL PRIVILEGES ON your_database_name.* TO 'your_username'@'localhost'; FLUSH PRIVILEGES; - Exit MySQL:
EXIT;
Step 8: Enable UFW Firewall and Allow Necessary Ports
To secure your server, we recommend enabling UFW (Uncomplicated Firewall) and allowing essential services.
- Enable UFW:
sudo ufw enable - Allow OpenSSH (for remote access) and HTTP/HTTPS traffic:
sudo ufw allow OpenSSHsudo ufw allow 'Apache Full' - Check UFW status:
sudo ufw status
Step 9: Final Apache Security Settings (Optional but Recommended)
For added security, consider enabling the following Apache modules and settings:
- ModSecurity: A web application firewall for added protection.
sudo apt install libapache2-mod-security2sudo a2enmod security2sudo systemctl restart apache2 - SSL (for HTTPS): You can also secure your site with SSL using a free certificate from Let’s Encrypt.
sudo apt install certbot python3-certbot-apachesudo certbot --apacheFollow the prompts to install the SSL certificate.
Conclusion
Congratulations! You have successfully installed and configured Apache, MySQL, and PHP-FPM on your Ubuntu 24.04 server. This setup will allow you to host dynamic websites and applications with improved performance and security.
By following the additional security measures, you can also ensure that your server is protected from common threats. If you have any issues or need more advanced configurations, feel free to explore the documentation for each software or consult community forums for support.
