Tomcat is a web server for deploying java-based web applications. It is developed and actively maintained by the Apache foundation. As of today, during updating this article Tomcat 11 is the latest version available for the installation. You can also check for the latest version on tomcat download page.
This tutorial will help you to install and configure latest Tomcat on your Ubuntu 24.04 system. You can also use the same instructions for Ubuntu 24.10 and 22.04.
Step 1: Update Your System
Before installing any software, it’s important to update your system. This ensures that you have the latest security patches and package versions.
sudo apt update && sudo apt upgrade -y
This command will update the list of available packages and install any available updates for your system.
Step 2: Install Java
Apache Tomcat requires Java to run. You can install the default OpenJDK package for Ubuntu, which will provide the necessary runtime environment for Tomcat.
sudo apt install default-jdk -y
After installation, you can verify that Java is installed correctly by running the following command:
java -version
If Java is installed, you should see a message similar to:
openjdk version "17.0.8"
Step 3: Download Apache Tomcat 11.0.0
The next step is to download the latest version of Tomcat (version 11.0.0). You can download it directly from the Apache website or use the command below to download it via the terminal:
wget https://dlcdn.apache.org/tomcat/tomcat-11/v11.0.0/bin/apache-tomcat-11.0.0.tar.gz
This will download the Tomcat 11.0.0 archive to your current directory.
Step 4: Extract the Tomcat Archive
Now, extract the Tomcat archive to the `/opt/` directory using the following command:
sudo tar -xvzf apache-tomcat-11.0.0.tar.gz -C /opt/
This extracts Tomcat into the `/opt/` directory where third-party software is often installed. To make it easier to work with, rename the extracted folder to a simpler name:
sudo mv /opt/apache-tomcat-11.0.0 /opt/tomcat
This shortens the directory path and makes it easier to manage.
Step 5: Set Up Environment Variables
To make it easier to start and manage Tomcat, you can set up environment variables. First, open your .bashrc file for editing:
nano ~/.bashrc
Then, add the following line at the end of the file:
export CATALINA_HOME=/opt/tomcat
After saving the file, apply the changes by running:
source ~/.bashrc
Step 6: Start Tomcat
To start Tomcat, navigate to the `bin` directory of your Tomcat installation:
cd /opt/tomcat/bin
Then, start Tomcat using the following command:
./startup.sh
If everything is set up correctly, you should see a message indicating that Tomcat has started.
Step 7: Verify Tomcat Installation
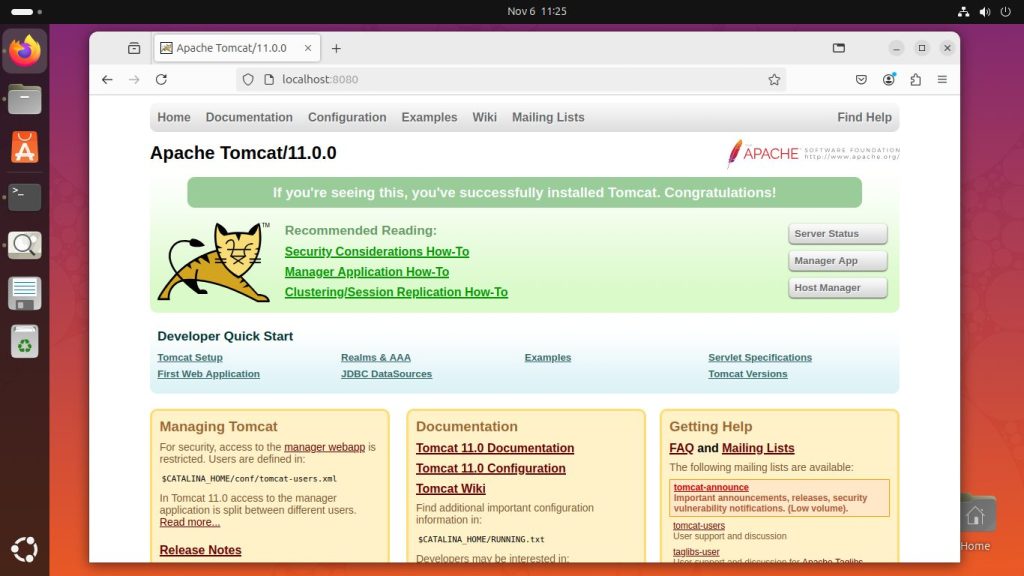
To check if Tomcat is running, open a web browser and navigate to:
http://localhost:8080
You should see the Tomcat default welcome page, confirming that the installation was successful.
Step 8: Create Tomcat Systemd Service File
To manage Tomcat as a service, you can create a Systemd service file that helps you easily start, stop and restart Tomcat service. So first of all, create a new systemd service file:
sudo nano /etc/systemd/system/tomcat.service
Add the following content to the file:
[Unit]
Description=Apache Tomcat Web Application Container
After=network.target

[Service]
Type=forking

Environment=JAVA_HOME=/usr/lib/jvm/default-java
Environment=CATALINA_PID=/opt/tomcat/temp/tomcat.pid
Environment=CATALINA_HOME=/opt/tomcat
Environment=CATALINA_BASE=/opt/tomcat
Environment='CATALINA_OPTS=-Xms512M -Xmx1024M -server -XX:+UseParallelGC'
Environment='JAVA_OPTS=-Djava.awt.headless=true -Djava.security.egd=file:/dev/./urandom'

ExecStart=/opt/tomcat/bin/startup.sh
ExecStop=/opt/tomcat/bin/shutdown.sh

User=tomcat
Group=tomcat
UMask=0007
RestartSec=10
Restart=always

[Install]
WantedBy=multi-user.target
Save the file and exit.
Step 9: Set Permissions
Next, create a `tomcat` user and group, and set the appropriate permissions for the Tomcat directory:
sudo groupadd tomcatsudo useradd -s /bin/false -g tomcat -d /opt/tomcat tomcatsudo chown -R tomcat:tomcat /opt/tomcat
Step 10: Enable and Start Tomcat Service
Finally, reload the Systemd daemon and enable the Tomcat service so that it starts automatically at boot:
sudo systemctl daemon-reloadsudo systemctl enable tomcatsudo systemctl start tomcat
You can check the status of Tomcat using this command:
sudo systemctl status tomcat
Step 11: Setup User Accounts
You need to configure tomcat users to access manager and host-manager dashboard. To do this edit the conf/tomcat-users.xml file:
sudo nano /opt/tomcat/conf/tomcat-users.xml
Now add the following content just before </tomcat-users> closing tag.
<role rolename="admin-gui"/>
<user username="admin" password="s3cret" roles="admin-gui"/>

<role rolename="manager-gui"/>
<user username="manager" password="s3cret" roles="manager-gui"/>

</tomcat-users>
Save the file and close it.
Now reestart Tomcat service to apply changes:
sudo systemctl restart tomcat
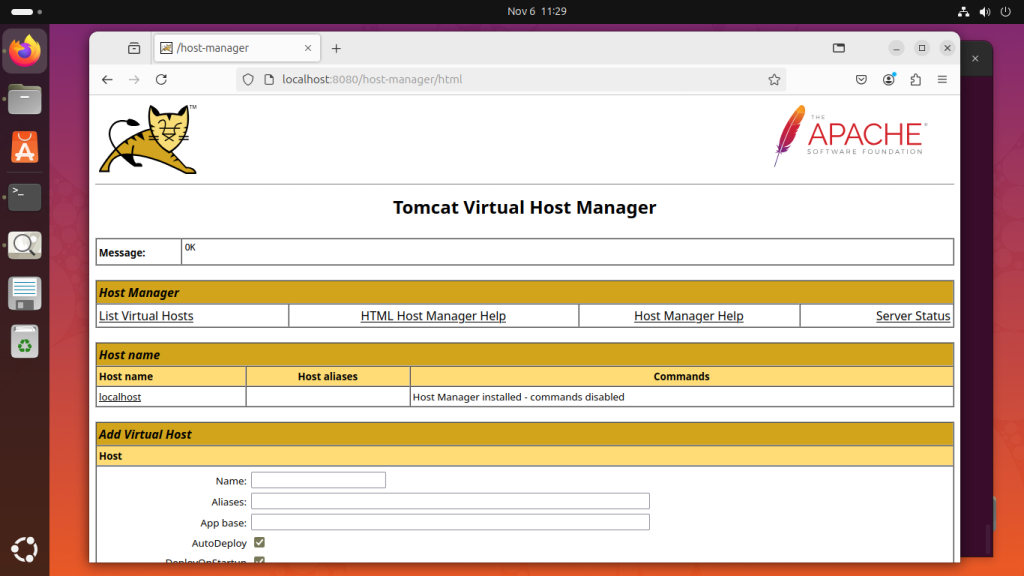
Now you can access Tomcat manager dashboard with username “manager”.
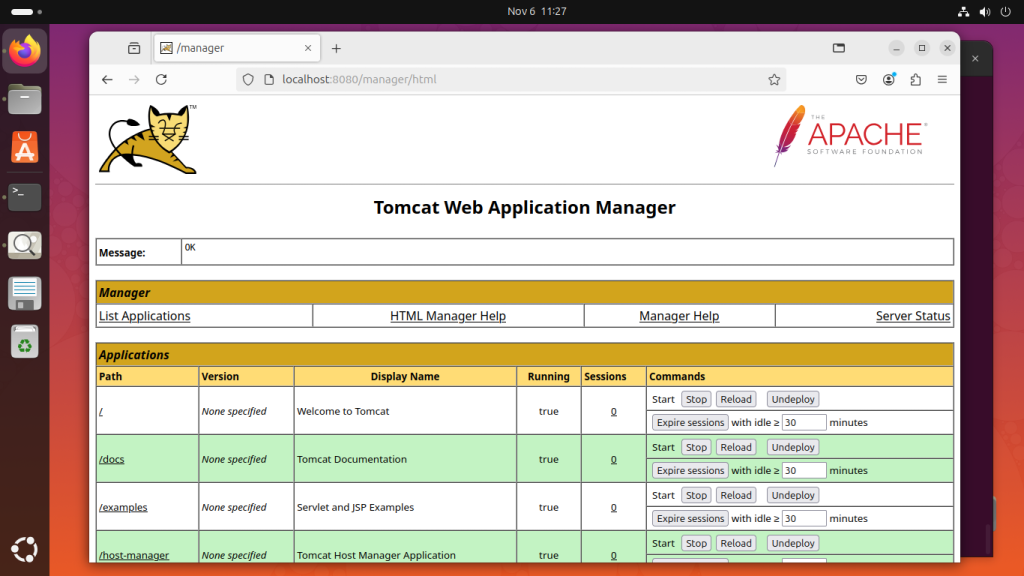
And to access host manager authenticate with “admin” user.
Conclusion
You have successfully installed and configured Apache Tomcat 11.0.0 on your Ubuntu 24.04 system. Tomcat is now ready to host your Java-based web applications, and you can easily manage its service using systemd.

