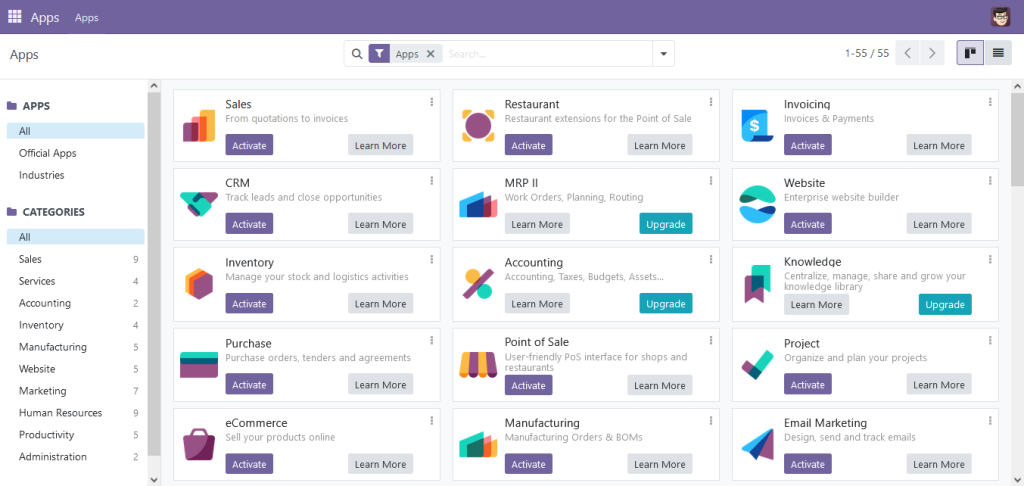
Odoo has many tools for managing a business, like CRM, e-commerce, billing, accounting, manufacturing, warehousing, project management, and inventory control. These tools are made to work together smoothly, making it easier to manage different parts of a business. The newest version, Odoo 17, has better features and is easier to use.
This guide will show you how to install Odoo 17 on Ubuntu. Ubuntu is a popular choice for servers because it is stable and well-supported. This installation is great for businesses that want to use Odoo in a reliable and stable environment.
How To Install Odoo 17 on Ubuntu
Before beginning the installation, ensure you have:
- A system running Ubuntu 22.04 or 20.04.
- Sudo privileges on your account.
- Basic familiarity with the Linux terminal.
Step 1: Upgrade Ubuntu Packages
Begin by updating your system’s package list and upgrading the existing packages to their latest versions:
sudo apt updatesudo apt upgrade
Step 2: Install Odoo Dependencies
Odoo is written in Python and requires several dependencies. Install them with:
sudo apt install git python3-pip build-essential wget python3-dev python3-venv \
python3-wheel libxslt-dev libzip-dev libldap2-dev libsasl2-dev python3-setuptools \
node-less libjpeg-dev libpq-dev -y
Step 3: Create Odoo User
Running Odoo with root privileges can compromise security. Instead, establish a dedicated system user, group, and home directory for Odoo:
Use this command to create a new user named ‘odoo17‘:
sudo useradd -m -d /opt/odoo17 -U -r -s /bin/bash odoo17
You may choose a different username, ensuring it aligns with the PostgreSQL user and the details in the configuration file.
Step 4: Install and Configure PostgreSQL
Odoo relies on PostgreSQL for its database needs. To install PostgreSQL, fetch it from Ubuntu’s official repositories using the following command:
sudo apt install postgresql -y
During the installation, when asked for confirmation, press ‘Y’ to proceed. After the installation is complete, proceed to set up a Postgres user matching the name you chose in the previous step:
sudo su - postgres -c "createuser -s odoo17"
This command establishes a PostgreSQL user named ‘odoo17’, which will be responsible for database management in Odoo.
Step 5: Install Wkhtmltopdf
Wkhtmltopdf is an open source command line tool to render HTML into PDF and various image formats. It is necessary for generating PDF reports in Odoo.
wget https://github.com/wkhtmltopdf/packaging/releases/download/0.12.6.1-3/wkhtmltox_0.12.6.1-3.jammy_amd64.debsudo apt install ./wkhtmltox_0.12.6.1-3.jammy_amd64.deb
For other Ubuntu versions, download package from Github download page.
Step 6: Install Odoo from Source
- Switch User: Switch to the odoo17 user with the sudo su command:
su - odoo17 - Download code: Clone the Odoo 17 source code from its official Github repository:
sudo git clone https://www.github.com/odoo/odoo --depth 1 --branch 17.0 --single-branch - Switch to Odoo 17 source code directory:
cd /opt/odoo17/odoo - Setup Python Environment: Create a Python virtual environment and activate it:
python3 -m venv venv && source venv/bin/activate - Install Python packages required by Odoo:
pip3 install wheelpip3 install -r requirements.txt
Step 7: Setting Up Odoo Configuration File
Proceed to create a configuration file for the Odoo server. This step is crucial for tailoring the Odoo application according to your needs. Begin by editing the file located at /etc/odoo17.conf using your preferred text editor:
sudo nano /etc/odoo17.conf
Insert the following lines into the file:
[options]
; Database operations password:
admin_passwd = PASSWORD
db_host = False
db_port = False
db_user = odoo
db_password = False
addons_path = /opt/odoo17/odoo/addons,/opt/odoo17/odoo/custom_addons
logfile = /var/log/odoo17.log
log_level  = debug
Remember to replace the admin_passwd with a secure password. Save and close the file.
Then, update the ownership and permissions of the configuration file to the Odoo user:
sudo chown odoo17:odoo17 /etc/odoo17.conf
Step 8: Crafting the Odoo Systemd Unit File
For efficient Odoo service management and to enable its automatic start-up at boot, create a Systemd unit file. Start by creating and editing a new file named odoo17.service:
sudo nano /etc/systemd/system/odoo17.service
Add these contents to the file:
[Unit]
Description=Odoo 17.0 Service
Requires=postgresql.service
After=network.target postgresql.service

[Service]
Type=simple
SyslogIdentifier=odoo
PermissionsStartOnly=true
User=odoo17
Group=odoo17
ExecStart=/opt/odoo17/odoo/venv/bin/python3 /opt/odoo17/odoo/odoo-bin -c /etc/odoo17.conf
StandardOutput=journal+console

[Install]
WantedBy=multi-user.target
Save and exit the file.
Now, reload the systemd daemon:
sudo systemctl daemon-reload
Start and enable the Odoo service:
sudo systemctl enable --now odoo17.service
Check the service’s status:
sudo systemctl status odoo17.service
You should see that the Odoo service is active and running.
Step 9: Accessing the Odoo Application
Odoo typically operates on port 8069. Open your web browser and navigate to your Odoo server on this port:
http://server-ip-host:8069
For first-time access, you’ll encounter the Odoo database creation page. Use the master password set in the odoo-server.conf file. Choose a database name, and set the username and password for future logins to the Odoo dashboard. If you want demo data, tick the respective checkbox. Click “Create Database” to finalize the setup.
Once the Odoo database is successfully created, you’ll be redirected to the login page. Log in with the credentials you just created.

Step 10: Modifying the Default Port Number (Optional)
Odoo operates on port 8069 by default. For enhanced security, it’s advisable to switch to a different port number.
To configure Odoo to operate exclusively on port 8000 and listen only on the local interface (127.0.0.1), add these lines to the /etc/odoo17.conf file:
xmlrpc_interface = 127.0.0.1
netrpc_interface = 127.0.0.1
xmlrpc_port = 8000
After making these adjustments, restart the Odoo service to activate the new settings:
sudo systemctl restart odoo17
These changes will take effect immediately.
Conclusion
You’ve successfully installed Odoo 17 on Ubuntu 22.04, embarking on a journey to efficient and integrated business management. This basic setup is suitable for testing and development purposes. For a production environment, consider additional security measures, backups, and possibly engaging with professional Odoo consultants for optimization and support. With Odoo, streamline your business operations and maximize productivity.

2 Comments
All the steps are missing other actions, some lines of code don’t even work, did you try it yourself before posting it?
This no longer works with ubuntu.
This command su – odoo17 doesn’t exist
this directory cd /opt/odoo17/odoo doesn’t exist
to many what if’s try another tutorial