OpenSSH is a popular open-source implementation of the Secure Shell (SSH) protocol, which is used to securely connect to and manage remote systems over a network. OpenSSH is included in many popular Linux distributions, including Pop!_OS, and it provides a wide range of tools and utilities for securely accessing and managing remote systems.
This tutorial will help you to install and secure the OpenSSH server on Pop!_OS Linux. In this tutorial, we will cover the following topics:
- Installing OpenSSH server on Pop!_OS
- Configuring the OpenSSH server
- Using the OpenSSH client to connect to a remote system
- Securing the OpenSSH server
Step 1: Installing OpenSSH Server on Pop!_OS
The OpenSSH server packages are available under the default system repositories. You first need to update the package manager cache by running the following command:
sudo apt update
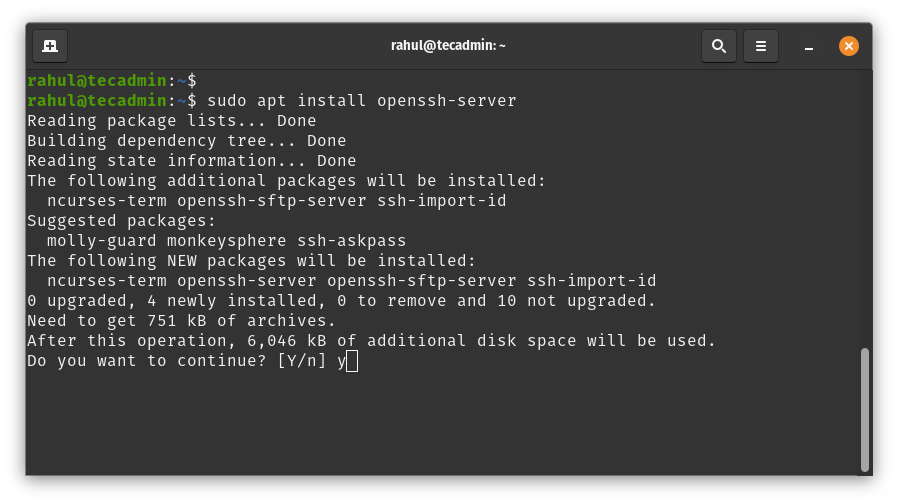
Next, install the OpenSSH server by the below-mentioned command:
sudo apt install openssh-server
Press ‘y’ when prompted for confirmation. This will install the OpenSSH server and all the necessary dependencies.

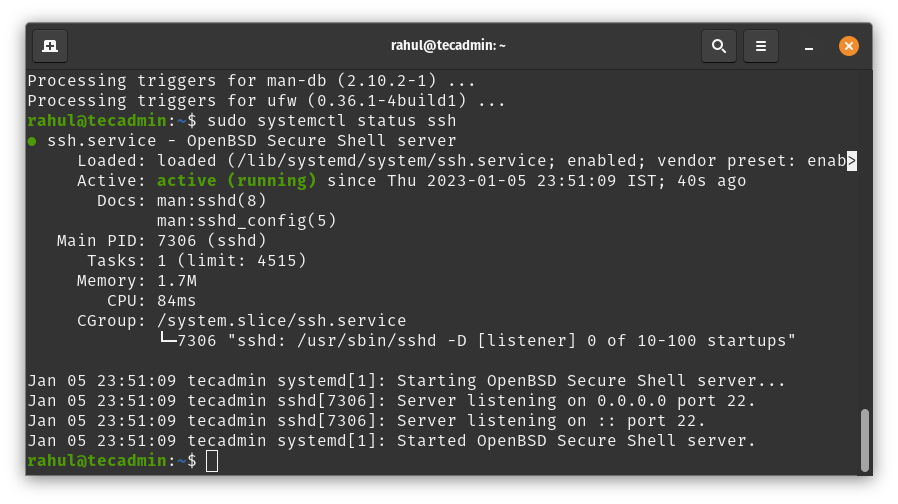
Once the installation is complete, the OpenSSH server will be automatically started and enabled to start on boot. You can check the service status by running the ‘systemctl status ssh’ command.

Step 2: Configuring the OpenSSH Server:
Once the OpenSSH server is installed, you can configure it by editing the main configuration file, which is located at “/etc/ssh/sshd_config“. This file contains a number of options that control the behavior of the OpenSSH server.
Some of the most important options that you might want to configure include:
- Port: This option specifies the port number that the OpenSSH server listens on. By default, the OpenSSH server listens on port 22, but you can change this to any unused port number if you want to.1Port 22
- PermitRootLogin: This option controls whether root login is allowed over SSH. By default, root login is disabled, but you can enable it by setting this option to “yes”.1PermitRootLogin yes
- PubkeyAuthentication: This option controls whether public key authentication is allowed. By default, public key authentication is enabled, but you can disable it by setting this option to “no”.1PubkeyAuthentication yes
- PasswordAuthentication: This option controls whether password authentication is allowed. By default, password authentication is enabled, but you can disable it by setting this option to “no”.1PasswordAuthentication no
Once you have edited the OpenSSH server configuration file, you need to restart the OpenSSH server to apply the changes. You can do this by running the following command:
sudo systemctl restart ssh
Step 3: Using the OpenSSH Client to Connect to a Remote System:
To connect to a remote system using OpenSSH, you will need to use the OpenSSH client, which is included in most Linux distributions. To connect to a remote system, you need to know the IP address or hostname of the system, as well as the username and password of a user account on the remote system.
To connect to a remote system, open a terminal and enter the following command:
1 2 | # Syntax ssh username@remote_system |
Replace “username” with the username of the user account on the remote system, and “remote_system” with the IP address or hostname of the remote system. For example, to connect to a remote system with the IP address 192.168.1.100 as the user “user1”, you would enter the following command:
ssh [email protected]
If this is the first time you are connecting to the remote system, you will be prompted to confirm the authenticity of the host. Type “yes” to continue. You will then be prompted to enter the password for the user account on the remote system. Once you have entered the correct password, you will be logged in to the remote system.
Step 4: Securing the OpenSSH Server:
To secure the OpenSSH server, there are several steps you can take:
- Use strong passwords: Make sure that all user accounts on the OpenSSH server have strong, unique passwords. Avoid using easy-to-guess passwords, and use a combination of letters, numbers, and special characters.
- Use public key authentication: Instead of using passwords for authentication, consider using public key authentication. With public key authentication, you generate a public and private key pair, and the public key is copied to the remote system. When you connect to the remote system, you use the private key to authenticate, instead of a password. This is more secure than password authentication, as the private key is much harder to guess than a password.
- Limit access to specific users: Instead of allowing any user to connect to the OpenSSH server, consider limiting access to specific users. You can do this by adding the names of the allowed users to the “AllowUsers” option in the OpenSSH server configuration file.
- Limit access to specific IP addresses: If you only want to allow connections from specific IP addresses, you can use the “AllowUsers” and “DenyUsers” options to specify which users are allowed to connect from which IP addresses.
- Use a firewall: Use a firewall to block access to the OpenSSH server from unwanted IP addresses. You can use the FirewallD service on Pop!_OS to set up a firewall and allow connections only from specific IP addresses.
Conclusion
In summary, OpenSSH is a powerful and flexible tool for securely accessing and managing remote systems. By following the steps outlined in this article, you can install and configure the OpenSSH server on Pop!_OS, use the OpenSSH client to connect to a remote system, and secure the OpenSSH server to protect against unauthorized access.

