Kubernetes (often abbreviated as K8s) is an open-source platform designed to automate the deployment, management, and scaling of containerized applications. In simpler terms, it lets you group Linux container hosts into clusters and takes the hassle out of managing them. In this tutorial, I’ll walk you through setting up a multi-node Kubernetes cluster using multiple Ubuntu virtual machines on AWS. Let’s dive in!
Prerequisites
For this setup, I’ve launched three EC2 instances in an AWS account, all running Ubuntu and using the t3.medium instance type. Here’s the plan:
- One instance will serve as the Kubernetes control plane.
- The other two will act as worker nodes, where our containers will run.
Make sure you have your AWS key pair (e.g., your-key.pem) ready for SSH access.
Step 1: Set Up Hostnames and Network Configuration
First, we need to configure the instances so they can communicate properly. Let’s start by setting hostnames and updating the network settings.
1.1 SSH into Each Node
Connect to each EC2 instance using SSH. Replace <instance-ip> with the public IP of each instance:
ssh -i your-key.pem ubuntu@<instance-ip>
Repeat this for all three nodes.
1.2 Set Hostnames
Assign a unique hostname to each node to make them easily identifiable.
- Control Plane:
sudo hostnamectl set-hostname k8s-control-plane - Worker Node 1:
sudo hostnamectl set-hostname k8s-worker-1 - Worker Node 2:
sudo hostnamectl set-hostname k8s-worker-2
Run these commands on the respective nodes.
1.3 Update the Hosts File
To ensure the nodes can communicate using their hostnames, update the /etc/hosts file on all three instances. Open the file with:
sudo nano /etc/hosts
Add the following lines, replacing the IP addresses with the private IPs of your EC2 instances:
192.168.1.100  k8s-control-plane
192.168.1.101  k8s-worker-1
192.168.1.102  k8s-worker-2
Save and exit (Ctrl+O, Enter, Ctrl+X). Do this on every node.
Step 2: Install Docker and Kubernetes Components on All Nodes
Now, let’s install the necessary software on all three nodes. We’ll need Docker for container runtime and Kubernetes tools like kubeadm, kubelet, and kubectl.
2.1 Update Packages
Start by refreshing the package list and upgrading existing packages:
sudo apt update && sudo apt upgrade -y
2.2 Install Dependencies
Install some required packages for secure downloads:
sudo apt install -y apt-transport-https ca-certificates curl
2.3 Install Docker
Next, install Docker and ensure it starts automatically:
sudo apt install -y docker.iosudo systemctl enable dockersudo systemctl start docker
2.4 Install Kubernetes Components
Add the Kubernetes repository and install the core tools:
curl -fsSL https://packages.cloud.google.com/apt/doc/apt-key.gpg | sudo gpg --dearmor -o /usr/share/keyrings/kubernetes-archive-keyring.gpgecho "deb [signed-by=/usr/share/keyrings/kubernetes-archive-keyring.gpg] https://apt.kubernetes.io/ kubernetes-xenial main" | sudo tee /etc/apt/sources.list.d/kubernetes.listsudo apt updatesudo apt install -y kubelet kubeadm kubectlsudo systemctl enable kubelet
2.5 Disable Swap
Kubernetes doesn’t work well with swap enabled, so disable it:
sudo swapoff -asudo sed -i '/ swap / s/^/#/' /etc/fstab
2.6 Enable Kernel Modules for Networking
Configure the kernel to support Kubernetes networking:
sudo modprobe br_netfilterecho 'br_netfilter' | sudo tee /etc/modules-load.d/br_netfilter.conf
Set up sysctl settings:
cat <<EOF | sudo tee /etc/sysctl.d/k8s.conf
net.bridge.bridge-nf-call-iptables = 1
net.bridge.bridge-nf-call-ip6tables = 1
net.ipv4.ip_forward = 1
EOF
Apply the changes:
sudo sysctl --system
Repeat all of Step 2 on every node.
Step 3: Initialize the Control Plane
Now, let’s set up the control plane. Run this only on the k8s-control-plane node:
sudo kubeadm init --pod-network-cidr=192.168.0.0/16
This command initializes the control plane and sets up the pod network. Once it finishes, you’ll see a kubeadm join command in the output. Copy it somewhere safe—you’ll need it later to connect the worker nodes.
3.1 Configure kubectl on the Control Plane
Set up kubectl so you can manage the cluster:
mkdir -p $HOME/.kubesudo cp -i /etc/kubernetes/admin.conf $HOME/.kube/configsudo chown $(id -u):$(id -g) $HOME/.kube/config
Step 4: Install the Calico Network Plugin
To enable pod networking, install the Calico CNI plugin on the control plane:
kubectl apply -f https://docs.projectcalico.org/manifests/calico.yaml
Check that all pods are running:
kubectl get pods -n kube-system
Wait until all pods show a Running status.
Step 5: Join Worker Nodes
Head over to your worker nodes (k8s-worker-1 and k8s-worker-2). Use the kubeadm join command from Step 3. It’ll look something like this:
sudo kubeadm join <control-plane-ip>:6443 --token <token> --discovery-token-ca-cert-hash sha256:<hash>
If you lost the command, regenerate it on the control plane:
kubeadm token create --print-join-command
Run the join command on both worker nodes. Then, back on the control plane, verify that all nodes are connected:
kubectl get nodes
You should see all three nodes in a Ready state.

Step 6: Deploy and Scale an Application
Let’s test the cluster by deploying an Nginx server on cluster:
6.1 Deploy Nginx
Create a deployment:
kubectl create deployment nginx --image=nginx
6.2 Expose Nginx as a NodePort Service
Make Nginx accessible:
kubectl expose deployment nginx --type=NodePort --port=80
6.3 Check Service Details
Find the port Nginx is running on:
kubectl get svc nginx
6.4 Scale Nginx to 5 Pods
Scale the deployment:
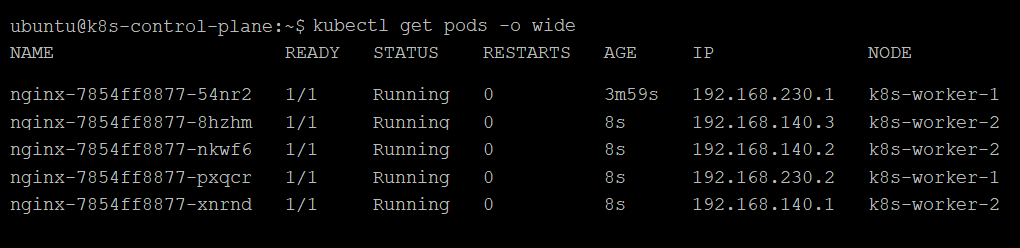
kubectl scale deployment nginx --replicas=5kubectl get pods -o wide
You should see three Nginx pods spread across your worker nodes.
Step 7: Delete a Pod
Simulate a failure by deleting a pod. First, list the pods:
kubectl get pods -o wide
Then delete one:
kubectl delete pod <pod-name>
Kubernetes will automatically spin up a replacement pod to maintain three replicas.
Final Verification
Let’s make sure everything’s working:
- Check the cluster nodes:
kubectl get nodes - Check running pods:
kubectl get pods -o wide - Test Nginx by accessing it in your browser: http://<any-node-ip>:<nodeport>
Replace
<nodeport>with the port number fromkubectl get svc nginx.
Conclusion
Congratulations! You’ve successfully set up a Kubernetes cluster with one control plane and two worker nodes on AWS. You’ve deployed Nginx, scaled it, and tested pod recovery—all the basics of a working K8s setup. Now you’re ready to explore more advanced features.

