Dig stands for Domain Information Groper and is a tool used to look up information in Domain Name Systems through command lines. It’s really helpful for network administrators when they need to solve problems related to DNS. With Dig, they can quickly find out which servers are connected to a specific domain and check if the DNS records are set up correctly. This helps use managing and monitoring the network more efficient.
The default Windows systems doesn’t provides dig command line tool, but still you can add it to your systems. This tutorial will help you to install dig command on Windows.
Step 1: Download Package
The latest version of ISC BIND no longer supports Windows. However, you can still get the older version that worked with Windows. The last version that supports Windows is BIND 9.17.15. You can download it by clicking on this link: Bind9 Windows Zip File.
After you download it, you’ll need to unzip the file to a place you choose on your computer. For instance, I unzipped mine into the “C:\BIND9” folder. This is where you can access all the files you need.
Step 2: Setup System Environment Variable
Bind9 includes a Windows installer, but if you only need the dig command, you can simply set up the Path environment variable instead. Here’s how you do it step-by-step:
- Click the Windows button in keyboard and start typing “system environment variable” on your Windows computer.
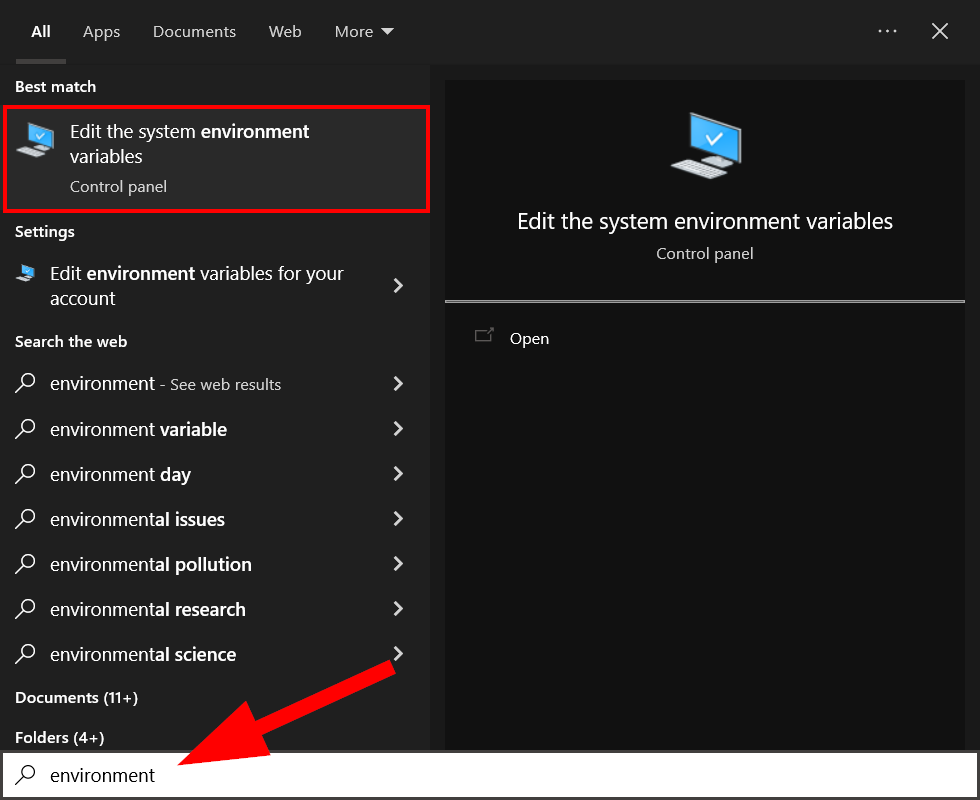
Open system environment variables. - The above search will open the “System Properties” window. Here, click on the “Environment Variables” button.
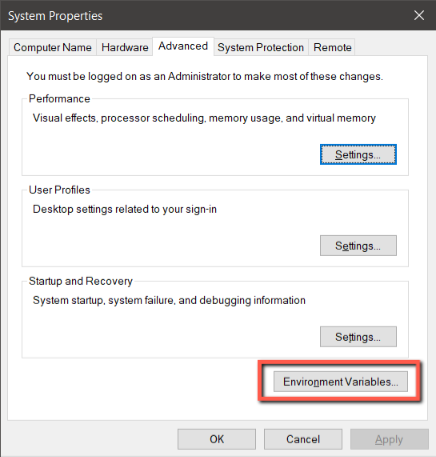
Click environment variables button - In the “System variables” section, select the “Path” variable and then click the “Edit” button.
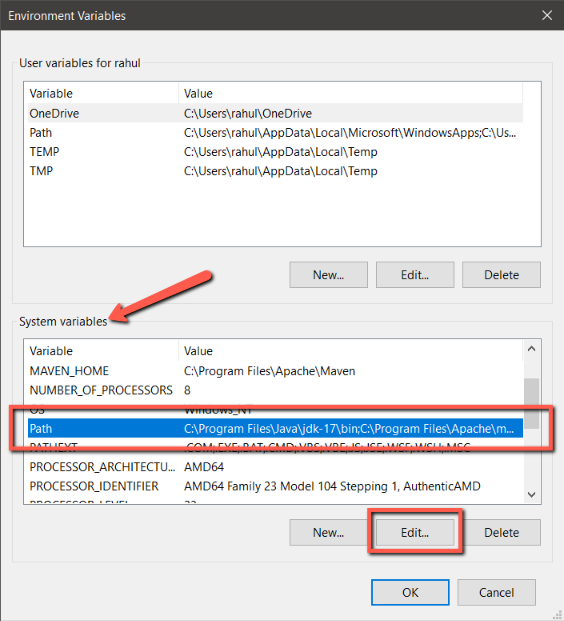
Editing Path environment variable - In the new window, you’ll see all the directories that are already added to the Path environment variable. Simply click the “New” button to add a new row and enter the Bind9 directory location. In my case it was “C:\BIND9\”. After you’ve added this, click “OK” to save the changes.
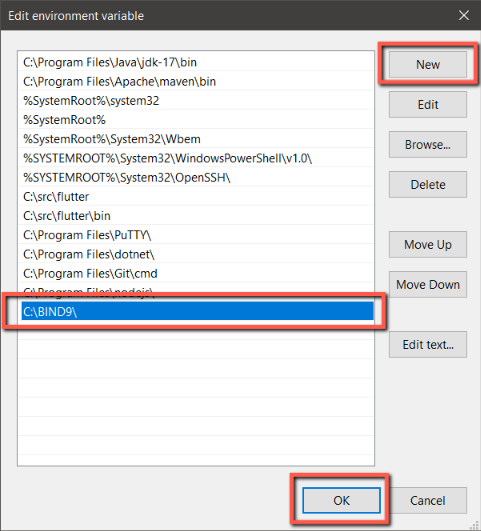
Adding Bind9 Directory to Path - That’s it! You have successfully added the dig utility to your system’s Path, making it ready to use from any command prompt.
Now, whenever you need to use the dig command, it will be readily accessible from any command prompt on your computer.
Step 3: Using dig Command in Windows
To use the dig tool on your Windows computer, open the command prompt or PowerShell and type the following command:
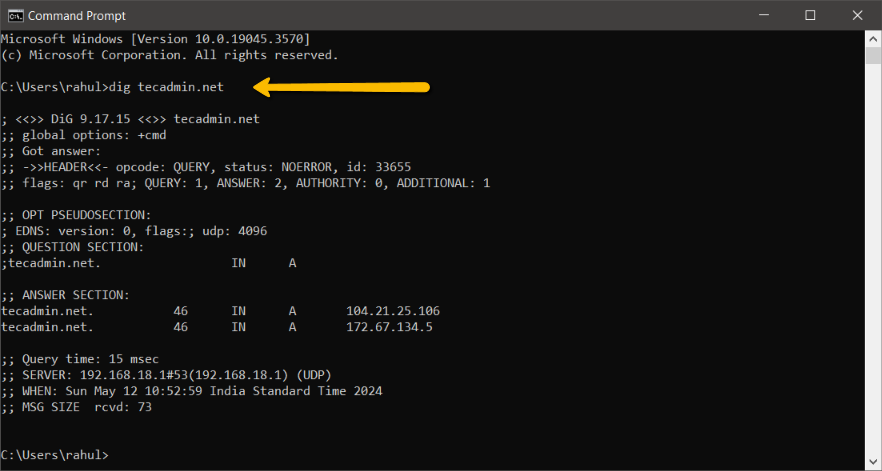
dig tecadmin.net
This command will show you various DNS records for the domain “tecadmin.net” as below screenshot:
Here are a few more simple commands you can use with dig:
- To check the IP address for a domain, type:
dig +short tecadmin.net - To find out the mail servers for a domain, use:
dig tecadmin.net MX +noall +answer - To get a detailed report about a domain, enter:
dig tecadmin.net ANY +noall +answer
These commands will help you quickly gather important DNS information directly from your command line.
Conclusion
This tutorial has shown you how to set up the dig command line tool on your Windows system. Now, you can use it to check the records for your domain in the Domain Name System (DNS). This will make it easier for you to troubleshoot DNS-related issues and find out what’s causing them.

1 Comment
what is the purpose of the “BINDInstall.exe” file since the installation is just a copy ?