In Linux, we use services to keep important programs running smoothly, like a web server or a database. But sometimes, these services fail because of errors, crashes, or system issues. When that happens, you don’t want to sit and restart them manually every time—it’s a waste of effort and time. That’s where automation comes in handy. With tools like systemd, which is very common in Linux systems today, you can make your services restart on their own if they stop working. This keeps everything running without you needing to check constantly.
Systemd is like a manager for services in Linux. It controls how they start, stop, and behave. Most modern Linux versions, like Ubuntu, CentOS, or Debian, use systemd by default. In this article, I’ll show you how to set up a systemd service to restart automatically if it fails. It’s a simple trick that saves a lot of headache, especially if you’re managing servers or important apps. Let’s see how to do it step by step in easy language.
What You Need Before Starting
Before we jump in, make sure you’re using a Linux system with systemd. You can check this by typing systemctl in your terminal. If it works, you’re good to go! Also, you should know the name of the service you want to fix—like nginx for a web server or mysql for a database. Lastly, you need root or sudo access because we’ll be editing system files. Don’t worry, I’ll keep it simple and explain everything.
Step 1: Find Your Service File
Every systemd service has a file that tells it what to do. These files are usually in /etc/systemd/system/ or /lib/systemd/system/. For example, if you’re working with the nginx service, the file might be called nginx.service. To find it, type this in your terminal:
sudo systemctl status nginx
This shows you where the service file is. If you don’t see it, search for it with:
find / -name nginx.service 2>/dev/null
Once you know the file, we’ll edit it to add the restart magic.
Step 2: Edit the Service File
Now, open the service file with a text editor like nano or vim. Let’s use nano because it’s easy. Type:
sudo nano /etc/systemd/system/nginx.service
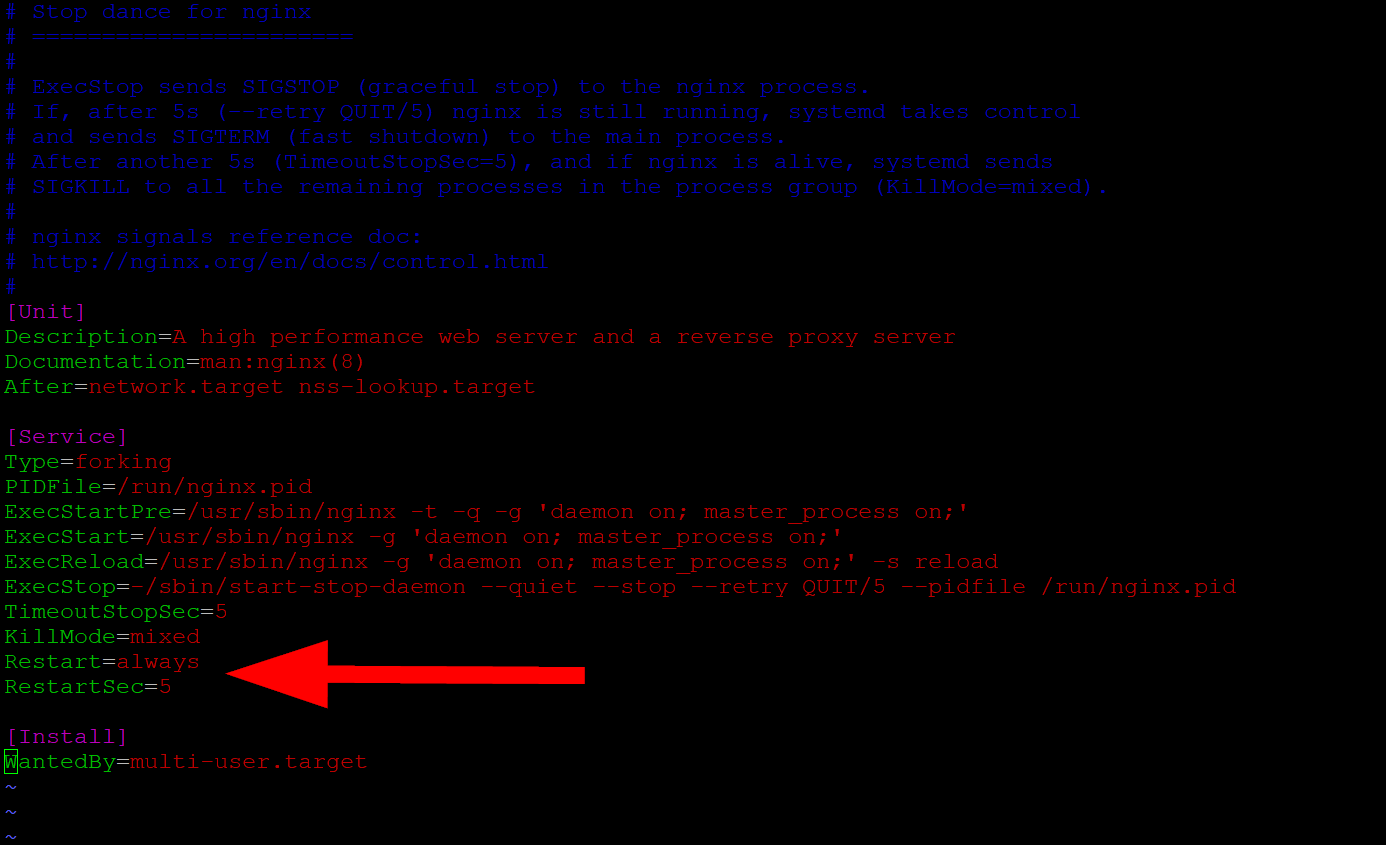
Inside the file, you’ll see sections like [Unit], [Service], and [Install]. We need to focus on the [Service] part. Add these two lines there:
[Service]
Restart=always
RestartSec=5
What do they mean? Restart=always tells systemd to keep restarting the service if it fails, no matter why. RestartSec=5 says wait 5 seconds before trying again. You can change the seconds if you want—like 10 or 15. Save the file by pressing Ctrl+O, then Enter, and exit with Ctrl+X.
Step 3: Reload and Test It
After editing, tell systemd to update itself with this command:
sudo systemctl daemon-reload
Now, restart your service to apply the changes:
sudo systemctl restart nginx
To test if the auto-restart works, we need to pretend the service fails. One easy way is to find the service’s process ID (PID) and kill it. First, check the PID with:
sudo systemctl status nginx
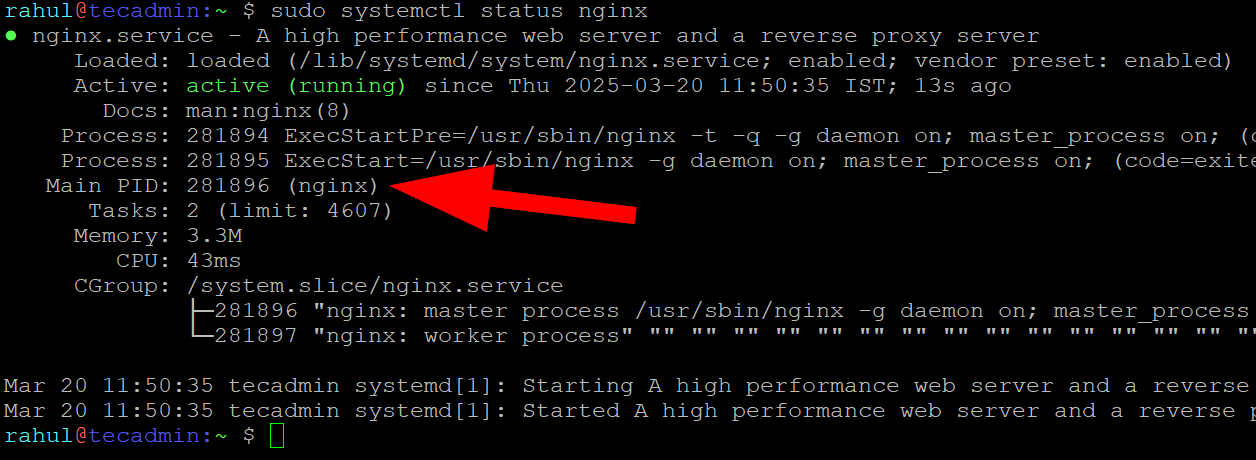
Look for a number like Main PID: 281896 (nginx). Then, kill it with:
sudo kill -9 281896
Wait a few seconds (like the RestartSec time you set), then check the status again:
sudo systemctl status nginx
If it’s running again with a new PID, great! Your service is now set to restart on its own when it fails.
Why This Matters
Setting up auto-restart is a big help for anyone running Linux servers. Imagine your website goes down at night because of a crash, and nobody notices till morning. With this trick, the service restarts in seconds, and your site stays up. It’s not just for pros—even if you’re learning Linux or running a small project, this keeps things smooth.
Wrap Up
That’s it! With just a few lines in the systemd file, you’ve made your service strong enough to recover itself. You can use this for any service—web servers, databases, or even custom scripts. If something’s not working, double-check the file path and commands. Linux is all about making life easier, and this is one simple way to do it. Try it out, and let me know how it goes!

