Ionic Framework is a powerful and popular option for developing cross-platform mobile applications. In this article, we’ll walk you through a step-by-step guide to creating a simple mobile app using Ionic Framework.
Prerequisites
Before getting started, you’ll need to have the following prerequisites installed:
- Node.js and NPM: You can download and install Node.js and NPM from the official website.
- Ionic CLI: You can install Ionic CLI using the following command:
npm install -g @ionic/cli
Step 1: Create a New Ionic Project
The first step is to create a new Ionic project using the following command:
ionic start myApp tabs --type=angular
This command will create a new Ionic project with the name “myApp” and the “tabs” template. We’re also specifying that we want to use Angular as the framework for our project.
Step 2: Add a New Page
The “tabs” template comes with three pages by default. Let’s add a new page to our app by running the following command:
ionic generate page about
This command will generate a new page called “about” in our app.
Step 3: Add Content to the About Page
Now that we have a new page, let’s add some content to it. Open the about.page.html file located in the src/app/about directory:
nano src/app/about/about.page.html
And add the following content:
1 2 3 4 5 6 7 8 9 10 11 12 13 14 15 16 17 18 19 20 | <ion-header> <ion-toolbar> <ion-title> About </ion-title> </ion-toolbar> </ion-header> <ion-content> <ion-card> <ion-card-header> <ion-card-title> Welcome to the About Page! </ion-card-title> </ion-card-header> <ion-card-content> <p>This is a simple Ionic app developed by [Your Name]</p> </ion-card-content> </ion-card> </ion-content> |
This code will create a simple card with some text that will be displayed on the About page.
Step 4: Update the Tabs Navigation
Since we added a new page to our app, we need to update the navigation in the tabs. Open the tabs.page.html file located in the src/app/tabs directory:
nano src/app/tabs/tabs.page.html
And update it as follows:
1 2 3 4 5 6 7 8 9 10 11 12 13 14 15 16 17 18 | <ion-tabs> <ion-tab-bar slot="bottom"> <ion-tab-button tab="tab1"> <ion-icon name="home"></ion-icon> <ion-label>Home</ion-label> </ion-tab-button> <ion-tab-button tab="tab2"> <ion-icon name="list"></ion-icon> <ion-label>List</ion-label> </ion-tab-button> <ion-tab-button tab="about"> <ion-icon name="information-circle"></ion-icon> <ion-label>About</ion-label> </ion-tab-button> </ion-tab-bar> </ion-tabs> |
This code will add a new tab button for the “about” page.
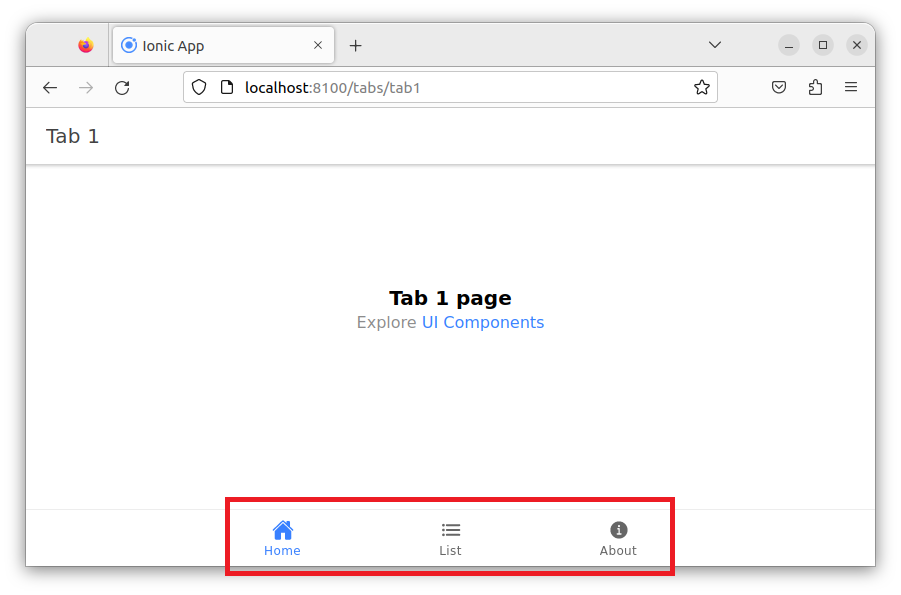
Step 5: Run the App
Now that we’ve made our changes, we can run the app in the browser using the following command:
ionic serve
This command will compile and start our app in the default browser. You should see the “Home”, “List”, and “About” tabs in the app.
Conclusion
In this article, we walked you through a step-by-step guide to creating a simple mobile app using Ionic Framework. We started by creating a new Ionic project, adding a new page, updating the tabs navigation, and finally, running the app in the browser. With these basic steps, you can start building your
