SELinux (Security-Enhanced Linux) is a Linux kernel security module that provides enhanced security for Linux systems. SELinux provides a mechanism for supporting access control security policies. This specifies how the processes communicate with each other and interact with the files.
SELinux Modes:
SELinux has three modes to run. By default, SELinux runs in Enforcing mode on CentOS 7
- Enforcing – SELinux security policy is enforced.
- Permissive – SELinux allows access but prints warnings on rules voilation.
- Disabled – No SELinux policy is loaded.
Check SELinux Status
You can use getenforce command to view the status of SELinux. Another command sestatus gives you more details about SELinux status.
Press CTRL+ALT+T to launch a terminal and type:
sestatus
Output:SELinux status: enabled SELinuxfs mount: /sys/fs/selinux SELinux root directory: /etc/selinux Loaded policy name: targeted Current mode: enforcing Mode from config file: enforcing Policy MLS status: enabled Policy deny_unknown status: allowed Max kernel policy version: 31
The above status shows that SELinux is enabled and enforcing.
How to disable SELinux on CentOS 7
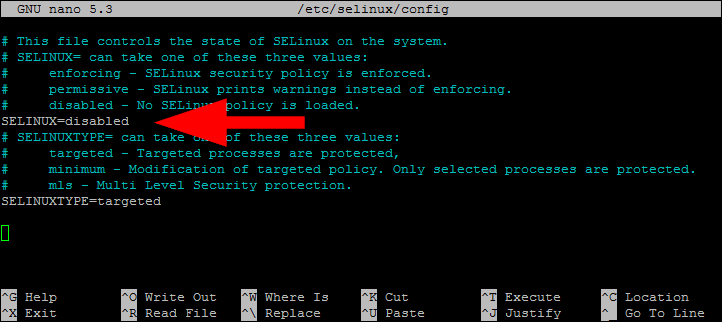
You can disable SELinux permanently by edition the /etc/selinux/config file in CentOS 7 and RHEL 7 systems. Edit the SELinux configuration file and set SELINUX=disabled to permanently disable the SELinux on a CentOS 7 system. This will completely disable all the SELinux context.
sudo nano /etc/selinux/config
Set SELINUX value to disabled:
SELINUX=disabled
Reboot your instance to apply changes.
You can again activate the SELinux by setting SELINUX=enforcing in configuration file. Instead of disabling SELinux, you can set it to permissive mode.
Set SELinux in Permissive Mode (Temporary)
The permissive mode means the SELinux policy is not enforced. SELinux does not deny any operations even they do policy violations. It only creates logs, which is helpful for debugging.
You can set the SELinux in permissive mode temporarily by using one of the below commands.
sudo setenforce 0
sudo setenforce Permissive
Once the system rebooted, the temporary mode will be disabled and SELinux will again in enforcing. Use the next method to apply changes permanently.
Set SELinux in Permissive Mode (Permanent)
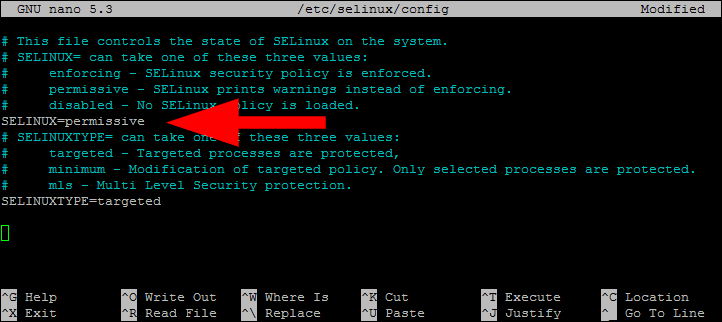
You can also Configure SELinux Permissive Mode Permanently by editing the configuration file. Edit the configuration in in your favorite text edit:
sudo nano /etc/selinux/config
Set the SELINUX value to permissive.
SELINUX=permissive
Save your file and close. Then reboot your system to apply changes.
Concusion
In this tutorial, you have learned how to disable SELinux on CentOS 7. Additionally discussed disabling SELinux permanently or set this to permissive mode on CentOS 7 or RHEL 7 Linux systems.
You can read more about SELinux on its official site: What is SELinux?
