Generally, the host manager used a separate server for each PHP version application deployment. Which increases the hosting cost. Some of the host managers are using Docker to run multiple PHP version on the single server. Also, most of you are aware of the configuration, I used in this tutorial. But some of the system administrators are not aware of this. This tutorial will help you to install multiple PHP version with Apache on Ubuntu 20.04 Linux system without switching PHP versions.
This tutorial describes the installation and configuration of two VirtualHost on Apache with separate PHP versions. First VirtualHost will work with PHP 5.6 and another VirtualHost will run with PHP 7.2. So just go through this tutorial. You can also use more than two PHP versions with Apache as required but this tutorial covers two only.
Installing Apache
Apache web server packages are available under the default repositories. Open a terminal on your Ubuntu system, then execute the following commands to install the latest available version of Apache web server.
sudo apt update
sudo apt install apache2 libapache2-mod-fcgid
Installing PHP
A PPA is maintained for PHP installation on Ubuntu systems from a long years. You just need to add that PPA to your system to install packages. Use the below couple of commands to add the PPA to your system.
sudo apt install software-properties-common
sudo add-apt-repository ppa:ondrej/php
For this tutorial, we are using the PHP 5.6 and PHP 7.4 to configure with Apache web server. To use the multiple PHP versions, we will use PHP FPM and FastCGI. Let’s install the following packages on your system.
sudo apt update -y
sudo apt install php5.6 php5.6-fpm -y
sudo apt install php7.4 php7.4-fpm -y
After installation, php-fpm services will be started automatically. Use the following commands to make sure both services are running.
sudo systemctl status php5.6-fpm
sudo systemctl status php7.4-fpm
- Recommended: How to Enable/Disable PHP Modules on Ubuntu
Configure Apache with Multiple PHP
Now enable few modules required for the configuration of multiple PHP versions with Apache. These modules are necessary to integrate PHP FPM and FastCGI with Apache server.
sudo a2enmod actions fcgid alias proxy_fcgi
Get ready for the configuration of websites on your Apache server. For the testing purpose, I am configuring two websites to work with two different-2 PHP versions. First, create two directories on your server.
sudo mkdir /var/www/php56-app
sudo mkdir /var/www/php74-app
Now, create and index.php containing the phpinfo(); function.
echo "<?php phpinfo(); ?> " > /var/www/php56-app/index.phpecho "<?php phpinfo(); ?> " > /var/www/php74-app/index.php
Let’s start the creation of VirtualHost. Apache keeps all the VirtualHost configuration files under /etc/apache2/sites-available with the extension .conf. Create a file for the first virtual host and edit in your favorite text editor.
sudo vim /etc/apache2/sites-available/php56.example.com.conf
Add the following content. Make sure to use correct ServerName and directory path according to your setup. This website is configured to work with PHP 5.6.
[apache]
ServerName php56.example.com
DocumentRoot /var/www/php56-app
Options -Indexes +FollowSymLinks +MultiViews
AllowOverride All
Require all granted
# Apache 2.4.10+ can proxy to unix socket
SetHandler “proxy:unix:/var/run/php/php5.6-fpm.sock|fcgi://localhost”
[/apache]
Similarly, create a second VirtualHost configuration file to work with PHP 7.2. Edit configuration file in text editor:
sudo vim /etc/apache2/sites-available/php74.example.com.conf
Add the following content to file with proper ServerName and DocumentRoot.
[apache]
ServerName php72.example.com
DocumentRoot /var/www/php74-app
Options -Indexes +FollowSymLinks +MultiViews
AllowOverride All
Require all granted
SetHandler “proxy:unix:/var/run/php/php7.4-fpm.sock|fcgi://localhost”
[/apache]
You both of the websites are configured now. But they are still not active. Apache keeps active sites under /etc/apache2/sites-enabled directory. You can simply create a symbolic link of config files to this directory or use below command to do the same.
sudo a2ensite php56.example.com
sudo a2ensite php74.example.com
After making all the changes restart Apache to reload new settings changes.
sudo systemctl restart apache2
Your setup has been completed now. Go to the next step to test your setup.
Test Your Setup
Edit /etc/hosts file on your local system and make an entry like below. This will resolve temporary names to localhost IP address.
sudo vim /etc/hosts
Add following entry to end of file
127.0.0.1   php74.example.com
127.0.0.1   php56.example.com
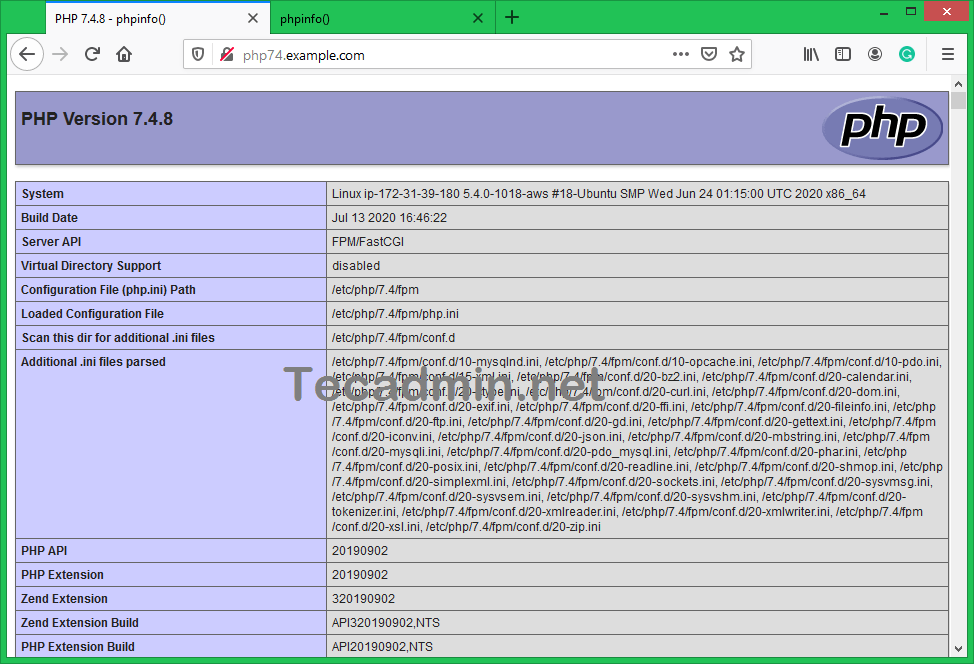
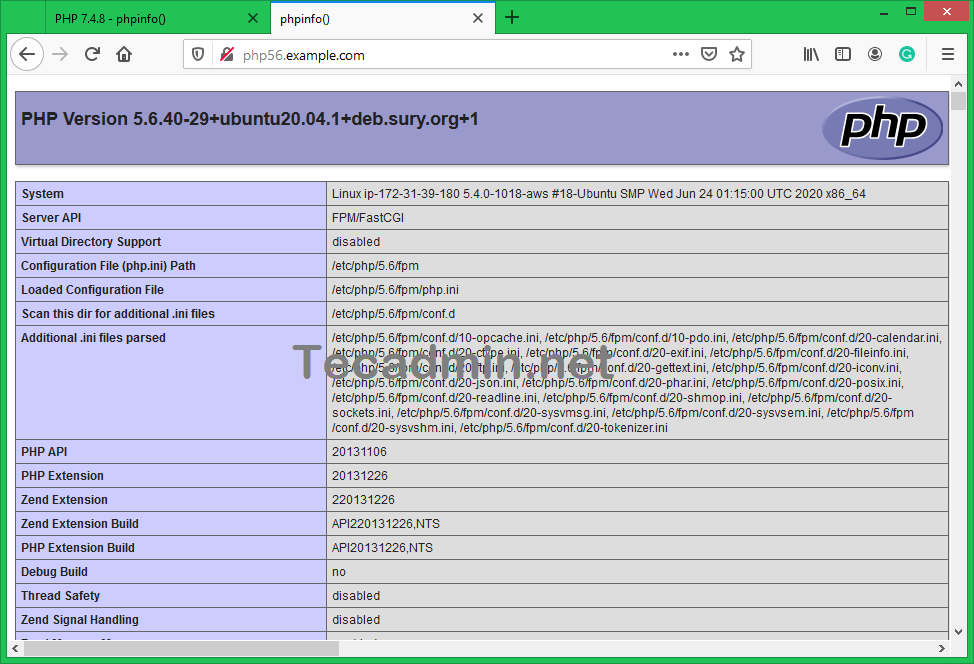
Open a web browser and visit both of the sites. You will see that php56.example.com shows the version PHP 5.6 and php74.example.com is showing the PHP 7.4 as the configuration.
http://php74.example.com:
http://php56.example.com:
Conclusion
This tutorial helps you to setup multiple websites with different-2 PHP version on single Apache server on a Ubuntu 20.04 system.


4 Comments
Thanks. Great article.
I am missing libapache2-mod-php5.6 (as I have something old I have to support). But libapache2-mod-php was not installed by default. Seems like you’d need that?
Great article
Amazing! Its really awesome article, I have got much
clear idea about from this piece of writing.