Linux distributions are widely used to create servers, and businesses are benefiting from this low-cost and secure solution. Linux distributions including Debian provide tons of utilities to set up, configure, and secure servers.
Debian is a stable, secure, and quite popular Linux operating system and ideal for server setup. Many distributions are based on it, especially well-liked Ubuntu, PureOS, SteamOS, etc.
The newest version of Debian is Debian 11 Bullseye, which comes with thousands of new packages, supports multiple desktop environments, driverless scanning, and an improved manual page.
This write-up is focusing on how to install, set up a server on Debian 11 Bullseye. When you install or upgrade to Debian 11, there is a configuration you need to perform to make your server secure.
Steps involve for initial server setup on Debian 11 are mentioned below:
Step 1 – Update and Upgrade the Debian
- The first step is properly upgrading and updating the packages and the distribution. Login to the Debian 11 system and open a shell. To update the packages list use:
sudo apt update - Upgrade the packages using:
sudo apt upgrade - It is recommended to update your distribution, for that use the below-mentioned command:
sudo apt dist-upgrade - Upon upgrading remove the unwanted file from your system by executing:
sudo apt autoremove
Step 2 – Creating a Sudo User
It is recommended to create a new sudo user for your server management instead of the root account. For that run the below-mentioned command to add user:
sudo adduser tecadmin
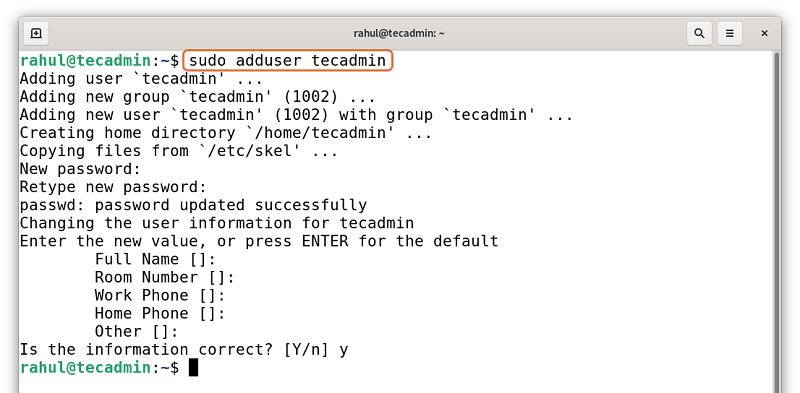
In the command “tecadmin” is the new user. Now, provide sudo privileges to the new user:
sudo usermod -aG sudo tecadmin
Switch account by executing the command:
sudo su tecadmin
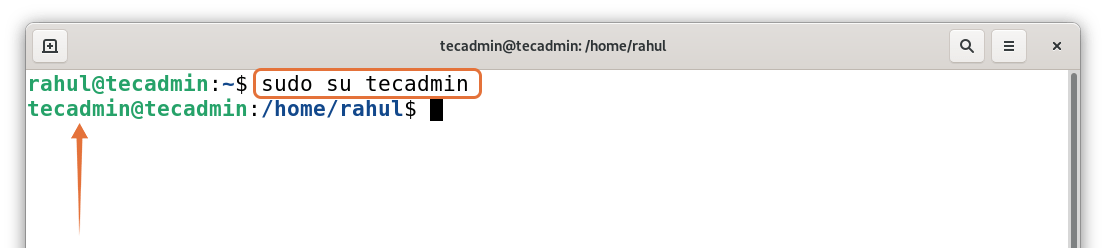
It can be seen that the user has switched.
Step 3 – Configuring the System Hostname
To check the current hostname, use:
sudo hostnamectl
The hostname is the identity of your system over a network so it is a good practice to properly name your hostname and to change the hostname use the below-mentioned command:
sudo hostnamectl set-hostname debian11
For the sake of demonstration, I have changed the hostname to “debian11”. Now close the shell instance and open it again a new hostname will appear. To check the hostname use:
hostname
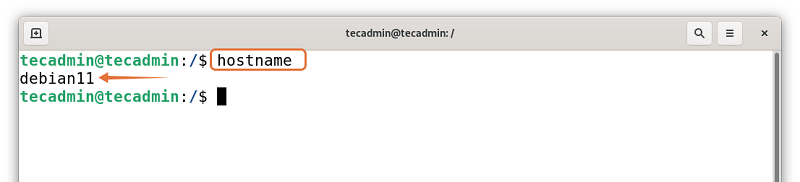
The new hostname is “debian11” now.
Step 4 – Securing SSH Server
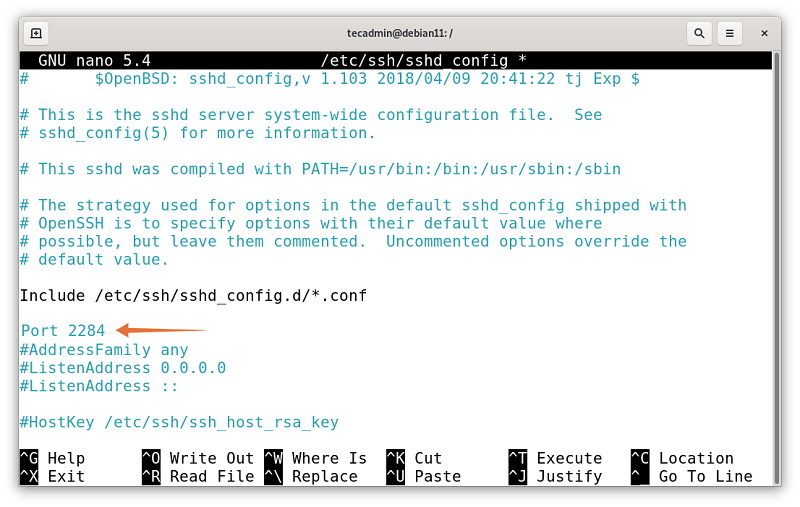
SSH is also known as secure shell is a protocol that is used to connect with remote servers. When configuring the server, it is suggested to change the default port and disable the root SSH login. To perform these operations you need to open the configuration file in any editor:
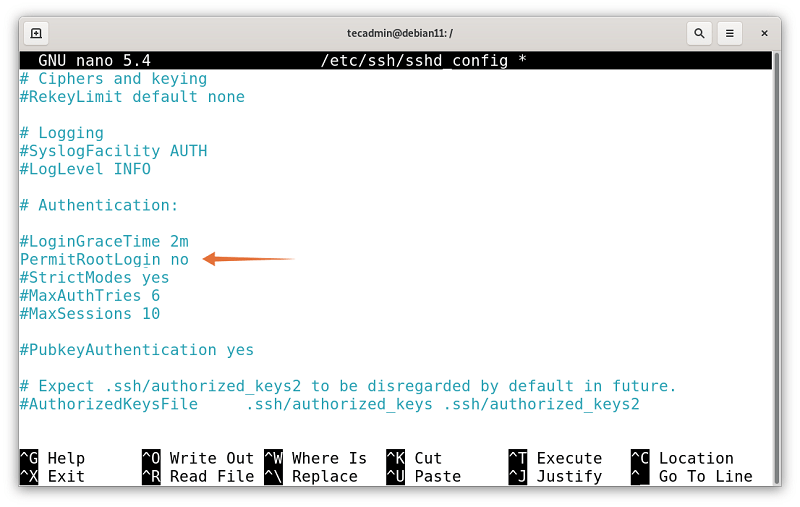
sudo nano /etc/ssh/sshd_confiq
Search for the below line, remove “#” from beginning of line and change port 22 to 2284:
Also set PermitRootLogin to no and remove “#” to uncomment, as demonstrated below:
Save the file and execute the below-mentioned command:
sudo systemctl restart ssh
If you are unable to open this file then SSH server would be missing from your system, install SSH using:
sudo apt install openssh-server
Step 5 – Managing the Firewall (ufw)
- Debian does not come with a firewall, so you are supposed to install it. Use the below-given command to install an uncomplicated firewall (ufw) on Debian 11:
sudo apt install ufw - To enable the firewall use:
sudo ufw enable - To allow the port, use:
sudo ufw allow 2284 - Though it is depend upon the preferences, to deny the incoming traffic use:
sudo ufw default deny incoming - And to allow outgoing traffic use:
sudo ufw default allow outgoing - And reload ufw:
sudo ufw reload - To check the status:
sudo ufw status
Step 6 – Rebooting The System
After making all the changes, reboot your Debian system.
sudo reboot
Conclusion
While setting up a new server on Linux there are a few steps that need to be followed, that include upgrading packages, adding a new user, setting up a firewall, securing SSH.
This write-up thoroughly explains how to set up a server on the newly released Debian 11 Bullseye. We learned how to create a new user with sudo privileges, how to change the default SSH port, and setting up a firewall for the initial server setup on Debian 11.