CentOS 8 is the latest release of CentOS Linux operating system, which is based on Red Hat Enterprise Linux 8. In this tutorial, we will help you to install the Apache web server on CentOS 8 or RHEL 8 system with additional configuration and security.
Prerequsities
- SSH access to CentOS/RHEL 8 system
- Sudo privileges to user to install packages
Step 1 – Install Apache on CentOS 8
First of all, Login to your CentOS 8 or RHEL 8 system via SSH. Then install Apache2 HTTP server packages using the following command. This will also install additional required packages on your system.
sudo dnf install httpd
Wait for the installation complete
Step 2 – Manage Apache Service
Apache service is managed with systemctl command line on CentOS/RHEL 8. After installation, use the following command to enable the Apache service and then start it.
sudo systemctl enable httpd.service
sudo systemctl start httpd.service
Here are the other commands to stop and restart Apache service via command line.
sudo systemctl stop apache2.service
sudo systemctl restart apache2.service
Step 3 – Test Apache Setup
You can view the installed Apache version details using the following command.
httpd -v

Server version: Apache/2.4.37 (centos)
Server built:   Oct  7 2019 21:42:02
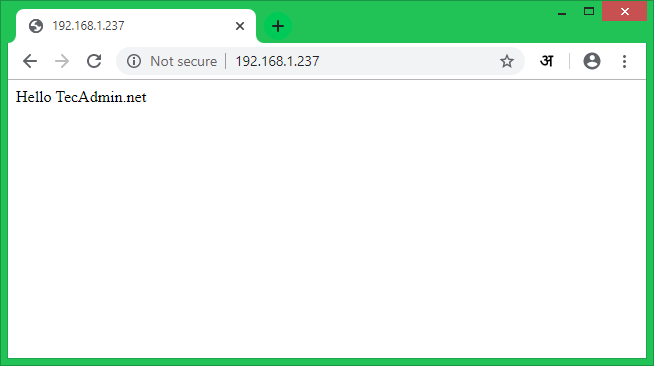
Create a test html page under default document root directory (/var/www/html).
sudo echo "Hello TecAdmin.net" > /var/www/html/index.html
Now access your Apache server using the server’s IP address or a domain pointed to the server IP.
Step 4 – Creating VirtualHost
Let’s create the first virtual host on your Apache server. For the tutorial, we are using the sample domain “example.com”. Here we will create a virtual host for example.com on port 80.
Create a sample index file in a directory:
sudo mkdir -p /var/www/example.com
echo "hello example.com" | sudo tee /var/www/example.com/index.html
Then create Virtualhost configuration file and edit in editor:
sudo vim /etc/httpd/conf.d/example.com.conf
Add the following content at the end of the configuration file. You may change the domain name as per your domain.
1 2 3 4 5 6 7 8 9 10 11 12 13 | <VirtualHost *:80> ServerAdmin admin@example.com DocumentRoot /var/www/example.com ServerName example.com ServerAlias www.example.com <Directory /var/www/example.com> #Allowoverride all ###Uncomment if required </Directory> ErrorLog logs/example.com_error.log CustomLog logs/example.com_access.log combined </VirtualHost> |
Save the Virtualhost configuration file and reload the Apache service using the following commands:
sudo systemctl reload httpd.service
Step 5 – Configure SSL VirtualHost
You can skip this step if you don’t need SSL. But the security is always the primary concern for any website. To use SSL with Apache, install the mod_ssl package on your system.
sudo dnf install mod_ssl
For the tutorial, I have followed these instructions to generate a self signed SSL certificate for our domain.
You can either use /etc/httpd/conf/ssl.conf for SSL virtual host or You can use a separate Virtual host configuration file for your domain. For example:
sudo vim /etc/httpd/conf.d/example.com_ssl.conf
with the following content:
1 2 3 4 5 6 7 8 9 10 11 12 13 14 15 16 17 18 | <VirtualHost *:443> ServerAdmin admin@example.com DocumentRoot /var/www/example.com ServerName example.com ServerAlias www.example.com <Directory /var/www/example.com> #Allowoverride all ###Uncomment if required </Directory> SSLEngine on SSLCertificateFile /etc/pki/tls/certs/example.com.crt SSLCertificateKeyFile /etc/pki/tls/certs/example.com.key ErrorLog logs/example.com_ssl-error.log CustomLog logs/example.com_ssl-access.log combined </VirtualHost> |
Here is three terms used to configure SSL virtualhost:
- SSLEngine – Set this to “on”
- SSLCertificateFile – Set the path of your SSL certificate
- SSLCertificateKeyFile – This is the private key files used to generate SSL certificate
After that enable the Virtualhost and reload the Apache service using the following commands:
sudo systemctl reload apache2.service
Step 6 – Secure Apache Server
Security is the most important part of hosting. Hackers are ready to exploit your web server. Edit Apache main configuration file
sudo vim /etc/httpd/conf/httpd.conf
Add the following values at the end of the file:
1 2 3 | ServerTokens Prod ServerSignature Off TraceEnable Off |
After that edit the Apache default SSL configuration file:
sudo vim /etc/httpd/conf.d/ssl.conf
Here are the multiple security-related settings. Add or Update the following settings. We are not going in detailed descriptions about it but these settings are very useful for the production servers.
1 2 3 4 5 6 7 8 9 10 11 12 13 14 15 16 17 18 | #Rules taken from https://cipherli.st/ SSLCipherSuite EECDH+AESGCM:EDH+AESGCM # Requires Apache 2.4.36 & OpenSSL 1.1.1 SSLProtocol -all +TLSv1.3 +TLSv1.2 SSLOpenSSLConfCmd Curves X25519:secp521r1:secp384r1:prime256v1 # Older versions # SSLProtocol All -SSLv2 -SSLv3 -TLSv1 -TLSv1.1 SSLHonorCipherOrder On Header always set Strict-Transport-Security "max-age=63072000; includeSubDomains; preload" Header always set X-Frame-Options DENY Header always set X-Content-Type-Options nosniff # Requires Apache >= 2.4 SSLCompression off SSLUseStapling on SSLStaplingCache "shmcb:logs/stapling-cache(150000)" # Requires Apache >= 2.4.11 SSLSessionTickets Off |
After making changes restart the Apache service to apply the new configuration.
sudo systemctl reload apache2.service
Conclusion
All done, You are running a secured Apache server on your CentOS 8 or RHEL 8 Linux system.


2 Comments
Too much ambiguity. You are giving the https virtual host the same name in the same directory as the http host. Shouldn’t the http host be handing off any http queries to https? So both are needed and the http cannot be overwritten.
how to upgrade httpd server